Gazebo installation advice
I love our gazebos, I think you are hard pressed to find a comparable product for the money and in the materials that are offered. They are now in pressure treated, tanalised timber or the cracking Larch timber. This page shows our full range of gazebos. Meanwhile let me take you through some Gazebo Installation Advice.
Price of course is always a consideration when looking at products but I highly recommend you look at Larch, yes it’s more expensive but the benefits may just outway the extra outlay.
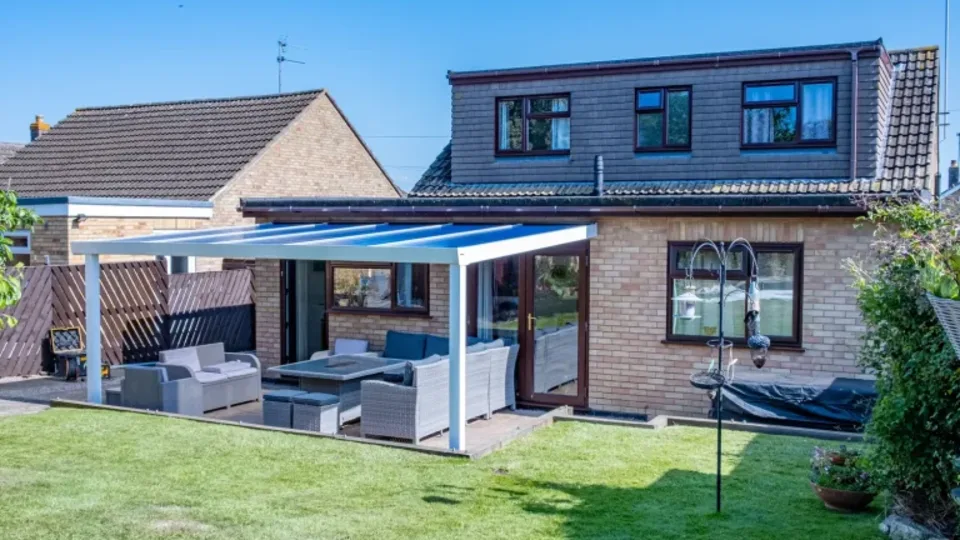
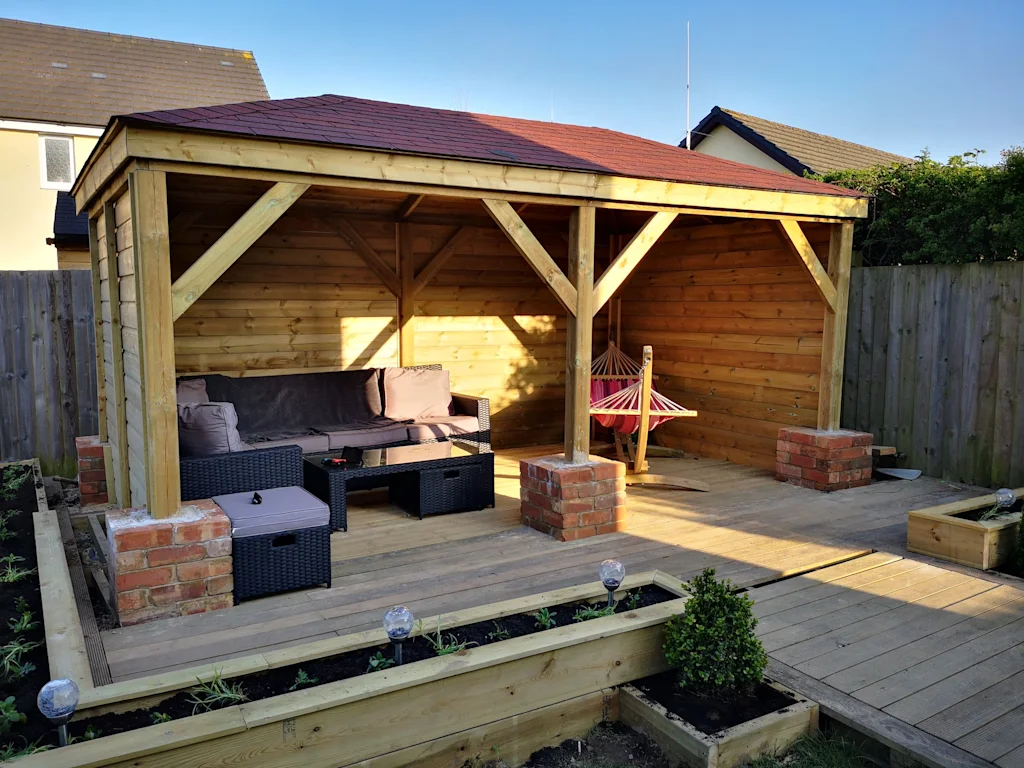
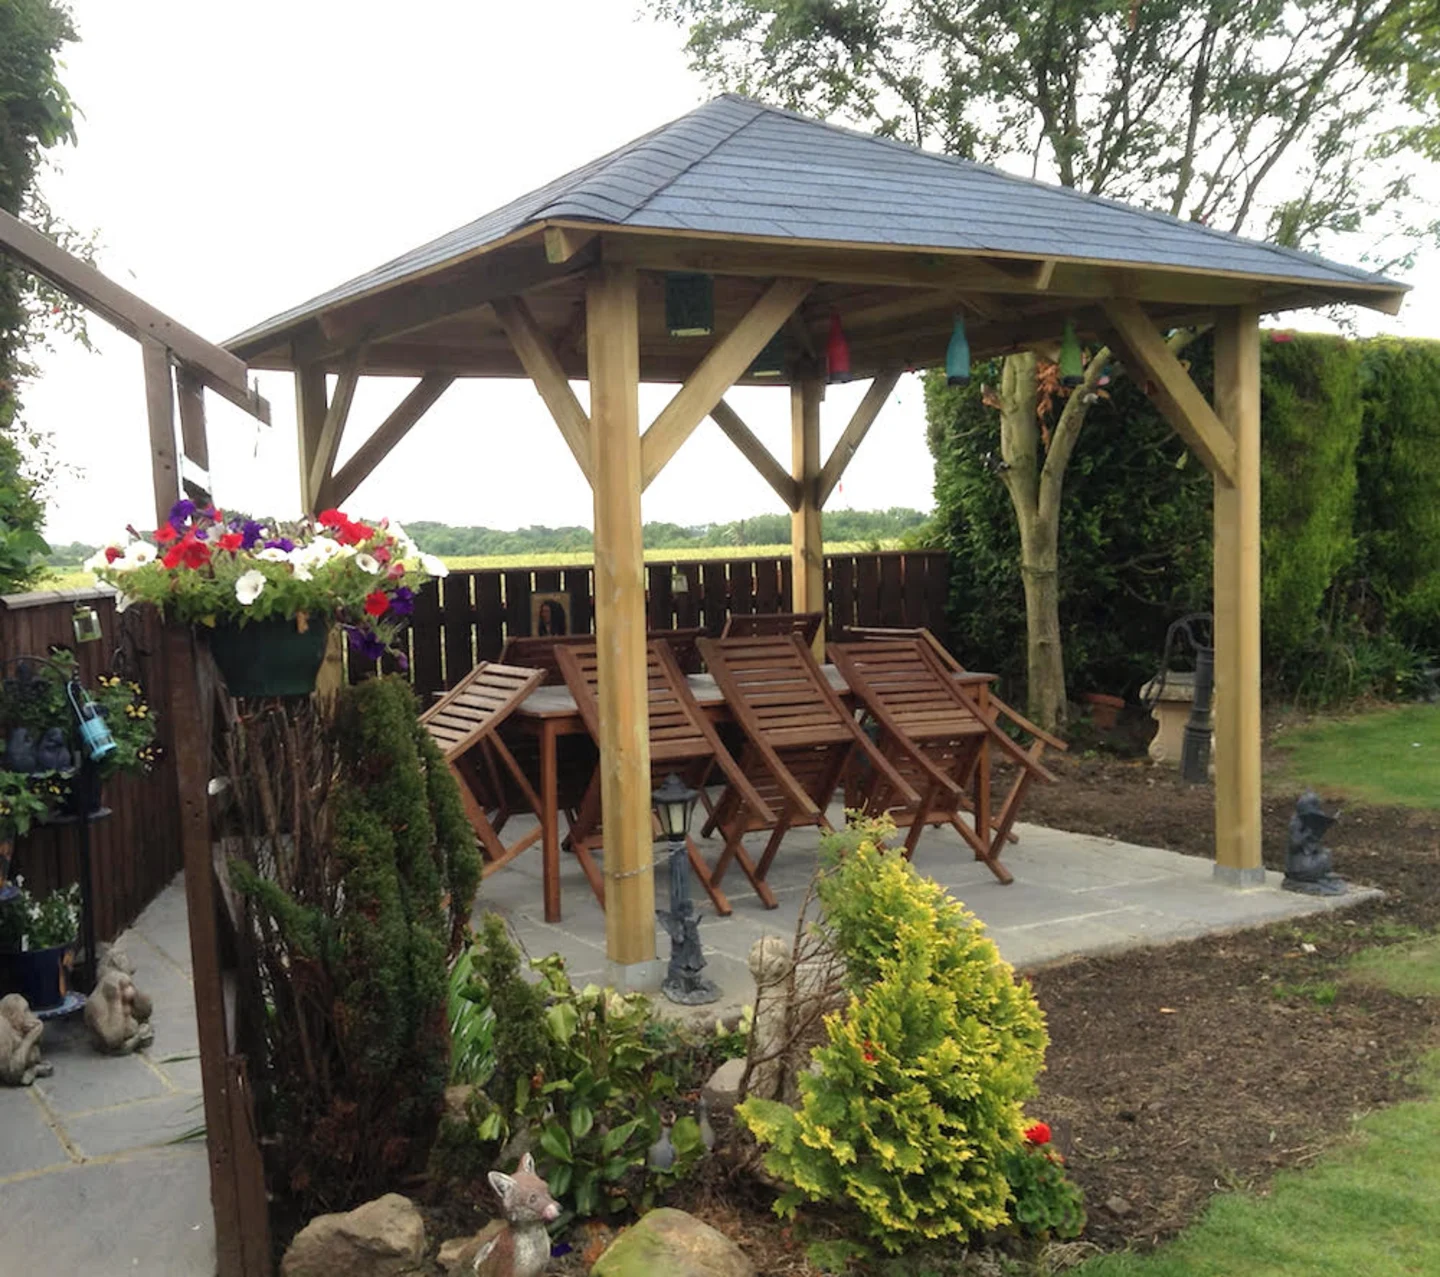
The gazebo I am featuring in this article is the Samos Larch Rectangular Gazebo.
This post is about my advice about the installation of Gazebos, please note it is ONLY my personal view, other people fitting these gazebos may have a better way of doing it.
Gazebo Installation Advice - Gazebo Plans
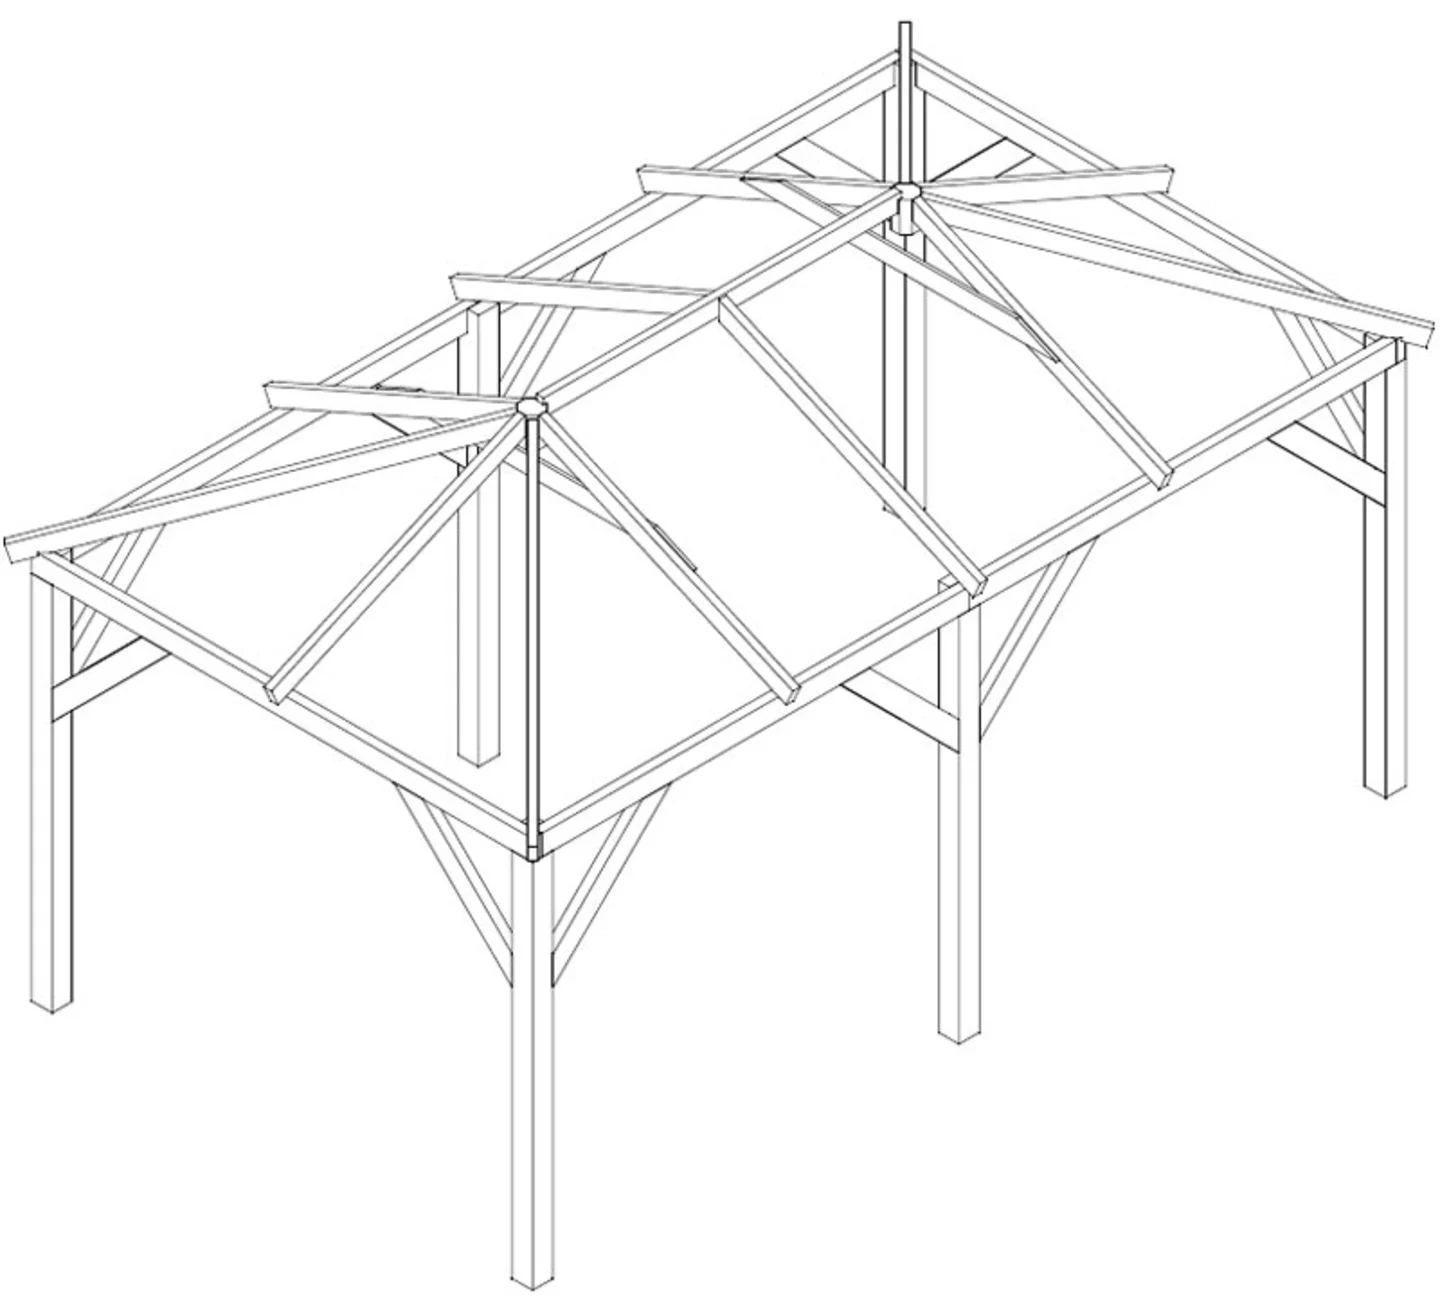
Plans are supplied with every Gazebo such as this, the picture links to the plans, as an example these are of the very popular Grande Gazebo. The Grande Gazebo is the pressure treated pine version of the one I’m featuring here.
Personally I have never had a problem with these plans, the same as I haven’t with our log cabins plans, this is from day one of my first ever install. But a few customers have had some problems and need a little extra help. I wrote a post on installation advice for log cabins.
This post will be similar for customers that need a different point of view and may need help with some questions while installing.
My Perspective on the Gazebo Installation
The plans are good, they show you exactly where the parts go. They then leave you to your own skills and interpretation according to your base, requirements and final finished product. The Gazebos are a full on building and need to be treated as such. It is impossible to give every possible instruction on how to install these, some common sense, DIY skill and understanding needs to be applied. That’s the bit I enjoy when installing all our buildings – The ability to change and adapt to what I require and what my customer wants.
So, with that said, lets deviate from the plans that come with the gazebo, this is my personal way of doing things and NOT the way I am instructed to do it by the plans (other than ensuring the correct parts are in the correct position) Here’s some information and tips from my experience. Of course you can follow the plans, follow my advice or devise your own method, this is a building and it’s up to you how you want to accomplish the install.
How does the Gazebo Arrive?
The gazebo will arrive exactly like our log cabins, on a really big lorry with a really handy forklift attached to it.
This is the pallet that will be delivered.
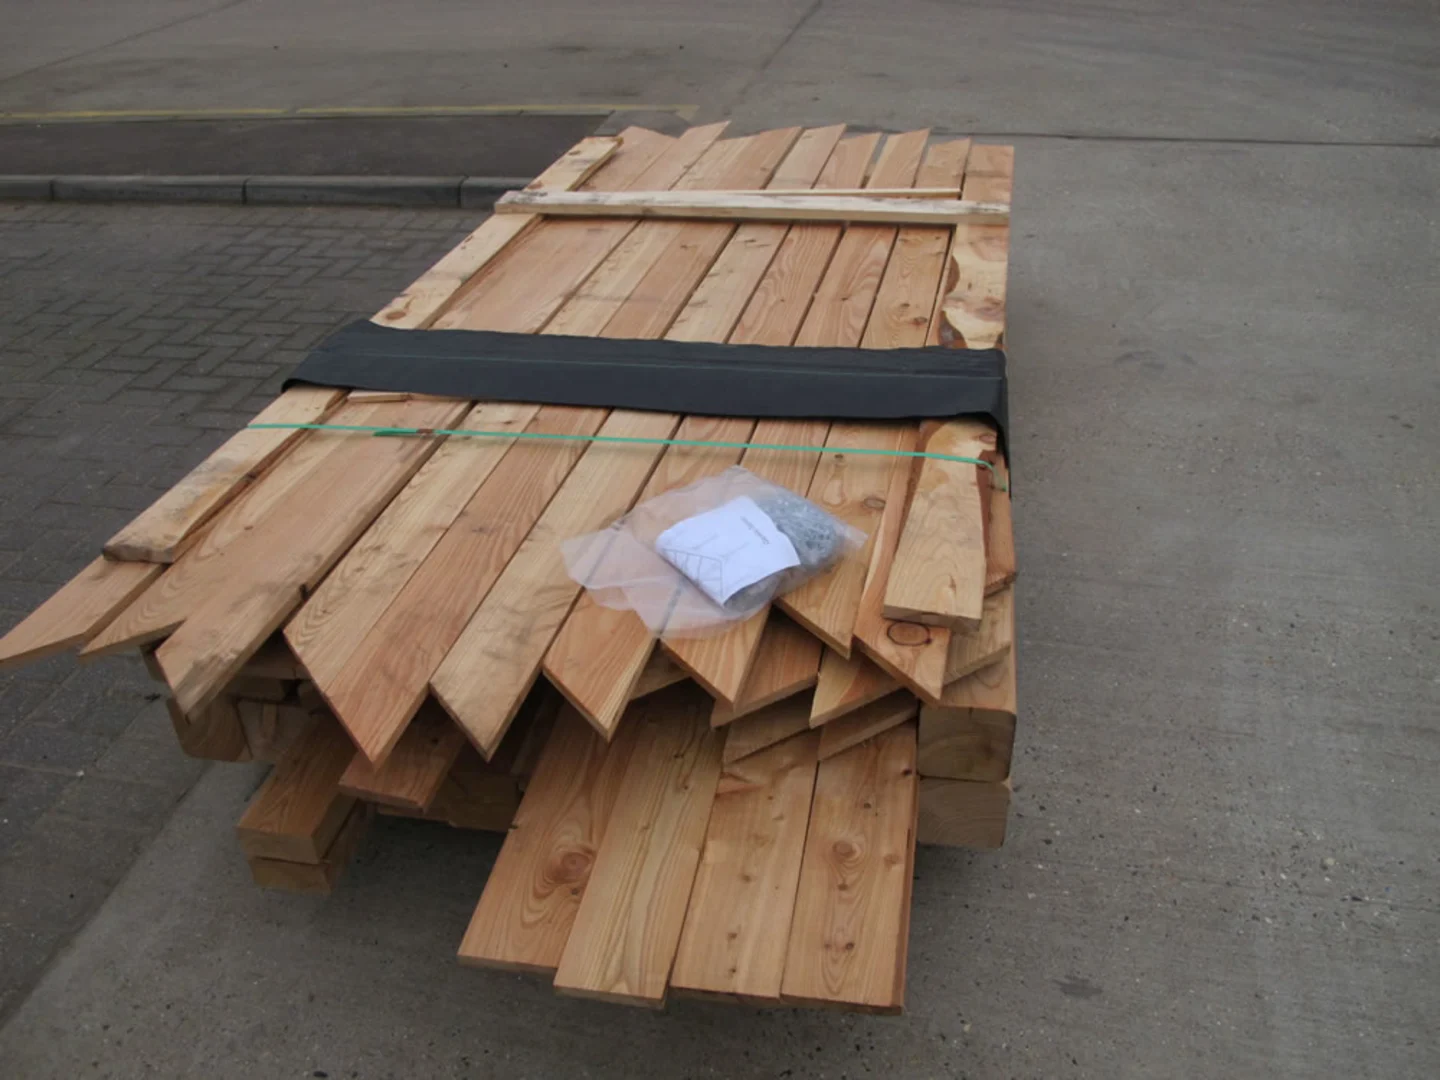
Please note, Despite the hauliers best efforts to deliver the gazebos safely, Sometimes the odd roof board can suffer small damage, Luckily they do normally include spares
There is a difference though, the Larch gazebo pallet is packed slightly different and each layer is kept apart by slats to allow the wood to dry more and to be kept straight and separate from each other. This is not found in the pressure treated gazebo version and nor does it need to be.
Unpacking the Gazebo
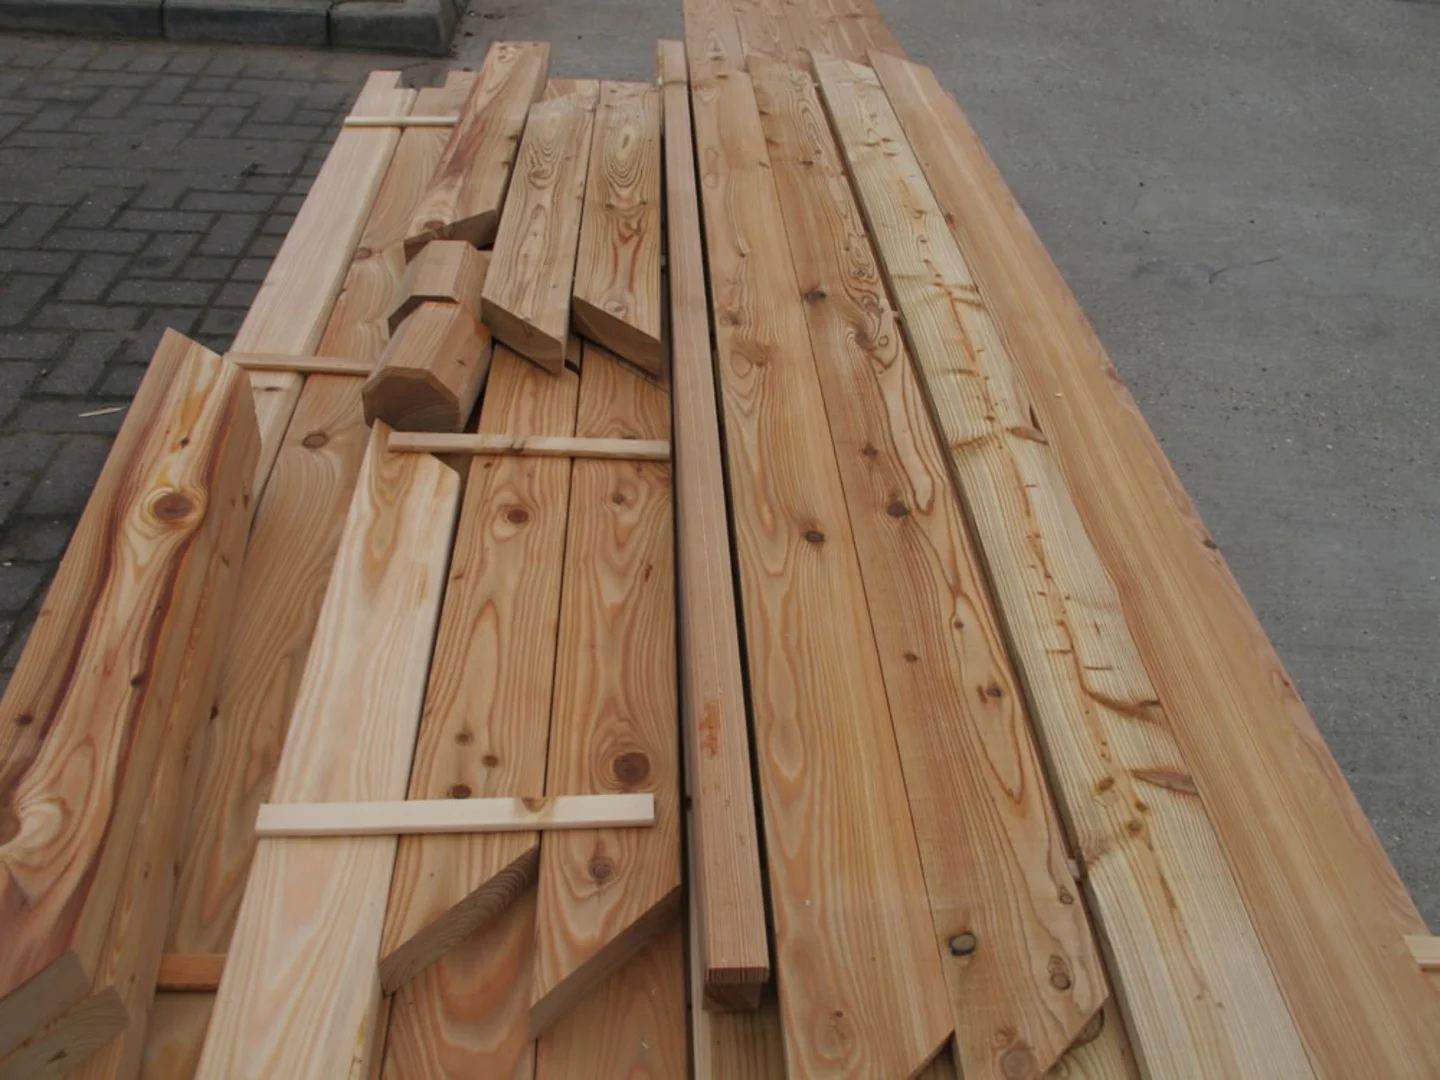
Nope, it’s not labelled and why would it need to be? It’s very simple to see what are the roof boards and what is the structure simply by the size and shape of the timbers. As I’m unpacking I will sort out the various parts as I come across them in the pallet. Please note sometimes the pallets can be wet if it has rained during loading or brief storing. We tend to keep the tanalised gazebos outside but protected with weed matting to act as shade to prevent discolouration. If you find your gazebo is wet as you unpack please do not let this be of concern as of course it is designed to be outside in all weathers for the next 20 years.
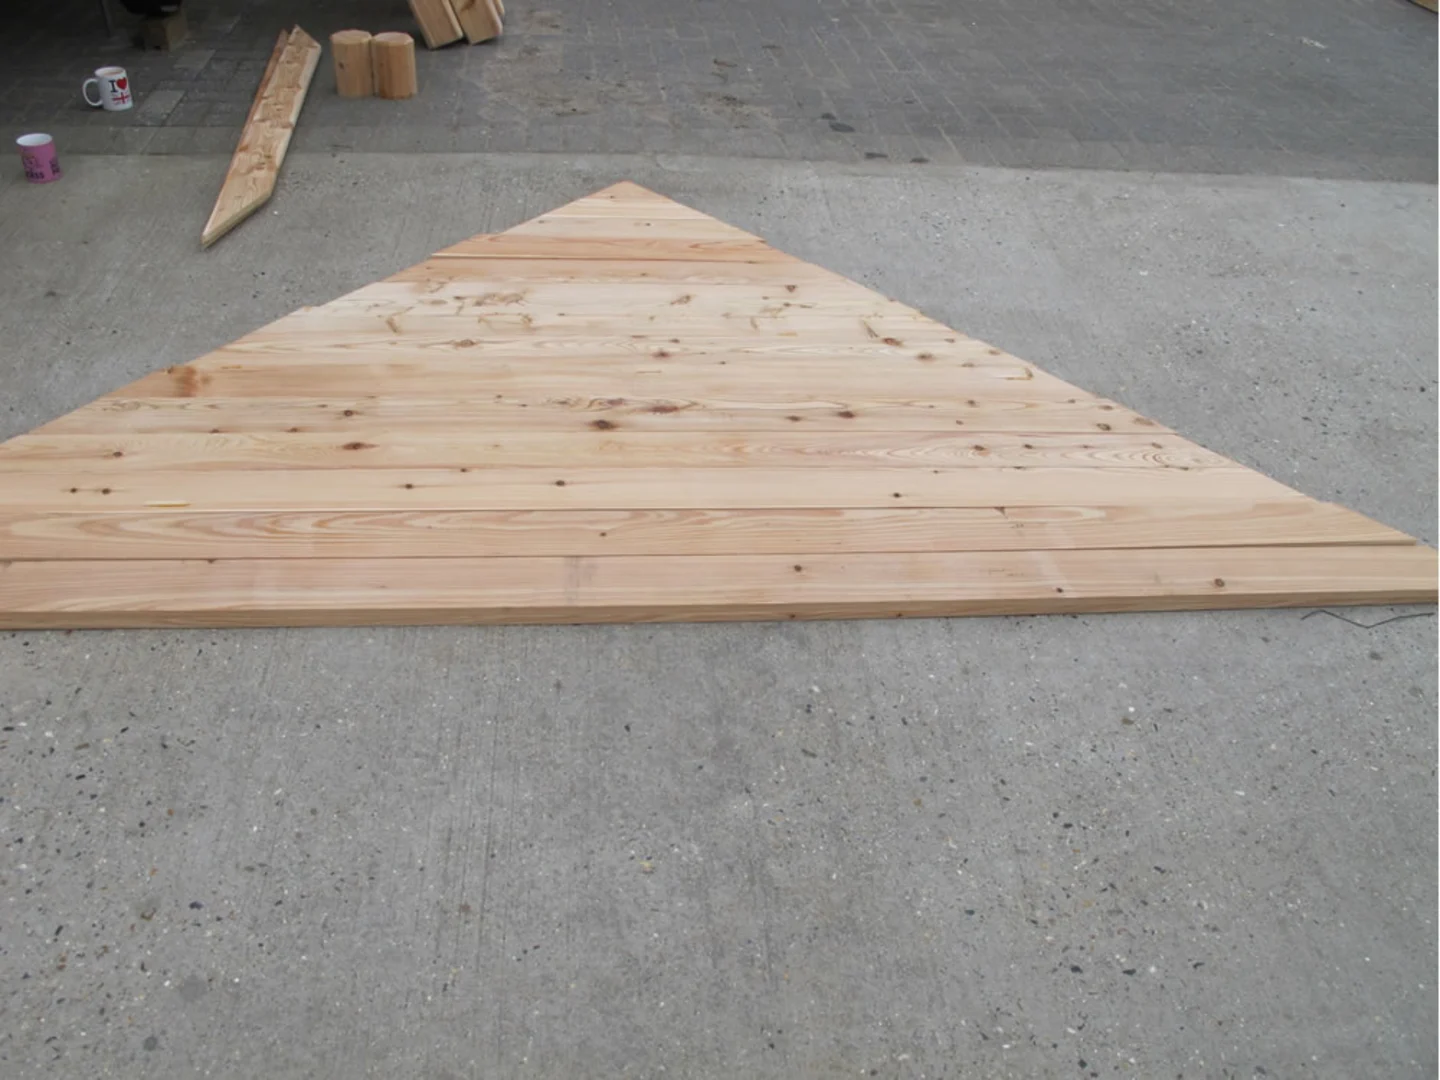
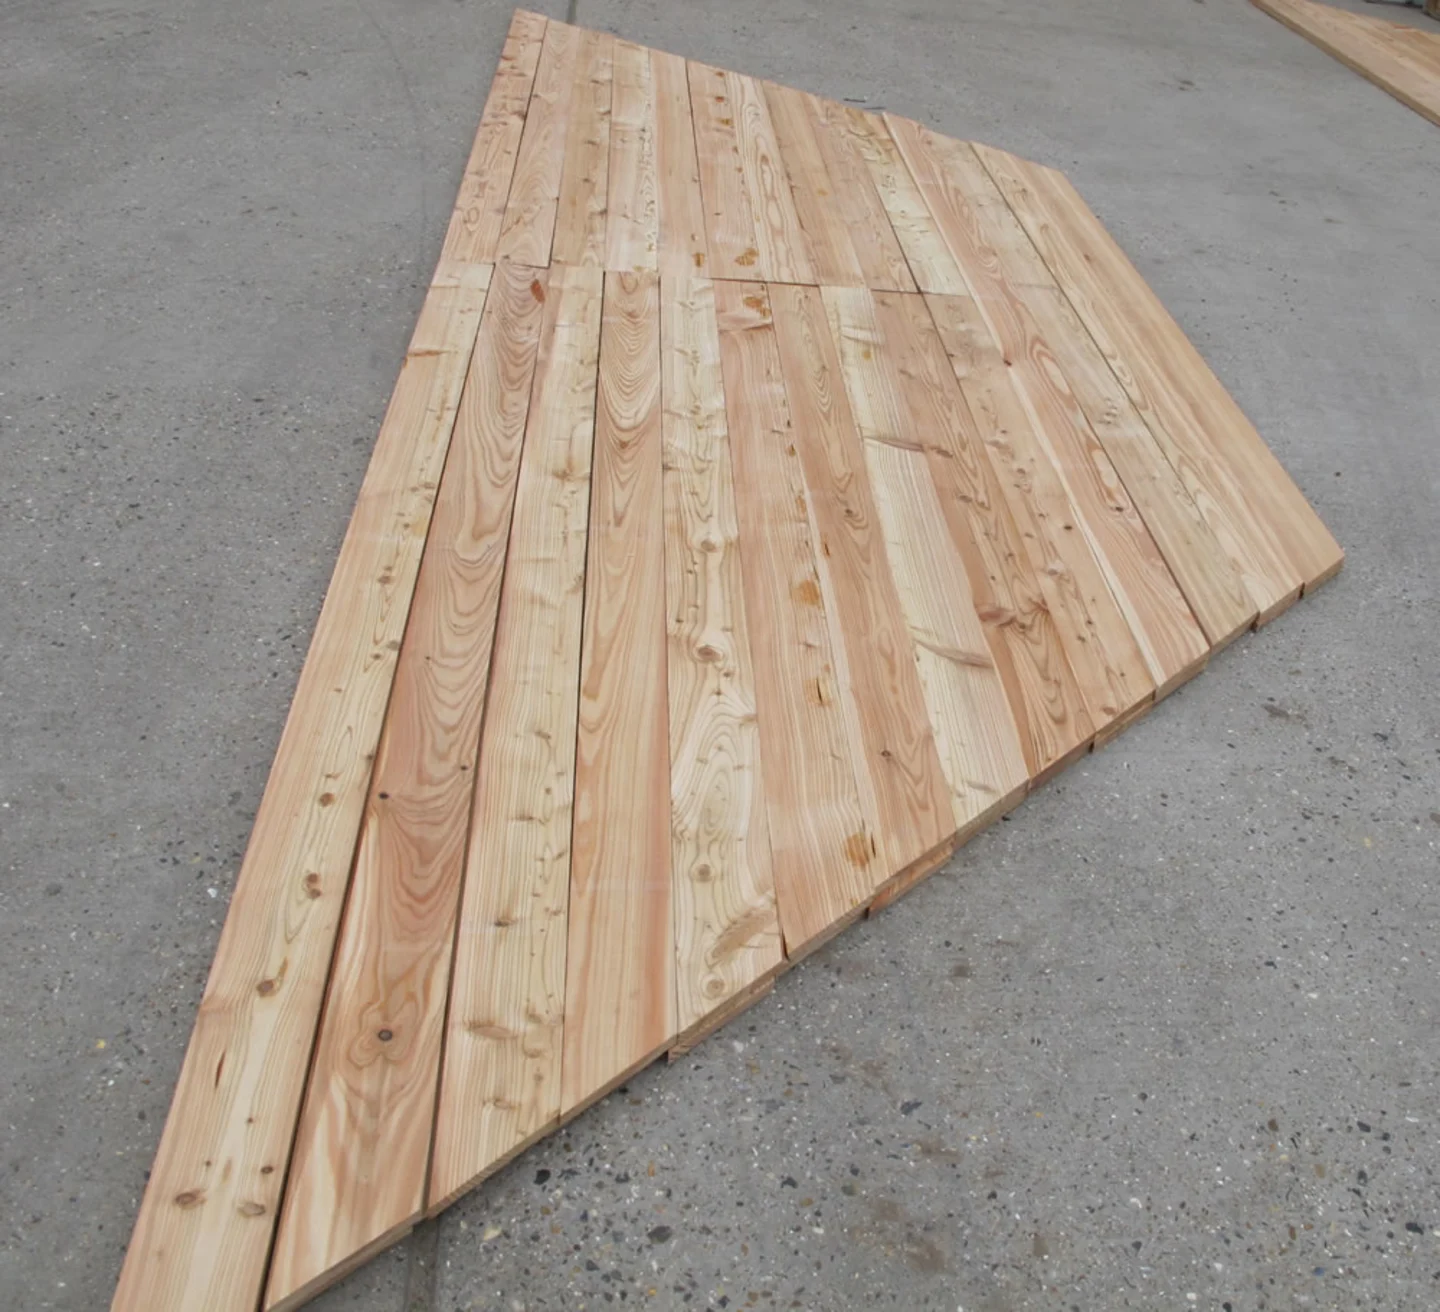
Placement of the Boards
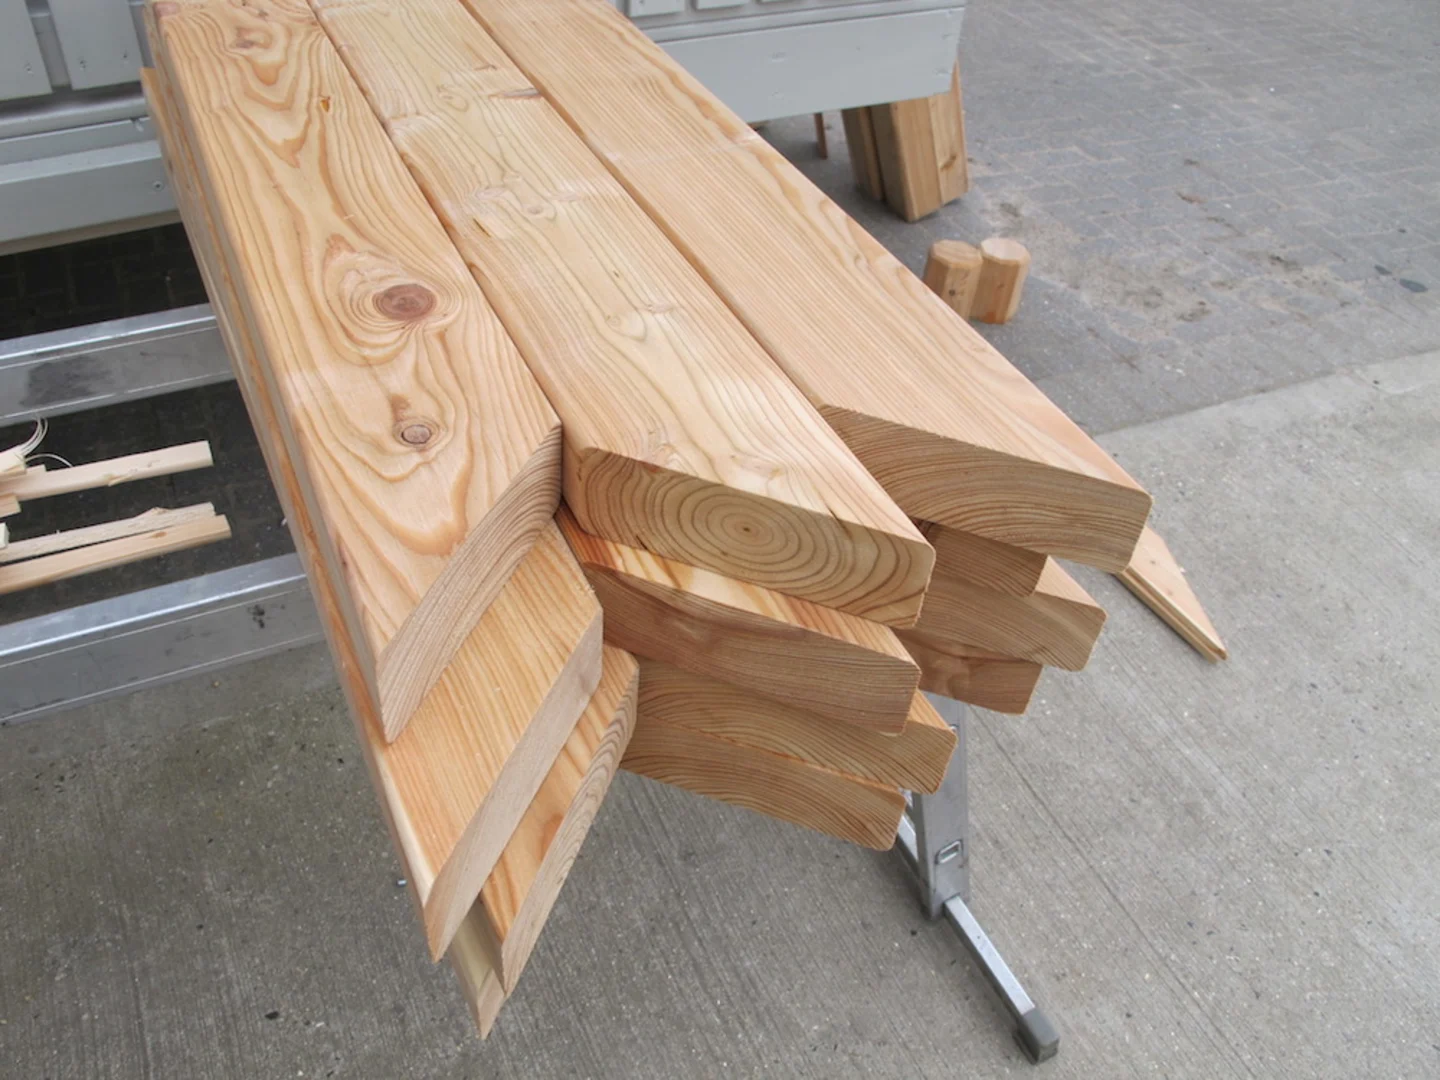
As I come across the roof boards in the pack I will put them in the sections of roof I’m expecting: for square roofs each side will be the same, for a rectangular roof I am expecting two triangle roofs and two extended triangles. It is far easier to do this as you unpack.
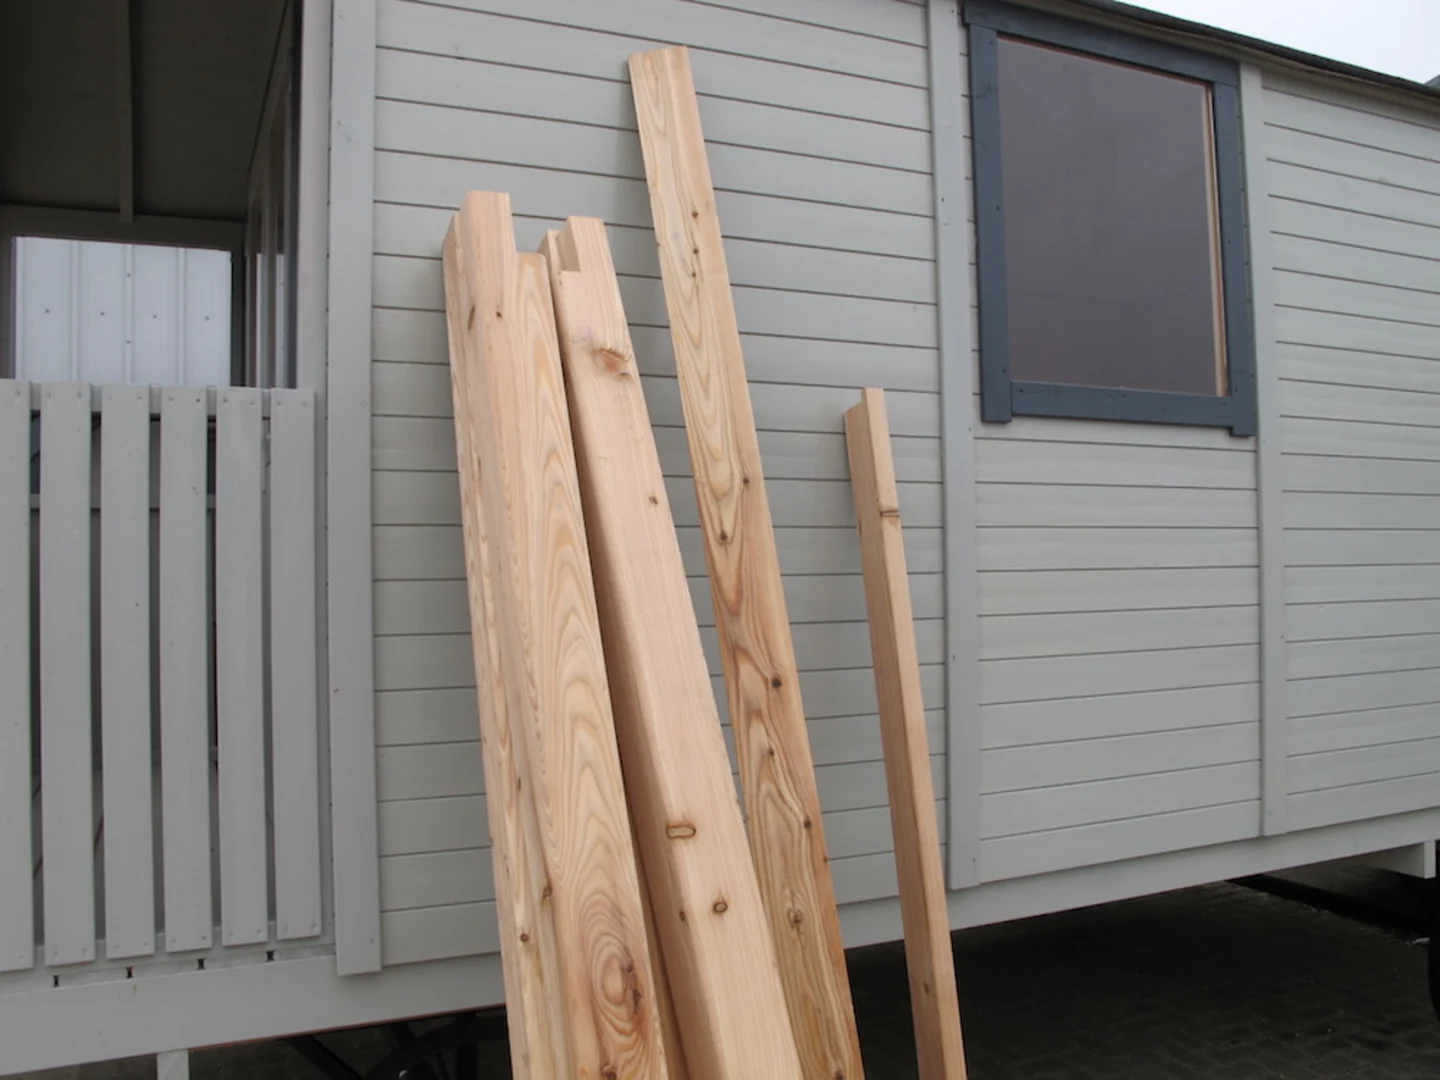
Identify Parts
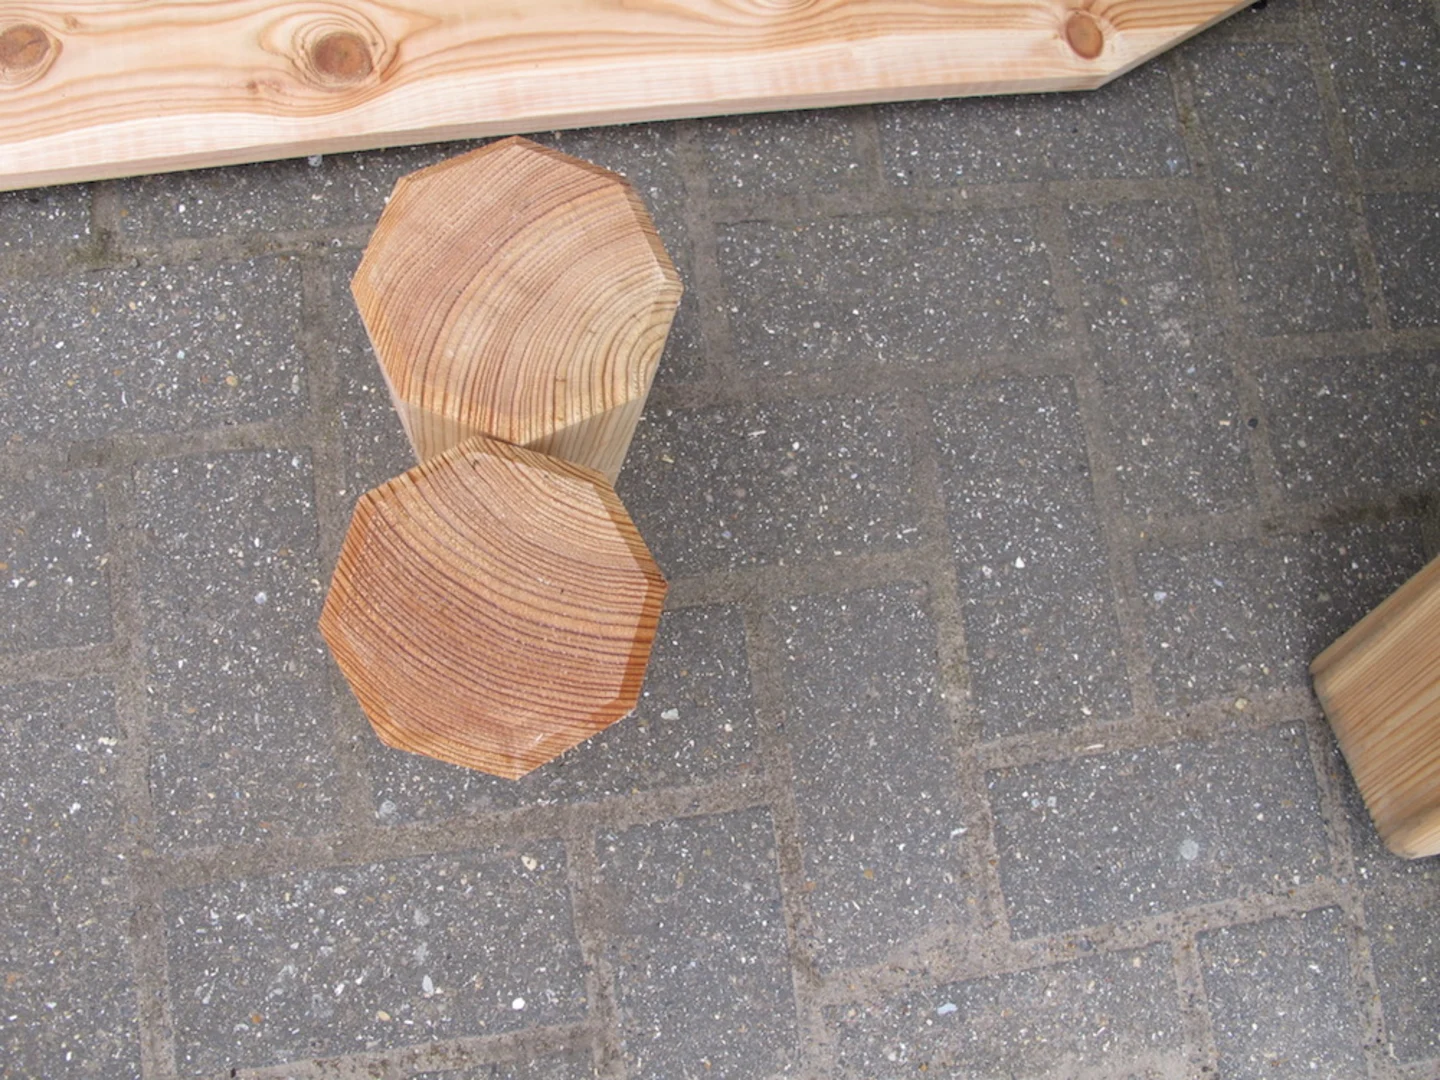
As well as laying out the roof boards in order I’m also identifying the other parts as I go, the posts and ring beam are very easy to spot.

Gazebo Fitting Kit
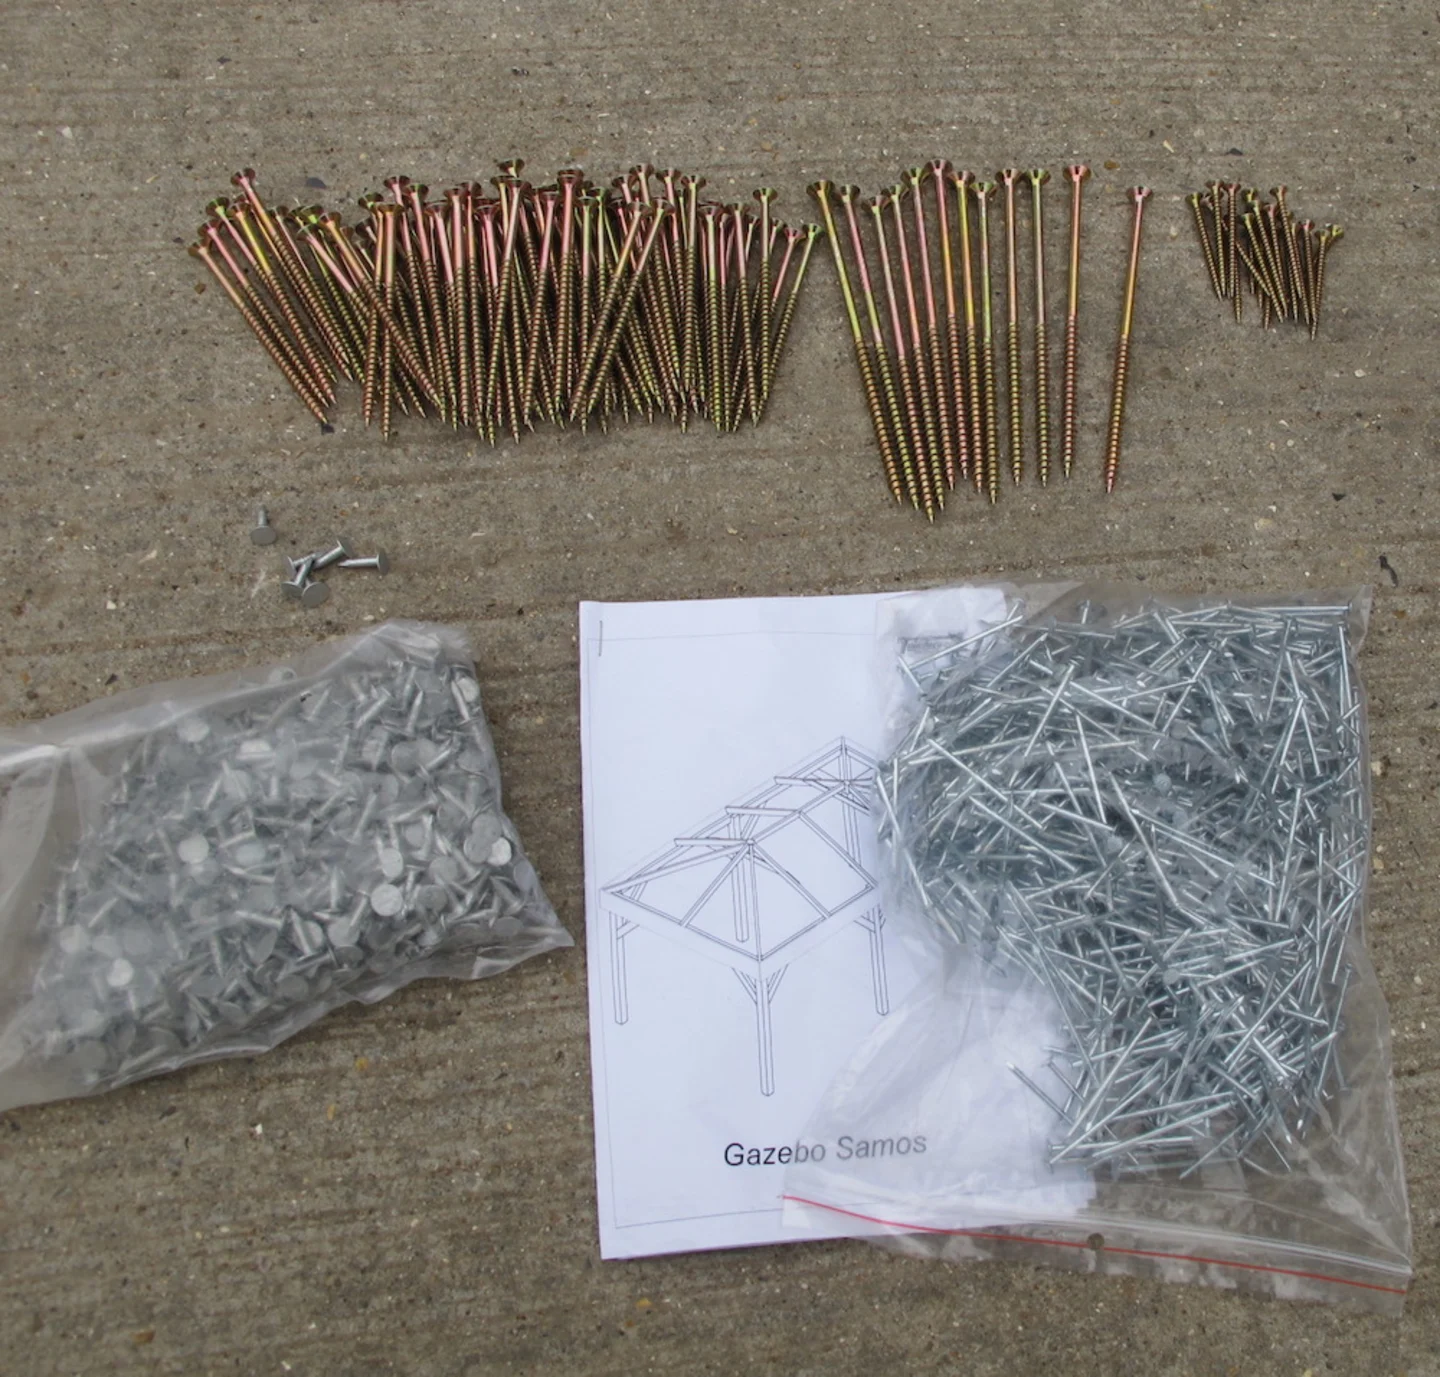
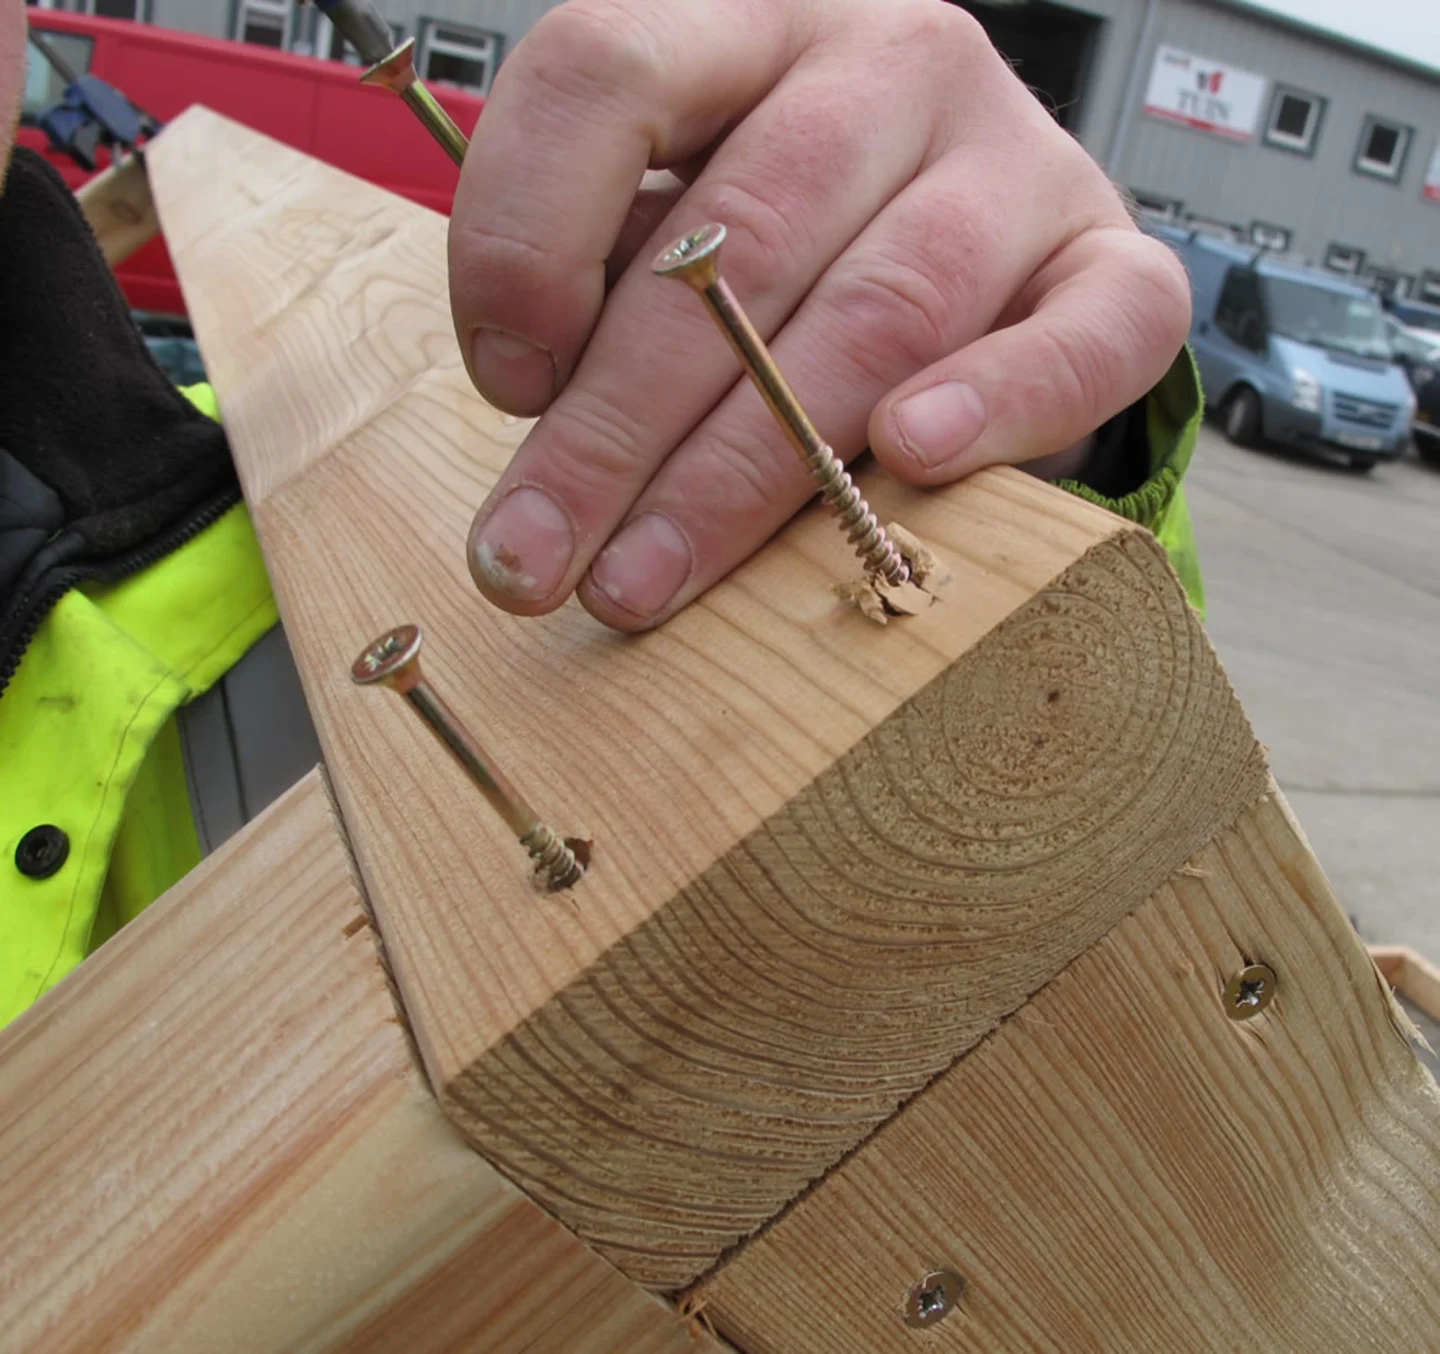
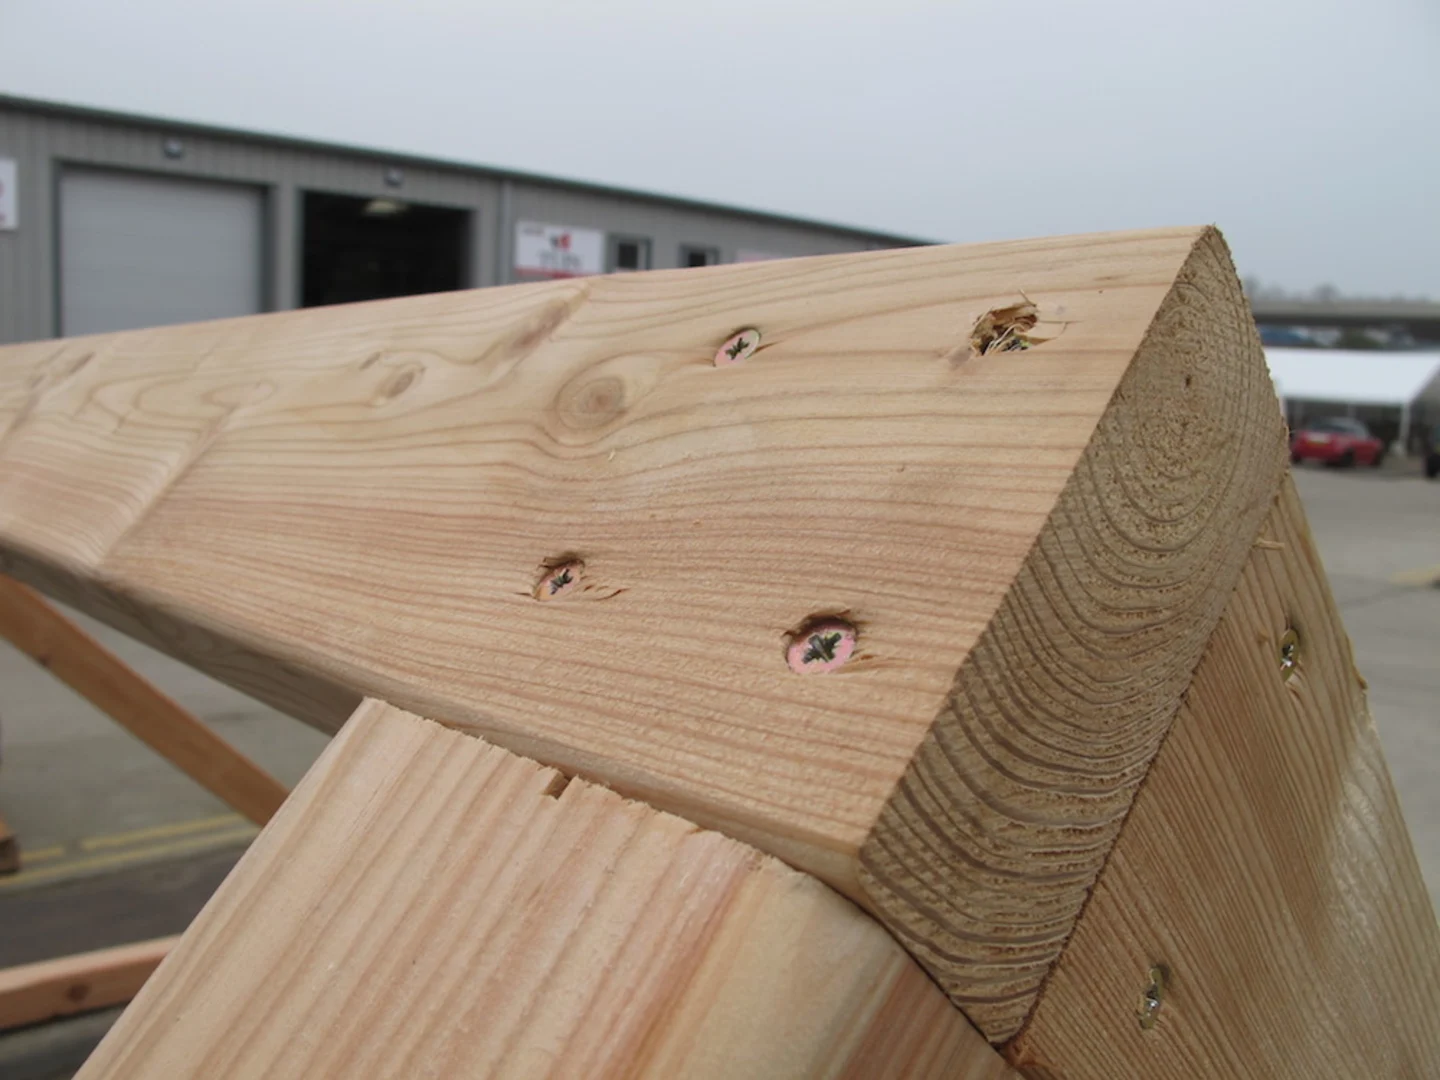
The Gazebo fitting kit. It’s pretty simple, the long nails are for the thickest bits of wood – the rafters. The medium ones for the ring beam, legs and corner supports and the very short ones will be used for the lateral bracing slats of which there are two in a rectangular roof gazebo. Nails are supplied for the roof boards. Felt tacks are for your final roof covering. I differ from the advice in the plans of number and placement of screws, you will see from the following pictures. For instance with the rafters I will only use one screw but use double screws elsewhere. It is of course up to you. You may also want to add additional fixings as you see fit.
Gazebo Installation - Advice
From this point I only use the plans to check that I am using the right parts in the right place. I am not following the construction method or the particular location of screws, this is the way I have found it to be easiest over the years. With this method:
You only need two people to carry out the install.
It is easier to find the EXACT location of where post holders should be fitted while accounting for timber not being an exact product to work with.
It is safer, stronger and quicker.
No strain is placed on any joints. Some plans will show building the gazebo on its side and then lifting into position. I have found this method very hard to do and can put strain on the joints.
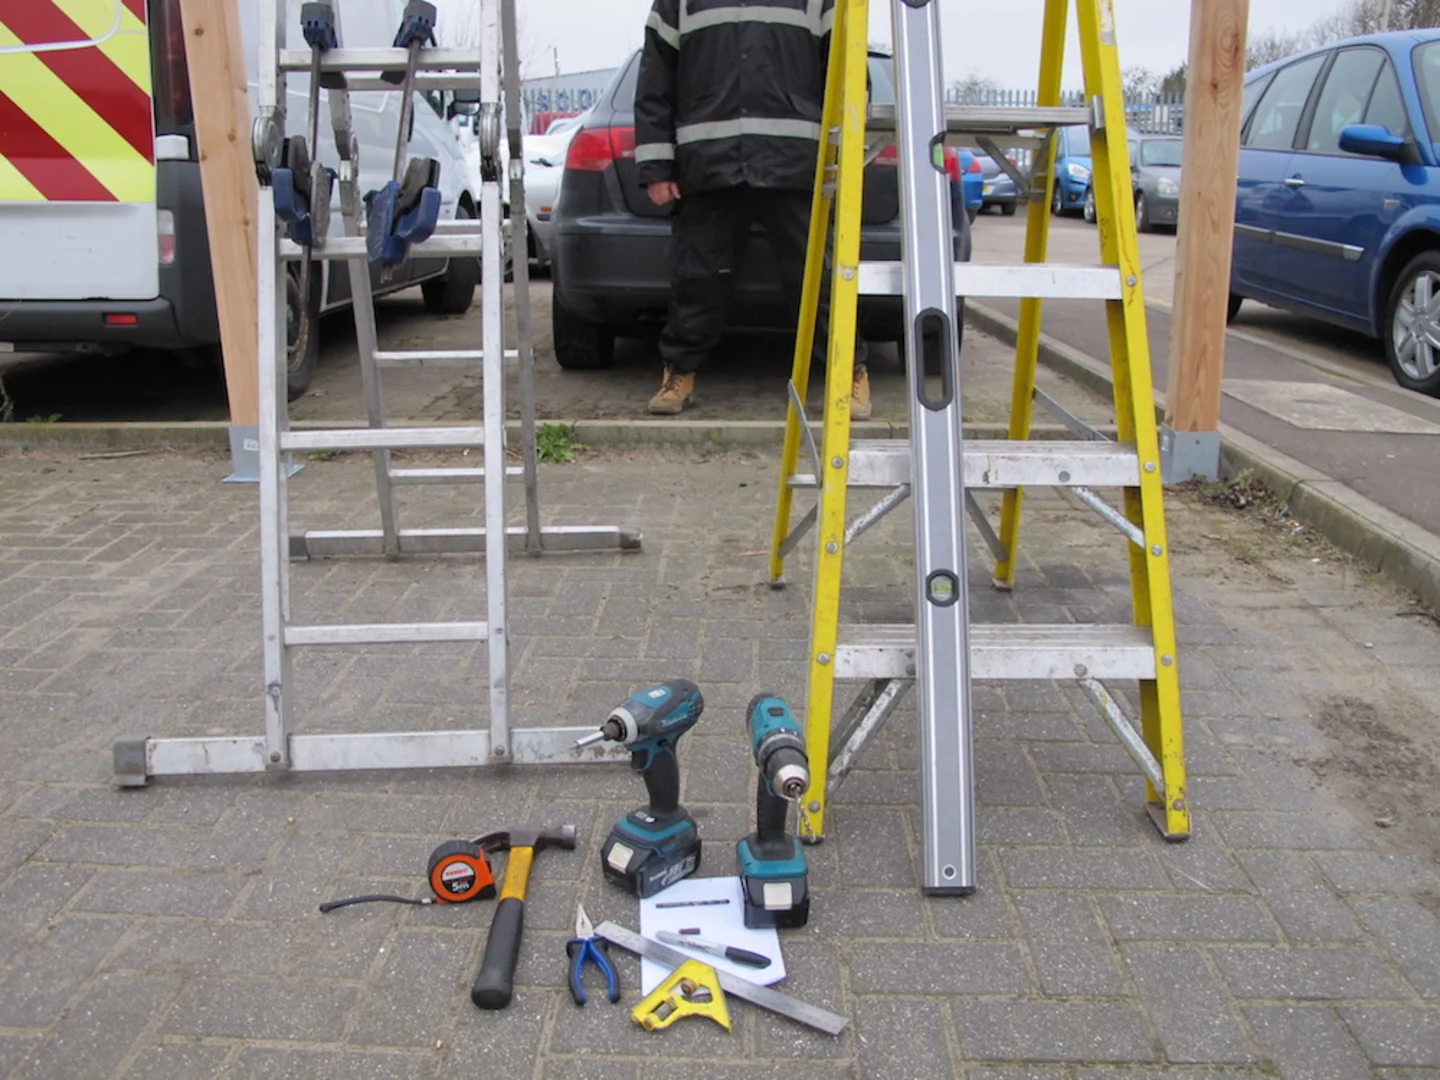
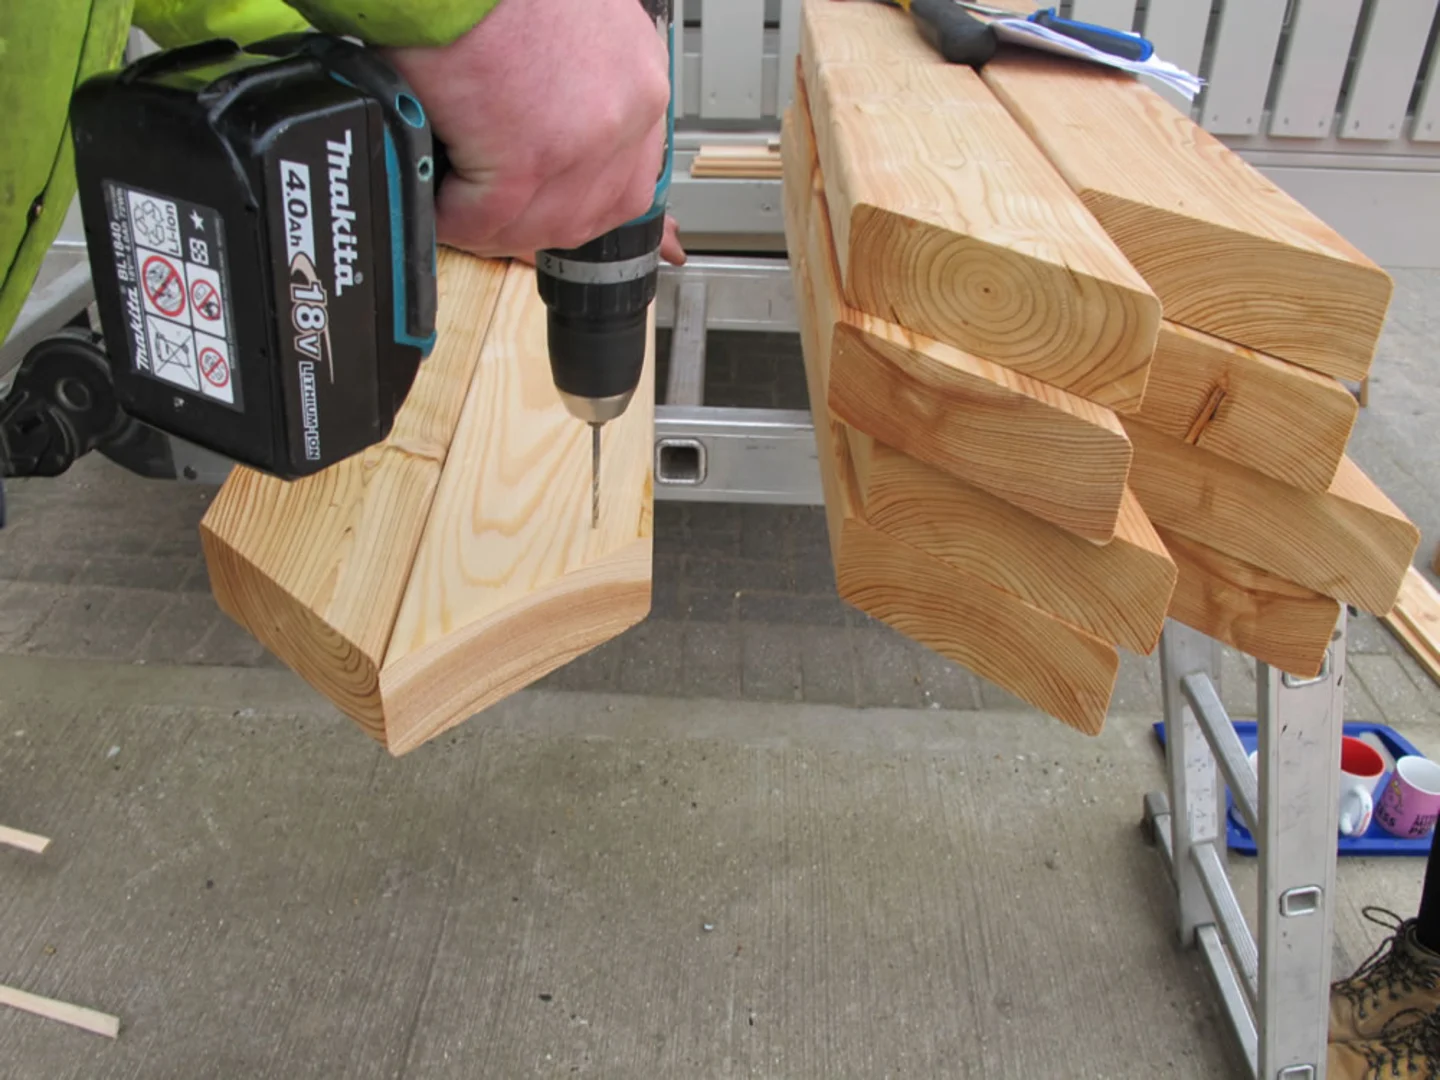
Tools Required
You only really need basic tools for fitting the gazebo. Two battery powered drills helps save time and clamps are essential really to make a good job, we use them a lot in fitting both gazebos and also log cabins. A very useful tool!
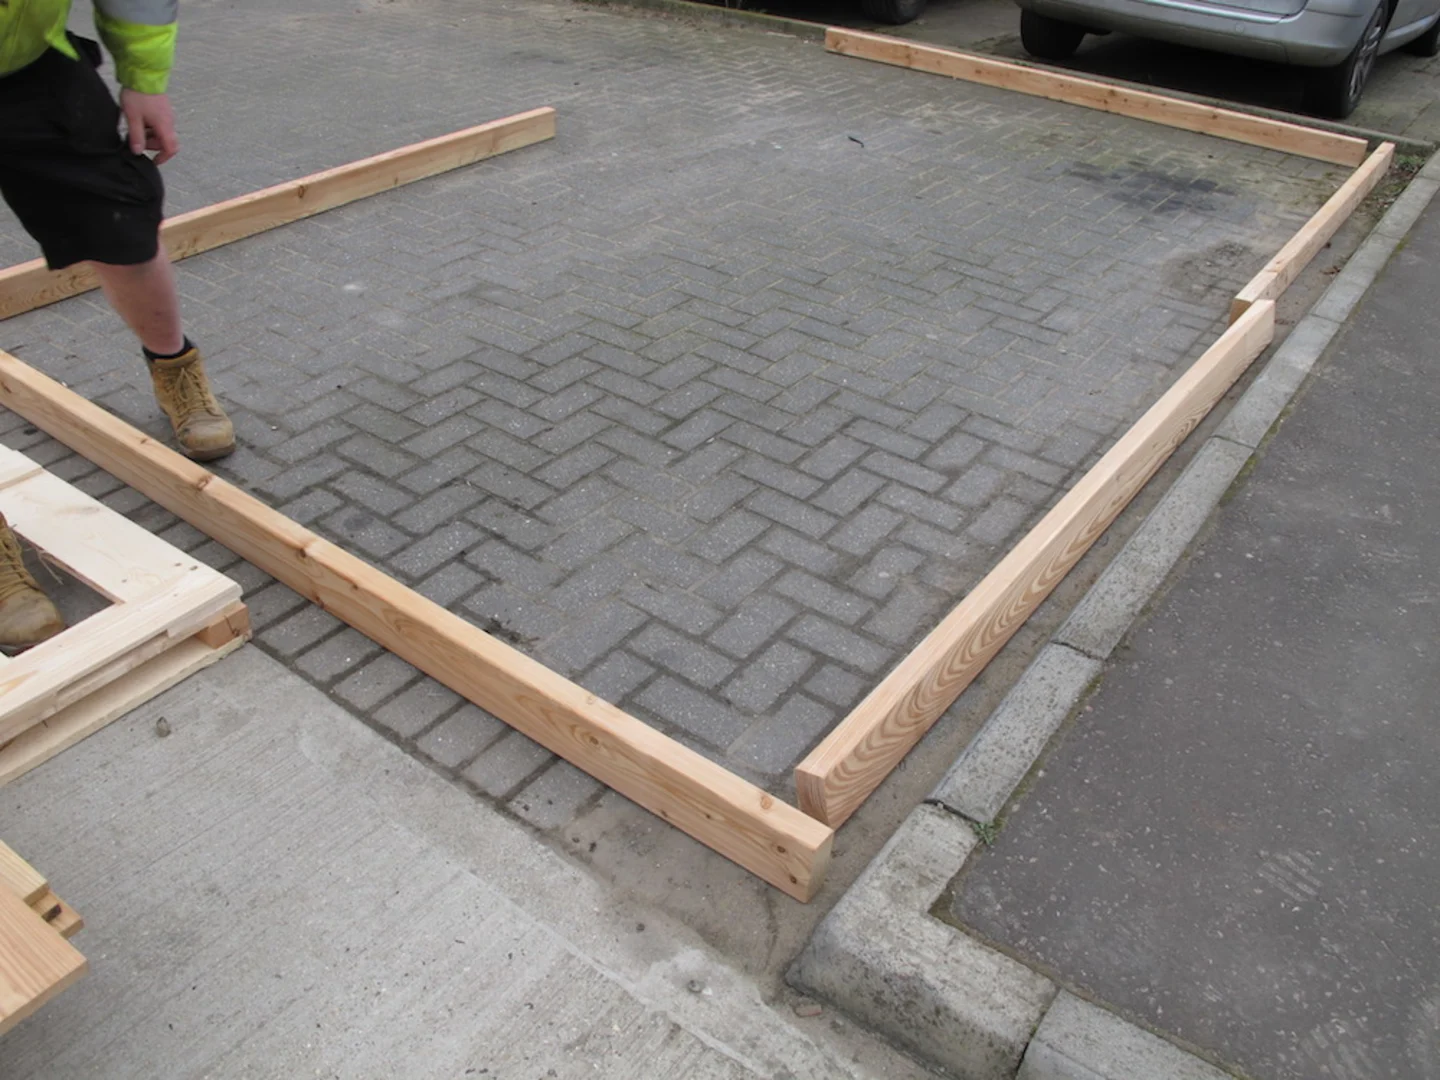
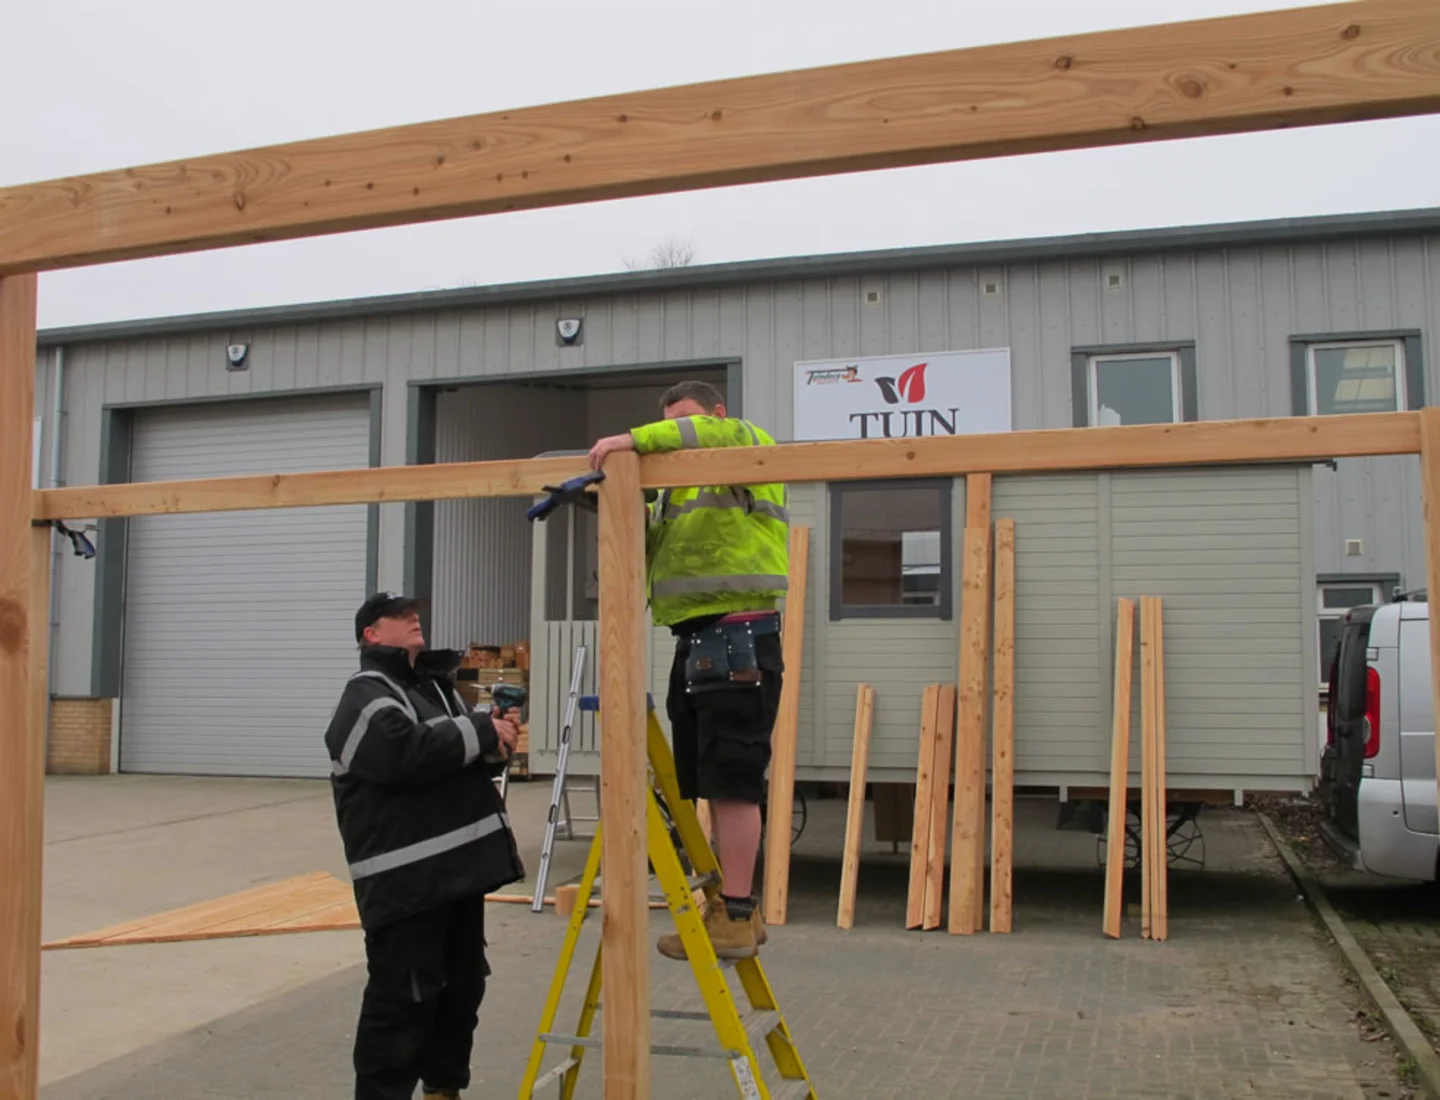
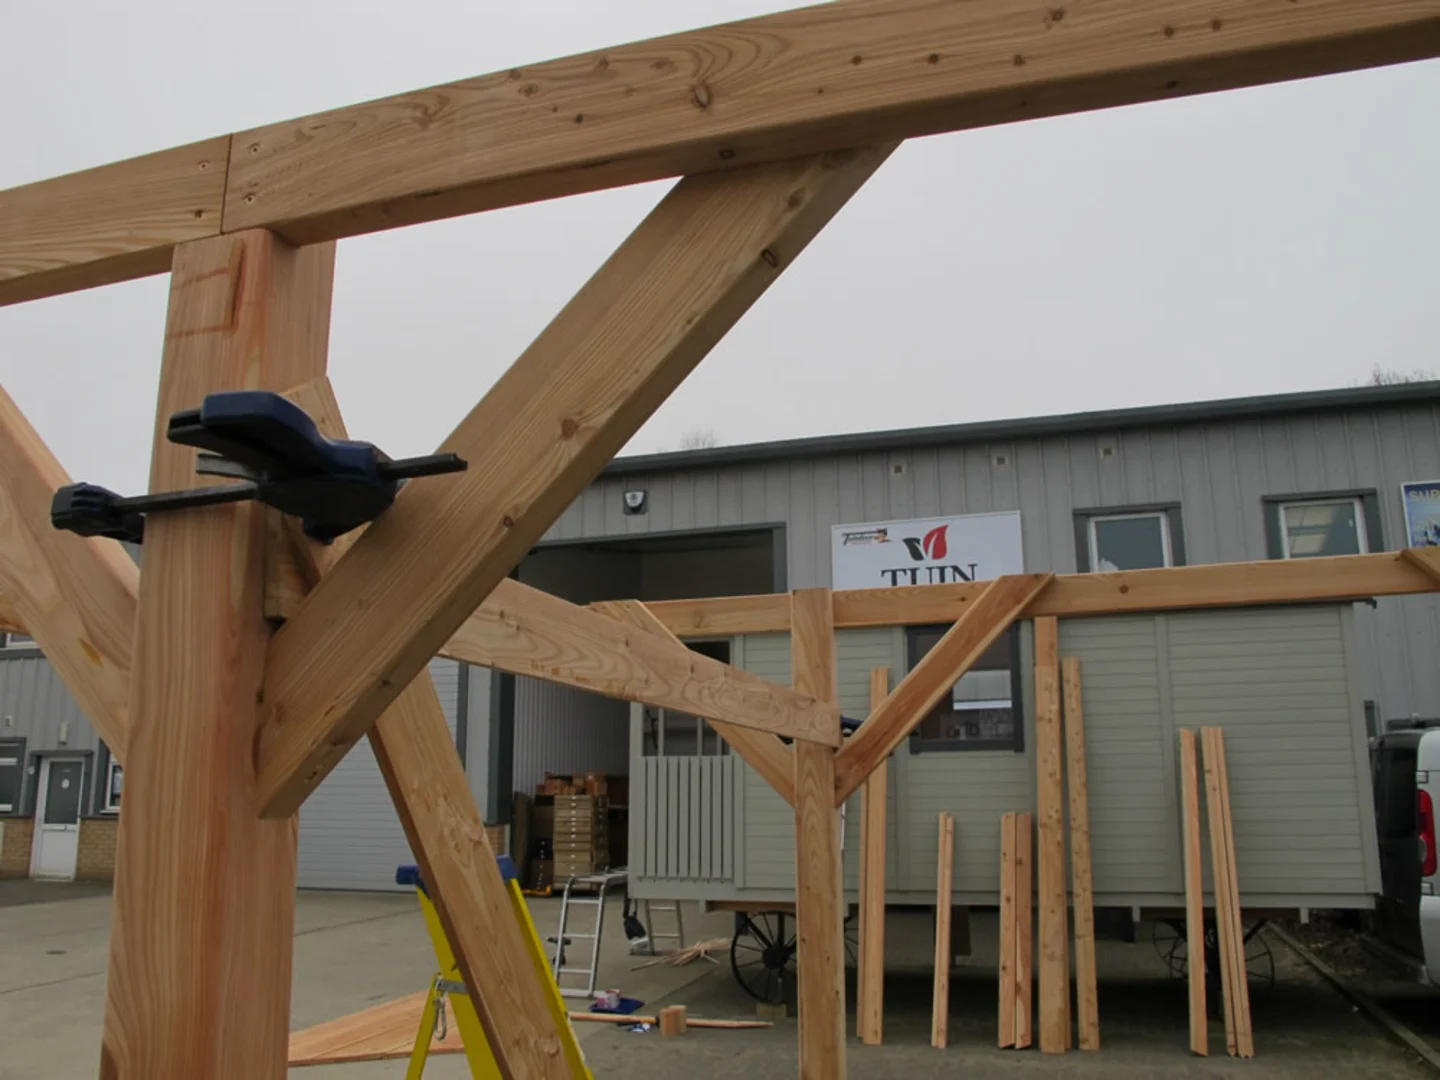
Ring Beam of the Gazebo
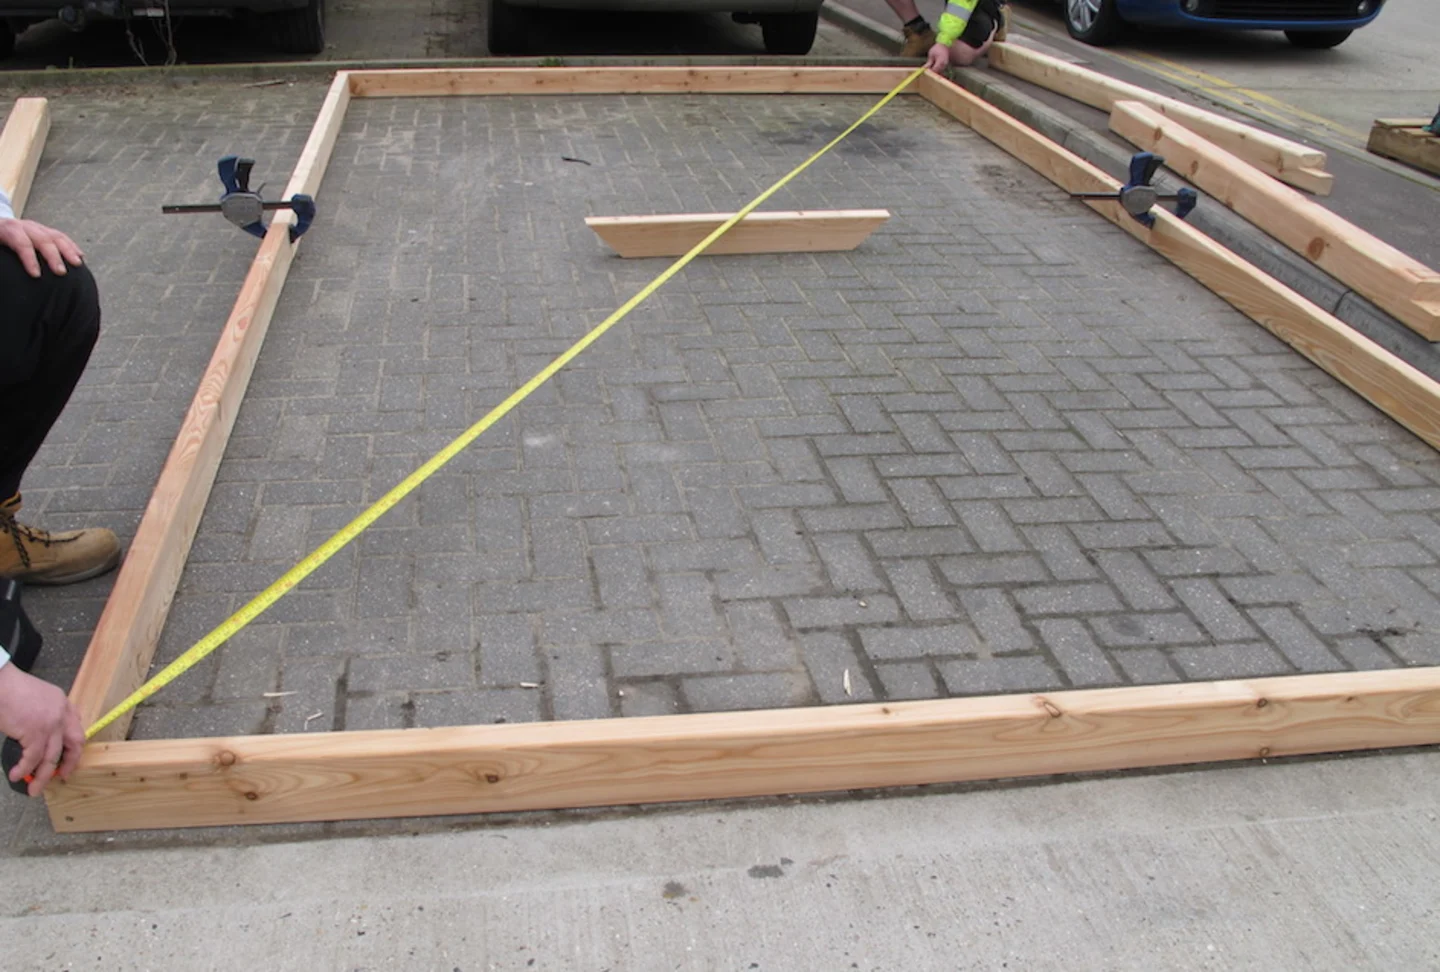
I had already laid the main ring beam parts in the location that it will be installed in, now I will carefully check the measurements against the plans. Please note that with square roofs there will be two shorter parts and two longer parts so it can form a square.
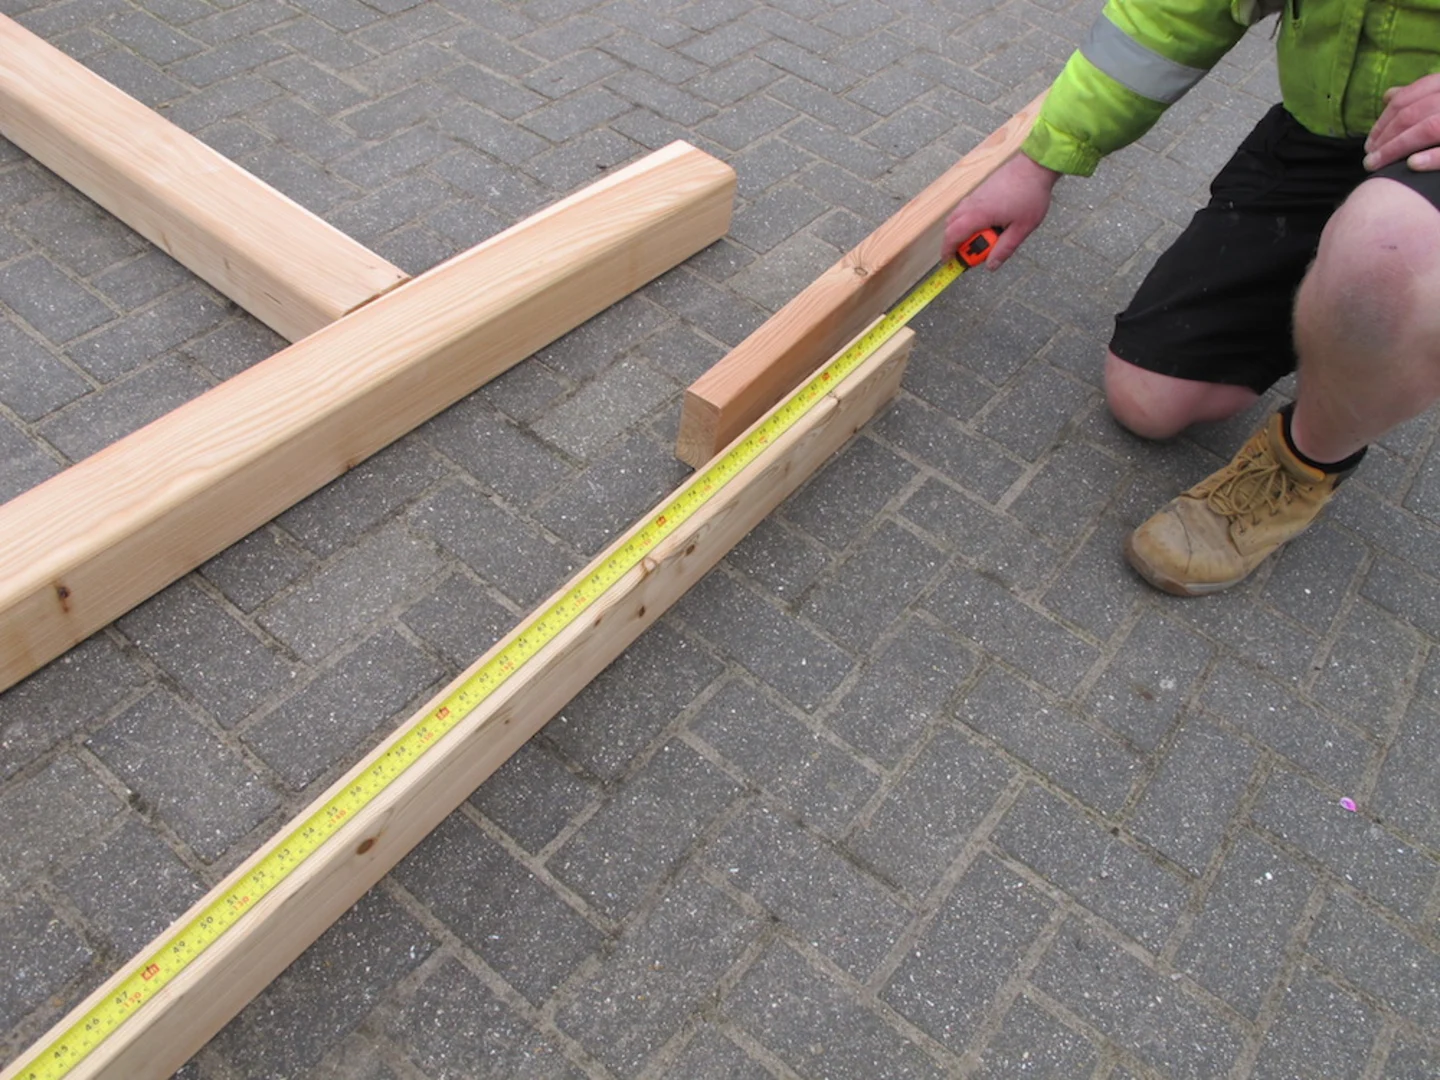
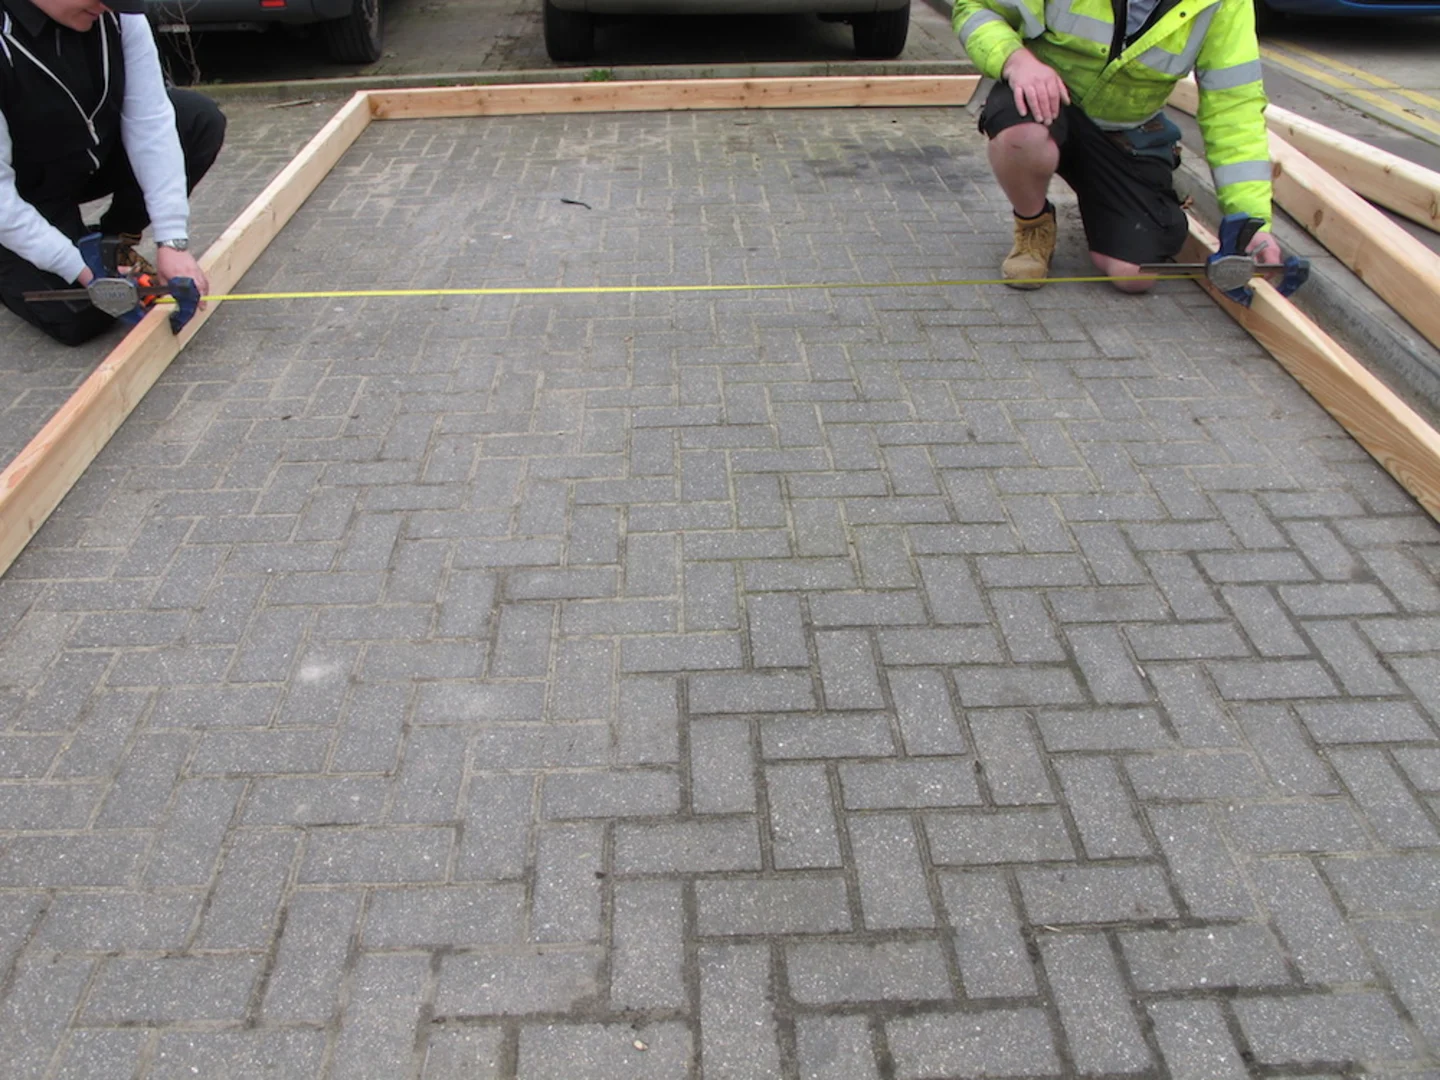
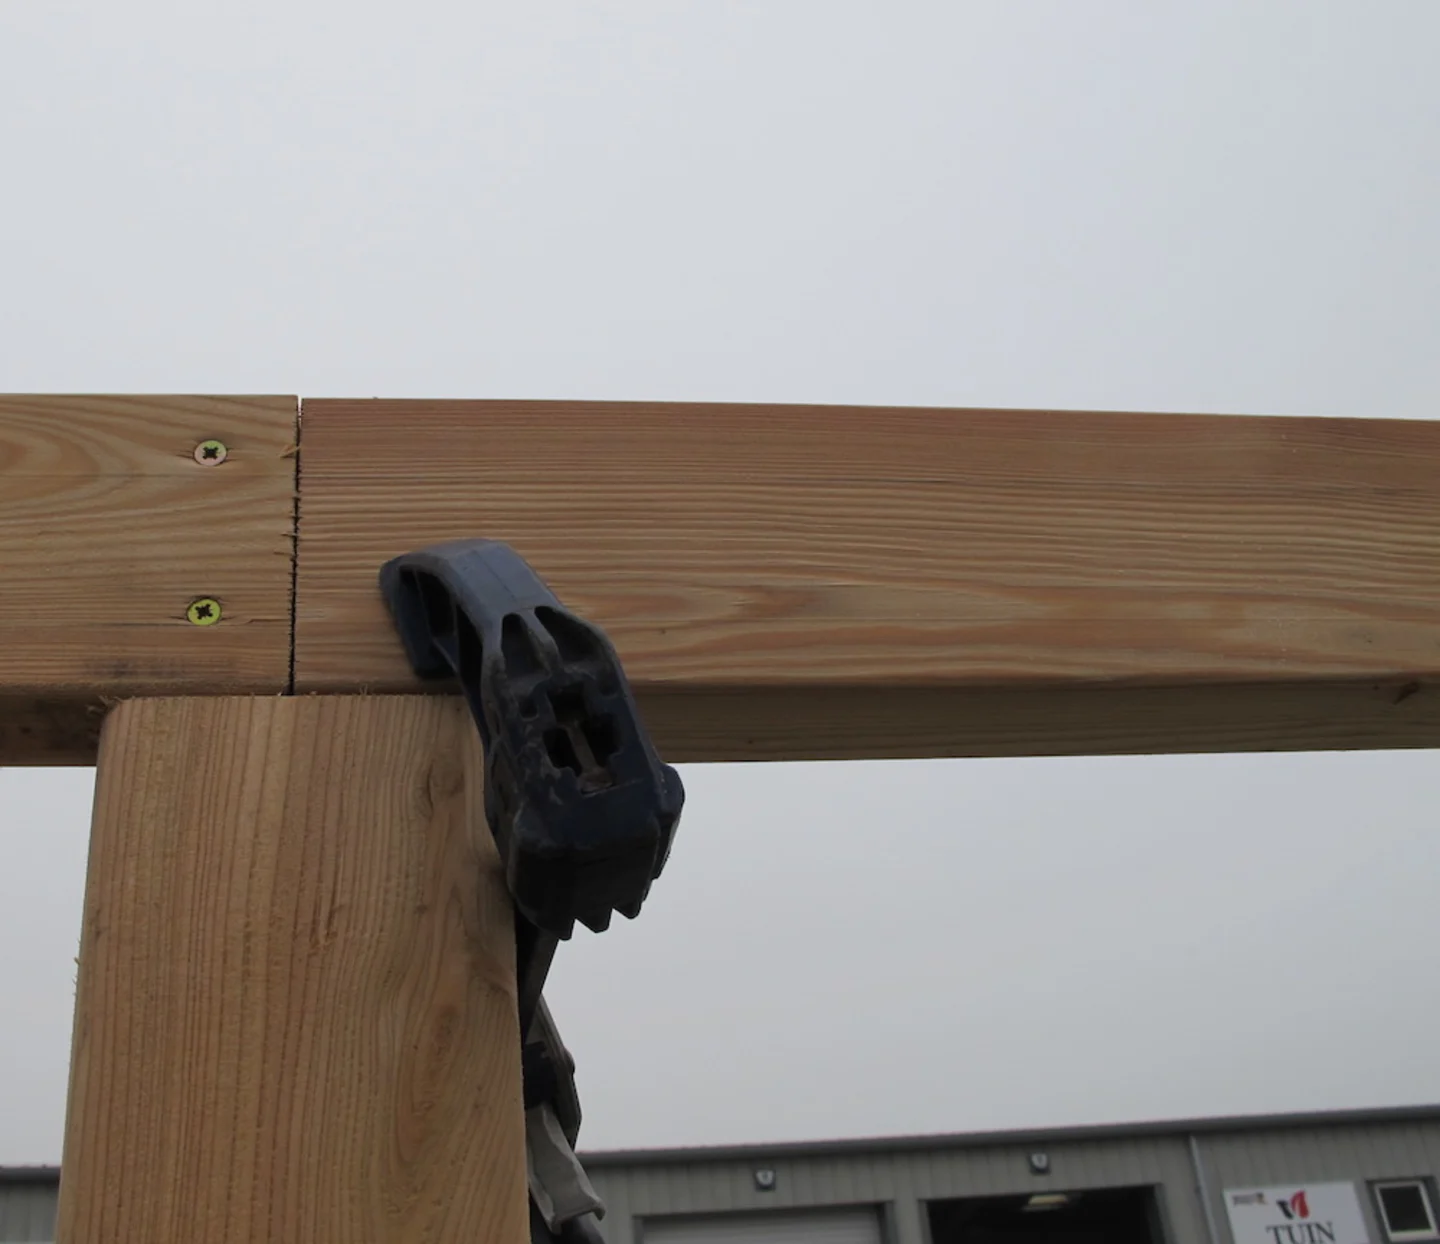
Using clamps we will temporarily fix the center joint together. Using a tape measure we check they are the same distance apart using the end beam as a reference. We then make sure the ring beam is 100% square.
Posts and Post Holders
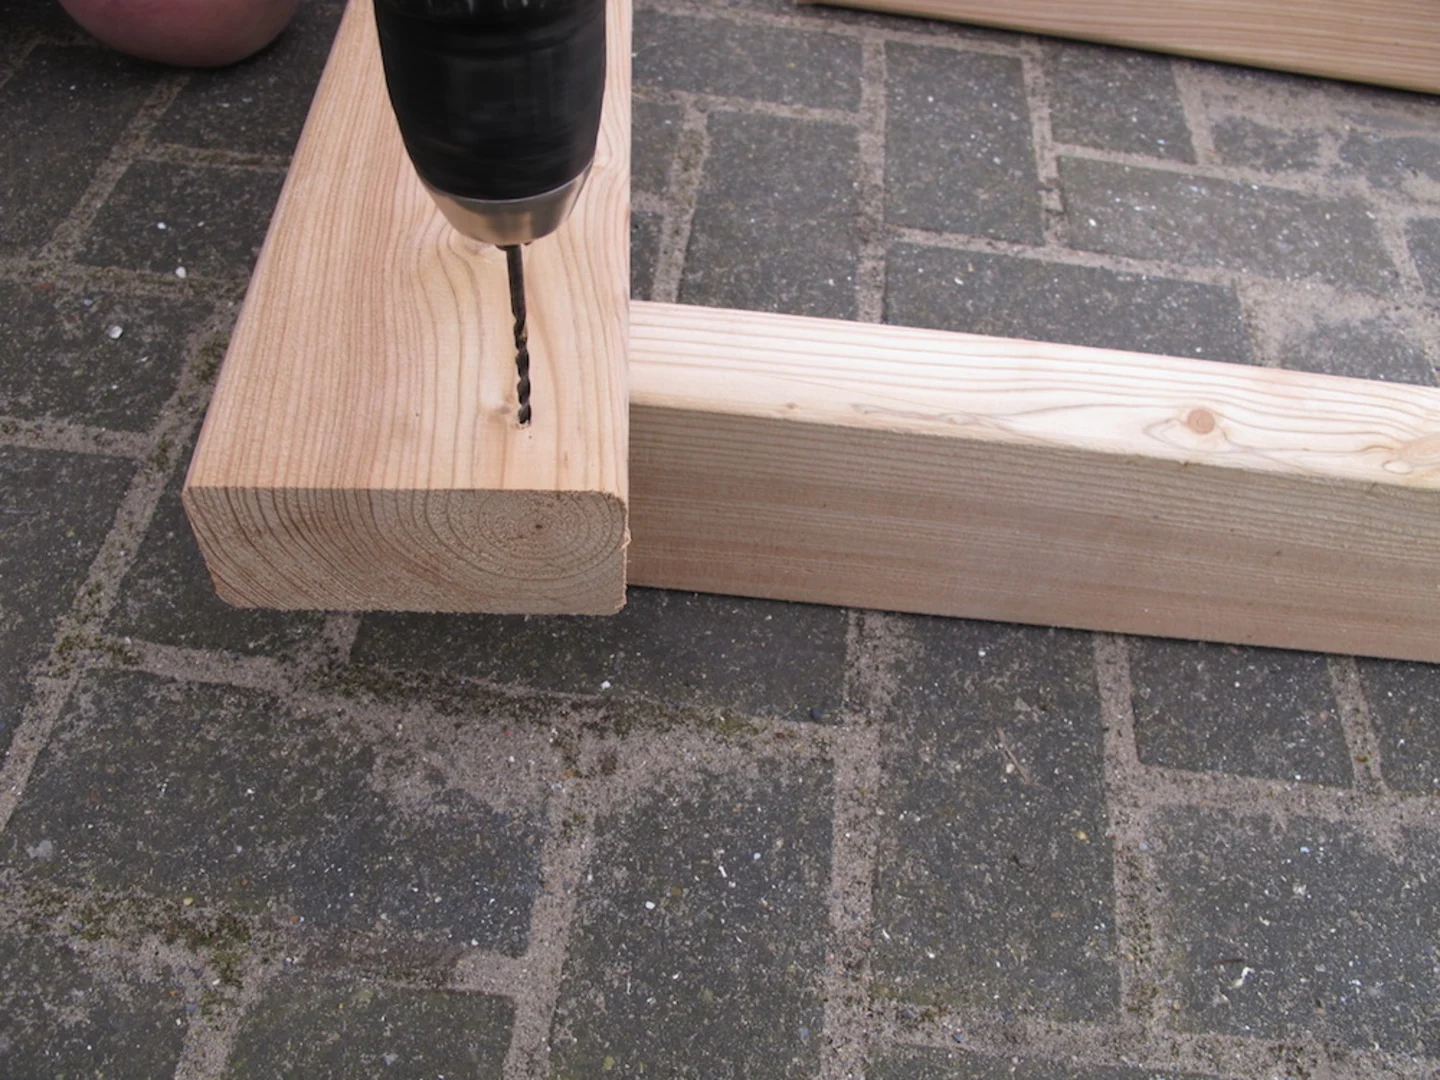
With the ring beam of the gazebo square and in the final position of where it will be we can now mark exactly where the legs will be.
Putting the post in upside down in their finished location we can then mark around the post to get the exact position of the posts in relation to the ring beam.
Different Anchor Posts
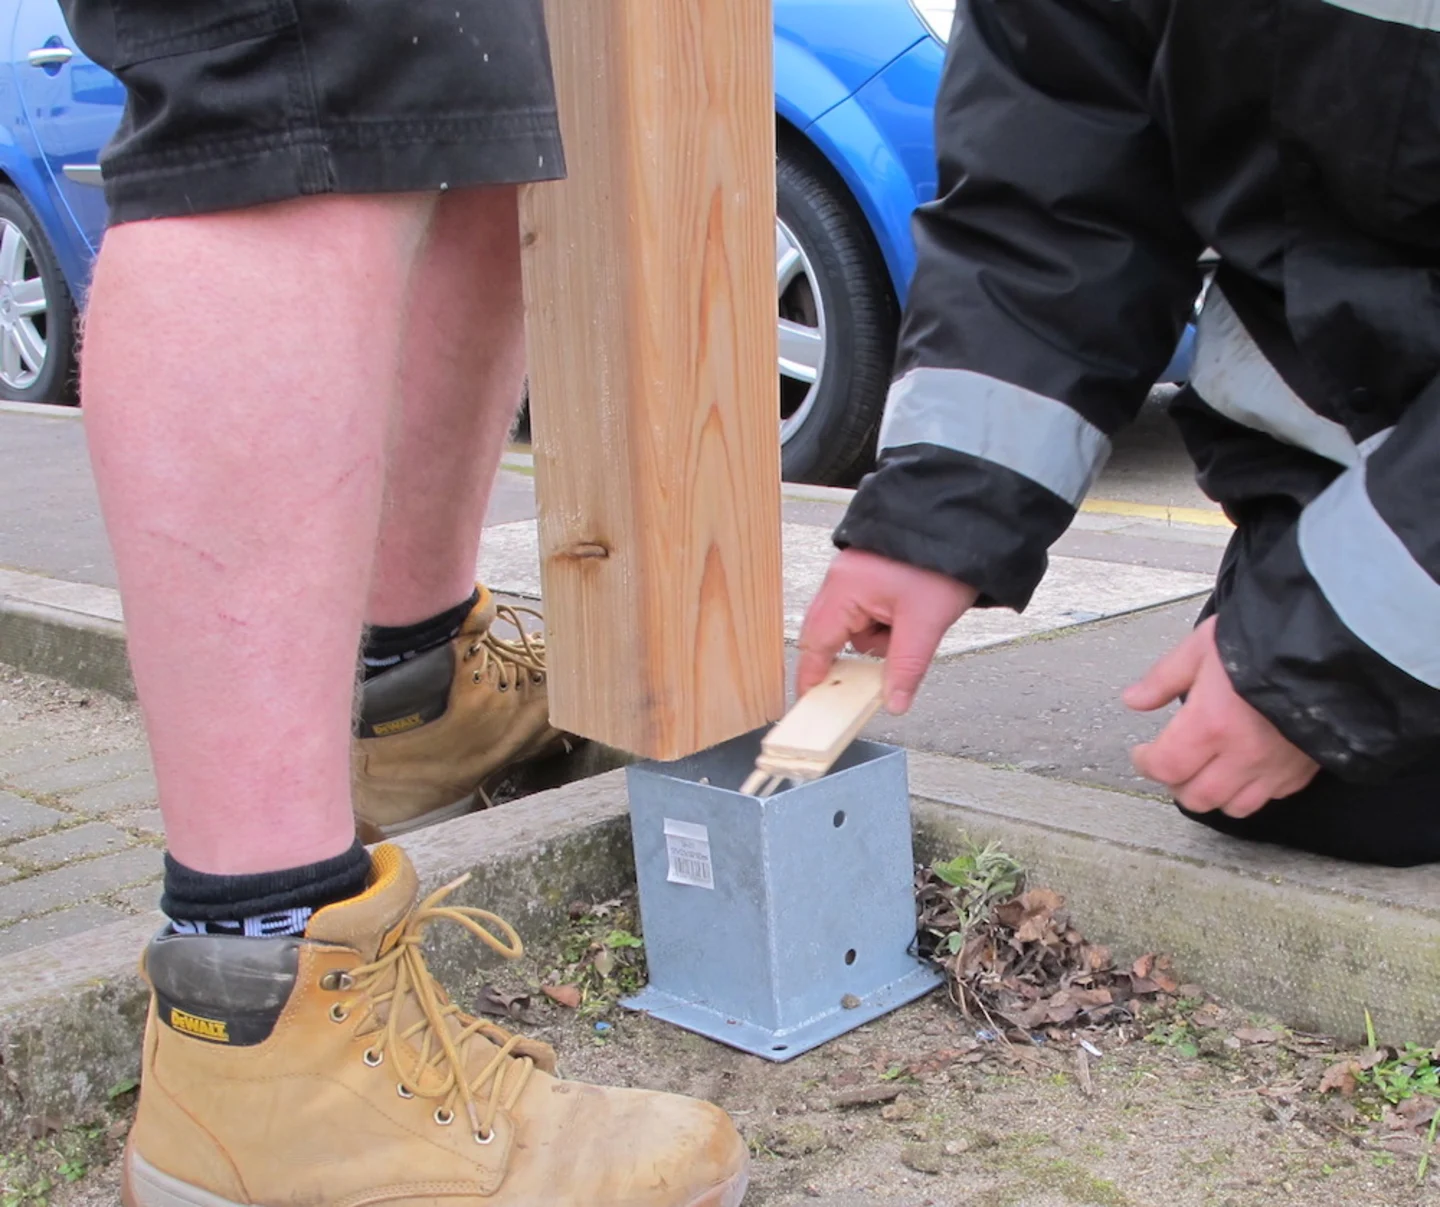
We have several types of post anchors available for use in soft / hard ground. It is very important to secure the posts and the holders do help with this. Without securing the posts if they are knocked during its lifetime you could well have some problems.
Post holders are handy if the area is not 100% level as we have with this install, we added packers inside the holder to get the post level as it was not possible in our install to break ground.
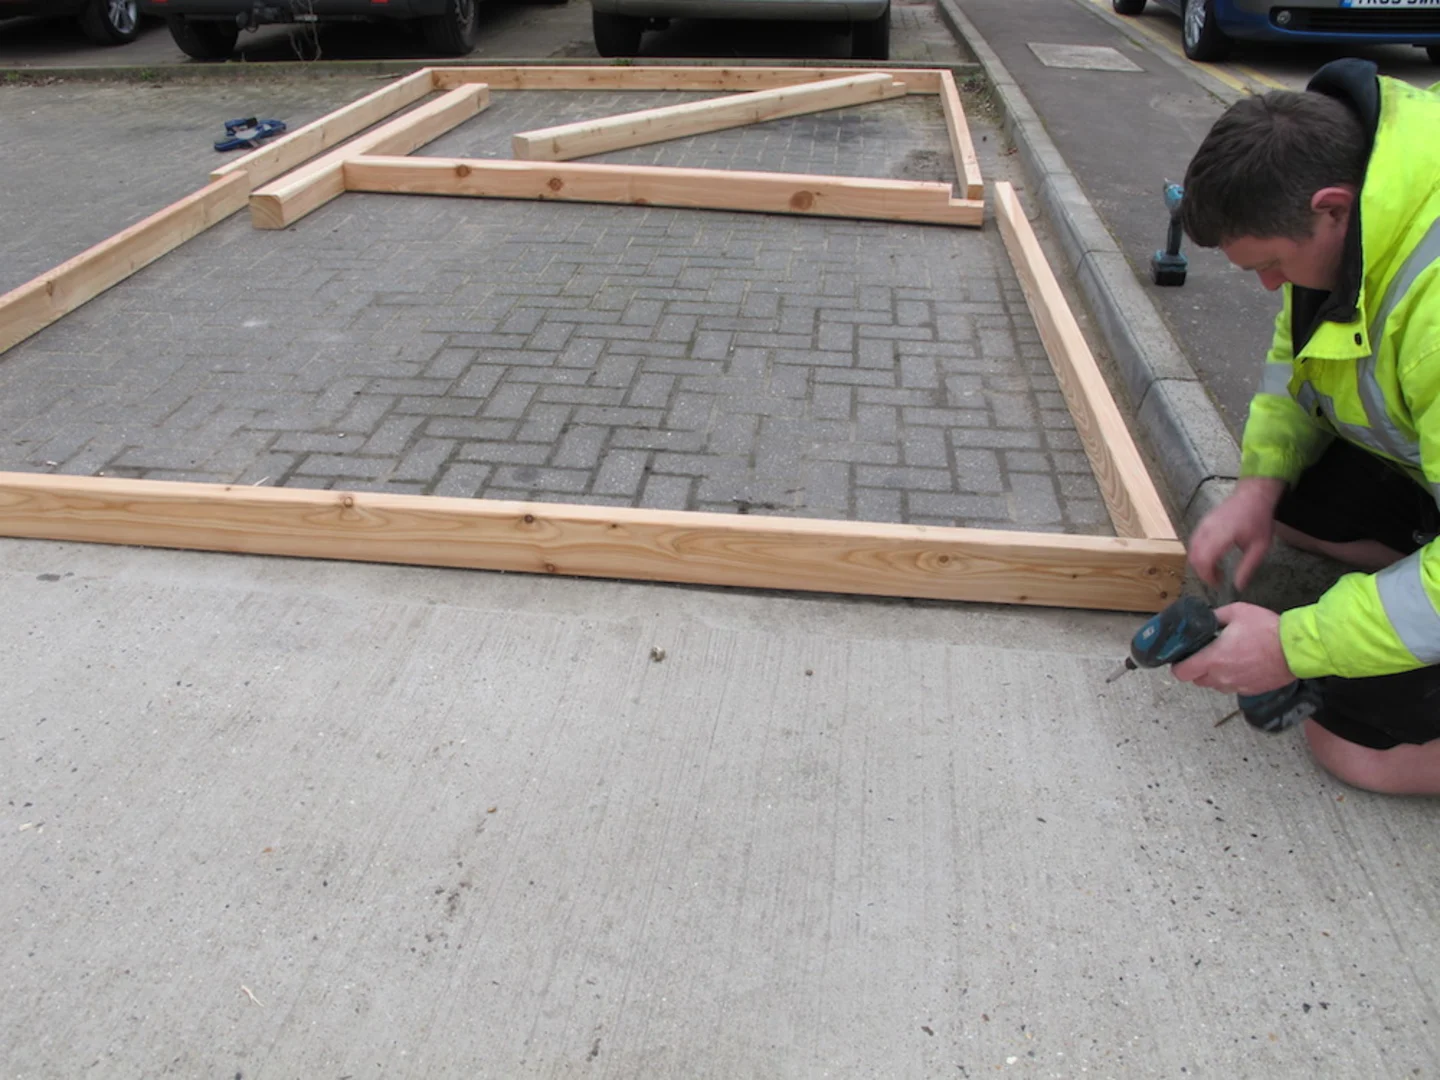
Using our clamps again we will fit two posts into the corner of one section of the ring beam.
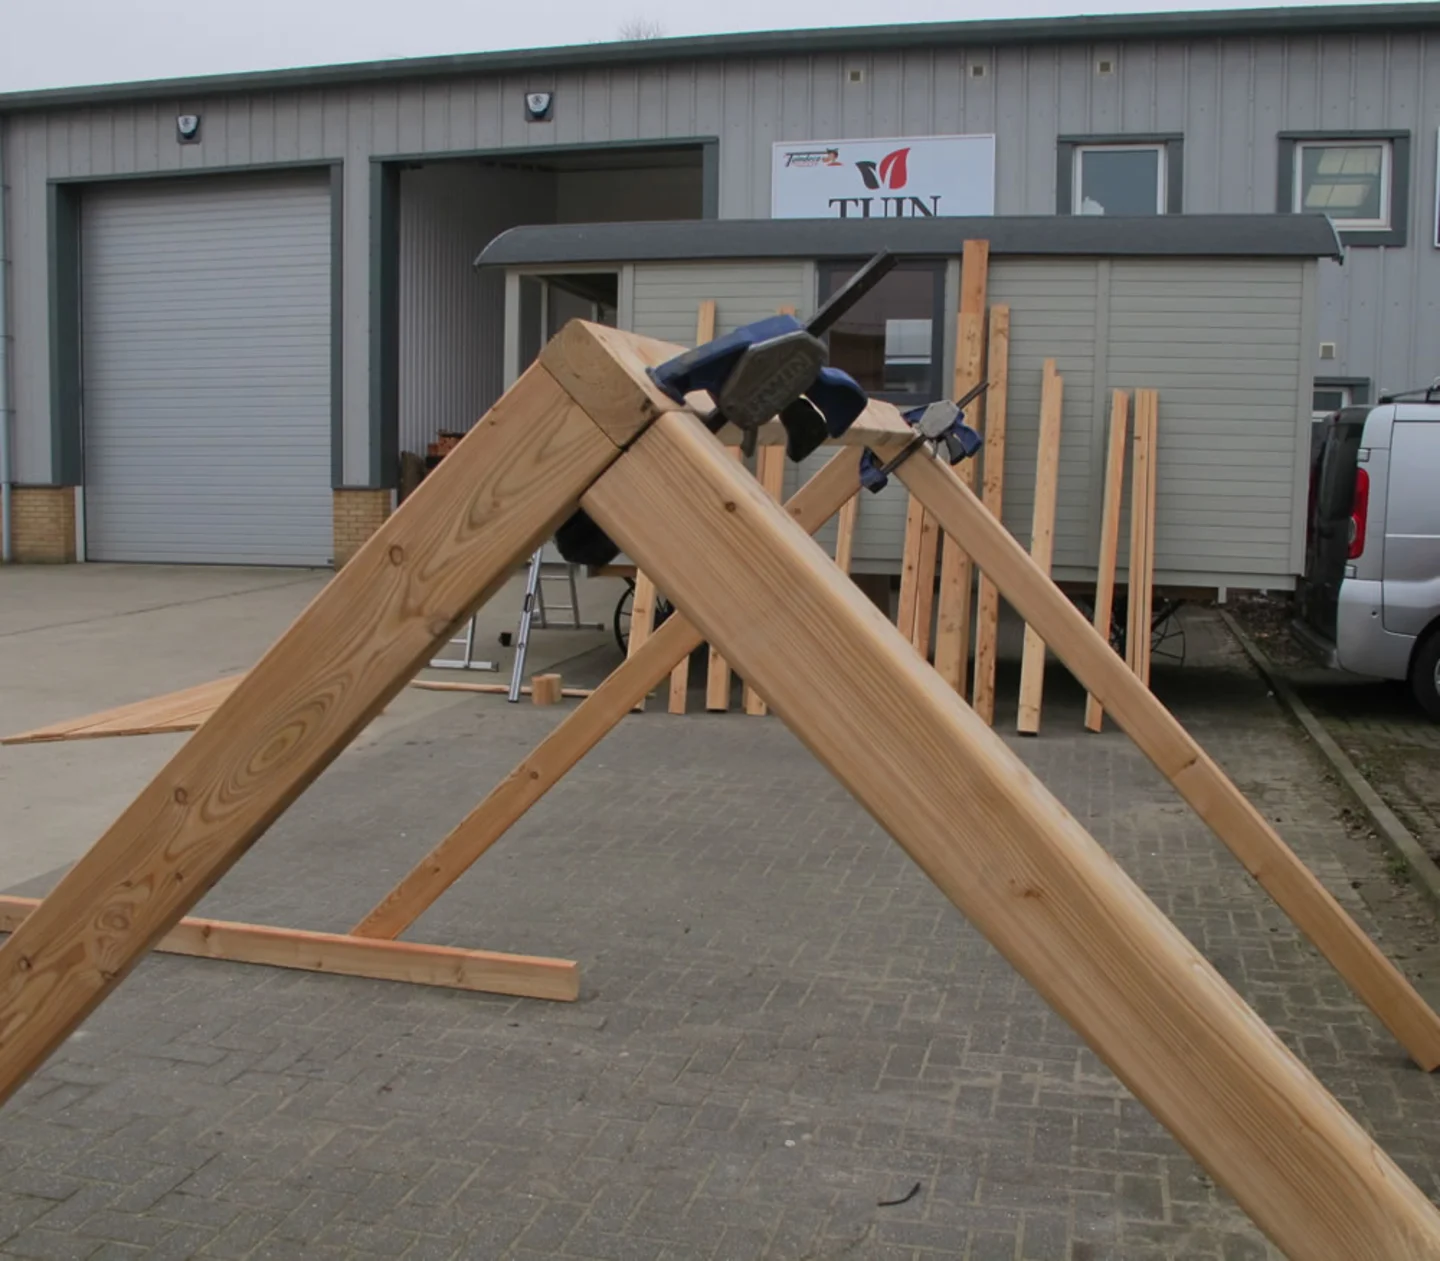
Next we clamp the center post to hold it in position. It is easier at this point to take the second part of the ring beam apart again clamping and fitting each section as you go.
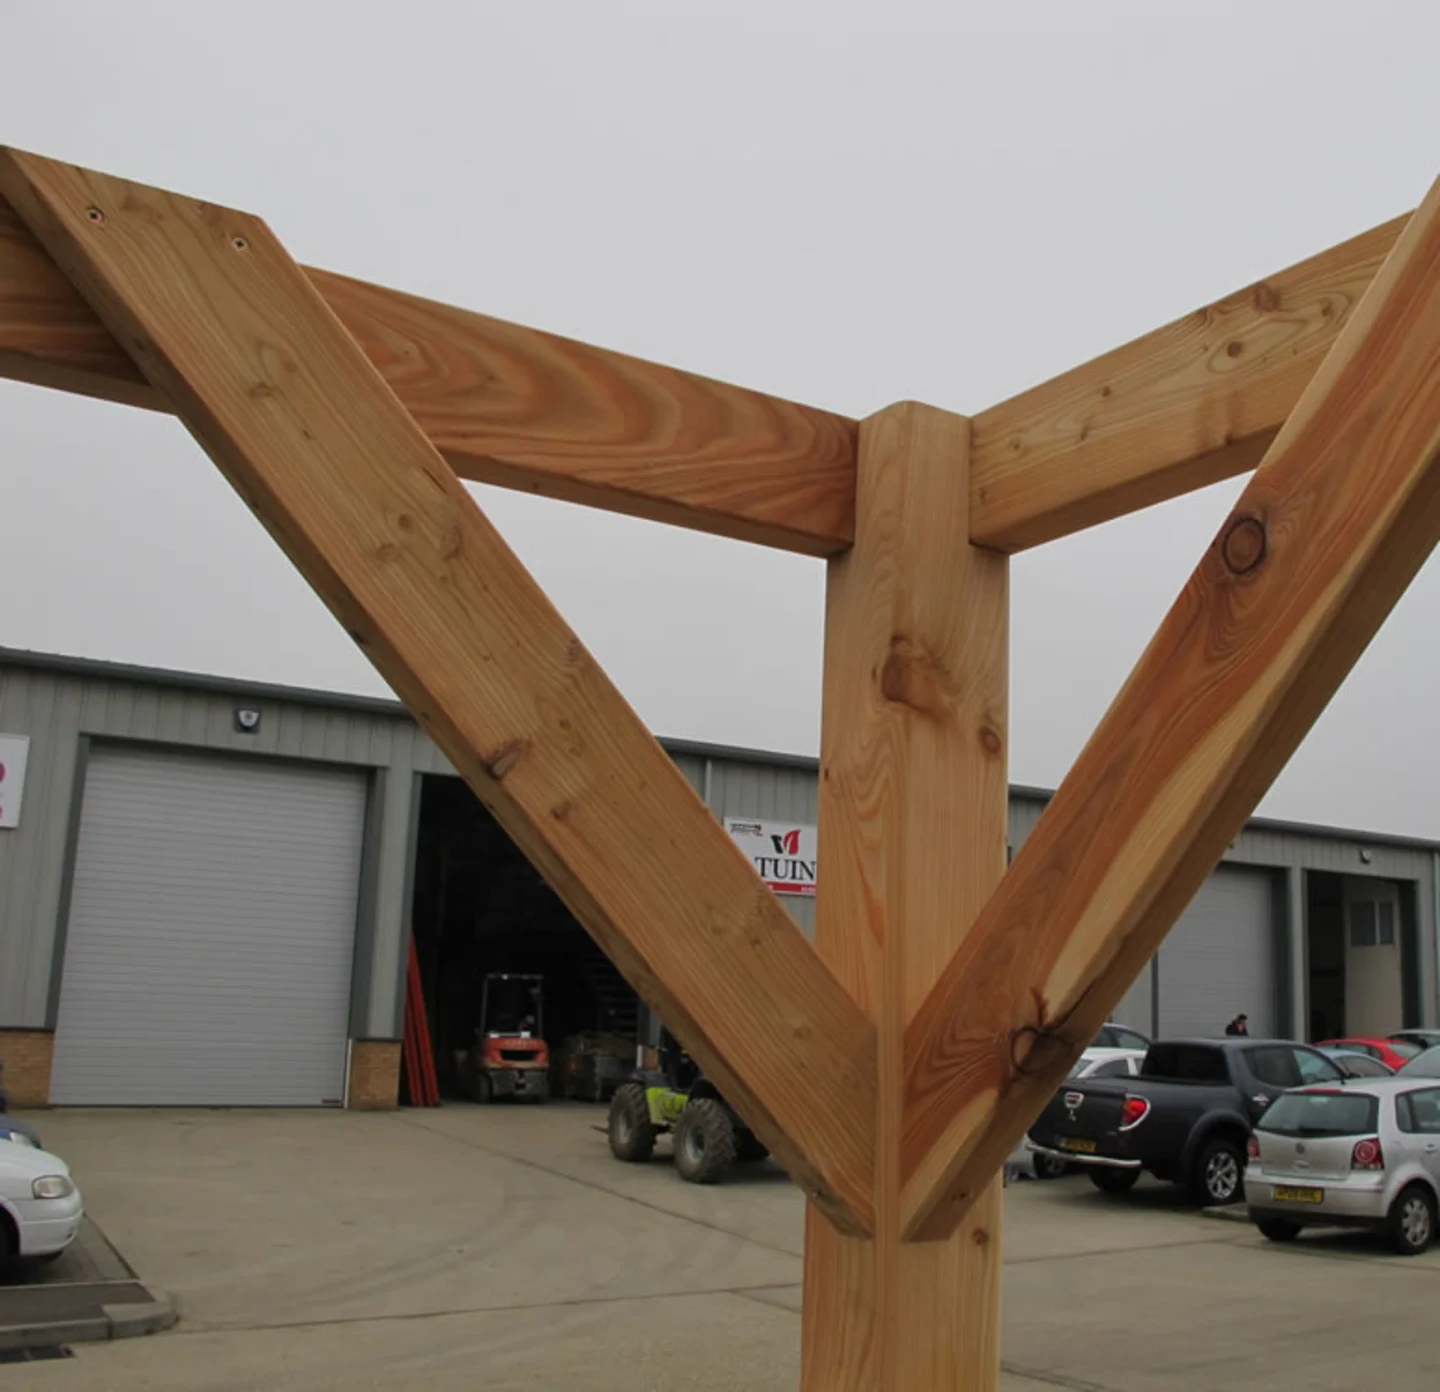
Gazebo Corner Braces
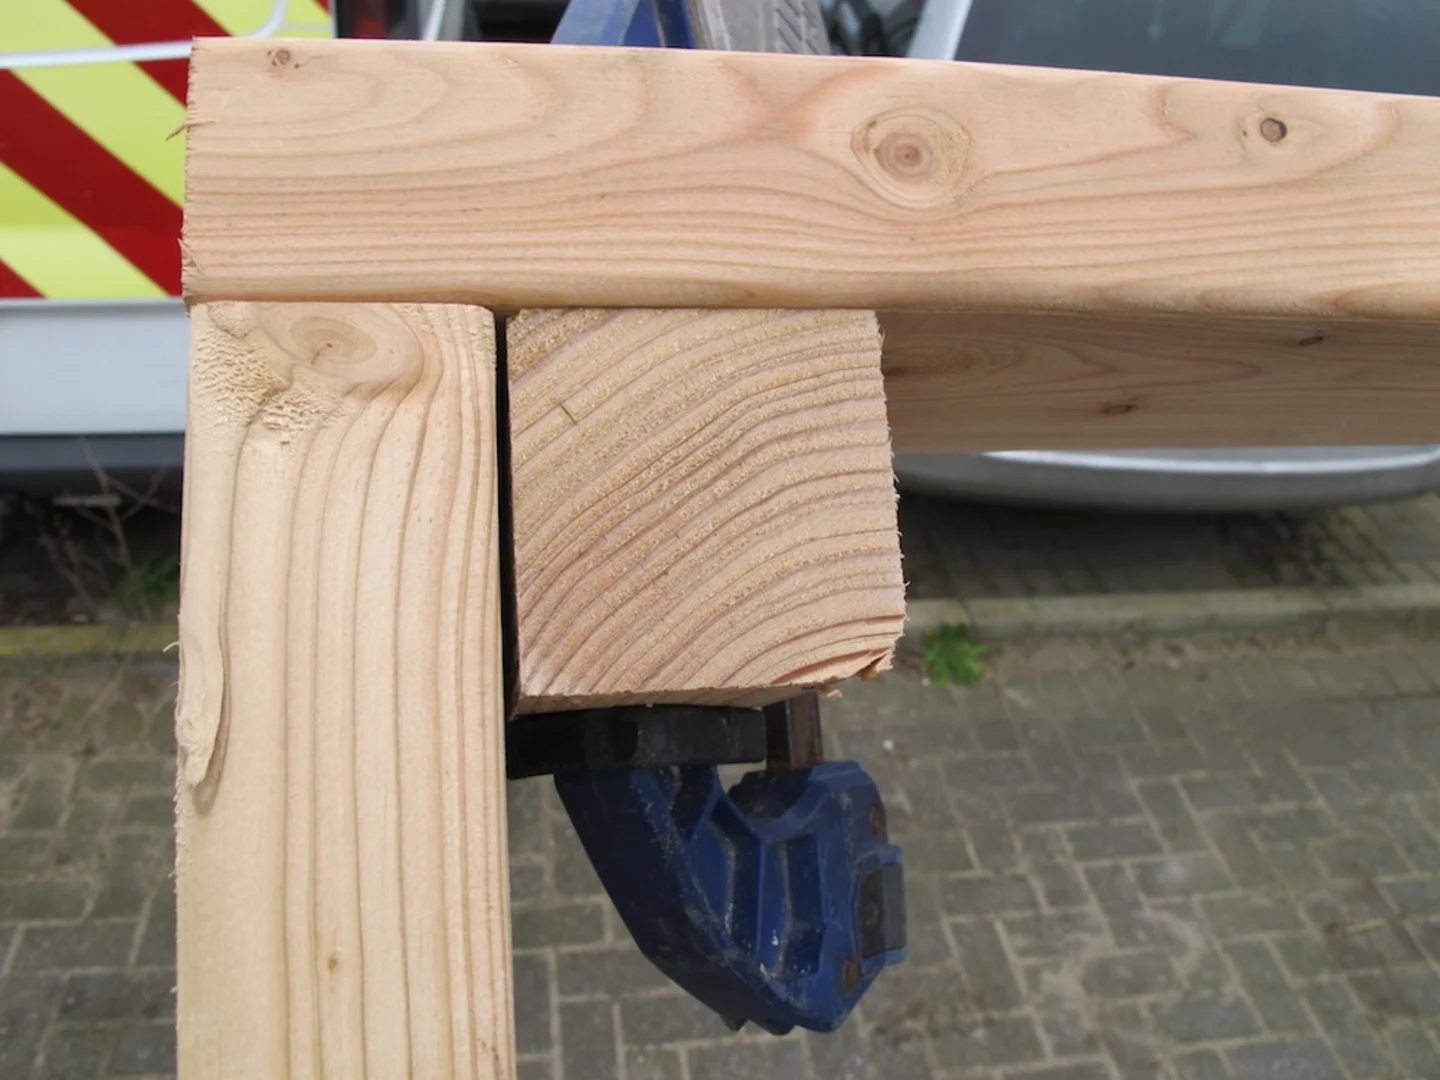
With the posts and ring beam fitted we can now add the corner support bracing. I deviate from the plans here as well. I prefer to set the bracing inside the ring beam. This is what it should look like, you will see as per the plans it is under the ring beam and against the post.
I will do it slightly different and set mine inside. I do this because:
I feel it makes for a stronger joint and more stable.
I can make minute adjustments easier to make sure the post is at a perfect right angle and 100% upright.
If there is any slight deviation in the cut angle I can allow for this and still have a lovely tight joint on the leg for aesthetic reasons.
It gives greater head room at the corners and less chance of bashing your head.
It is of course up to you and what you prefer when fitting the corner braces, this is only my personal preferred method.
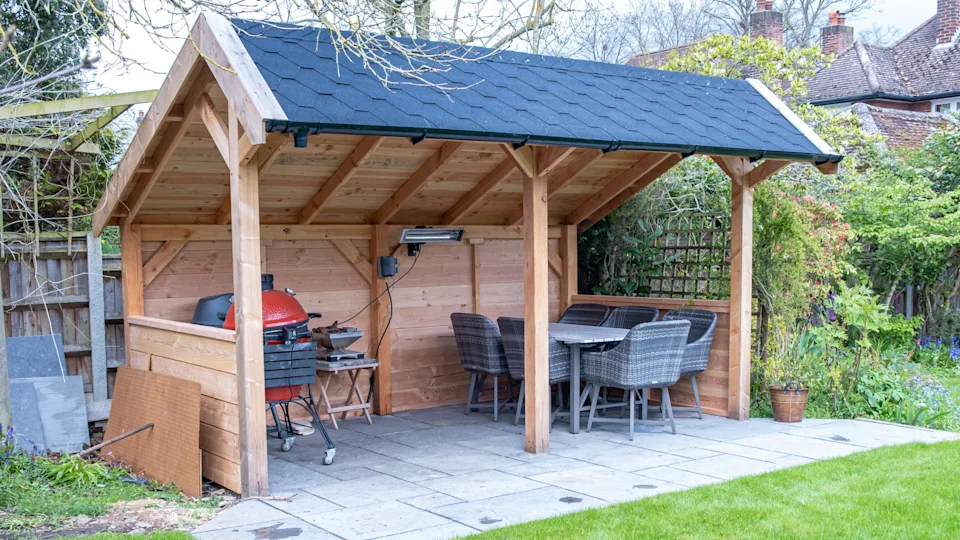
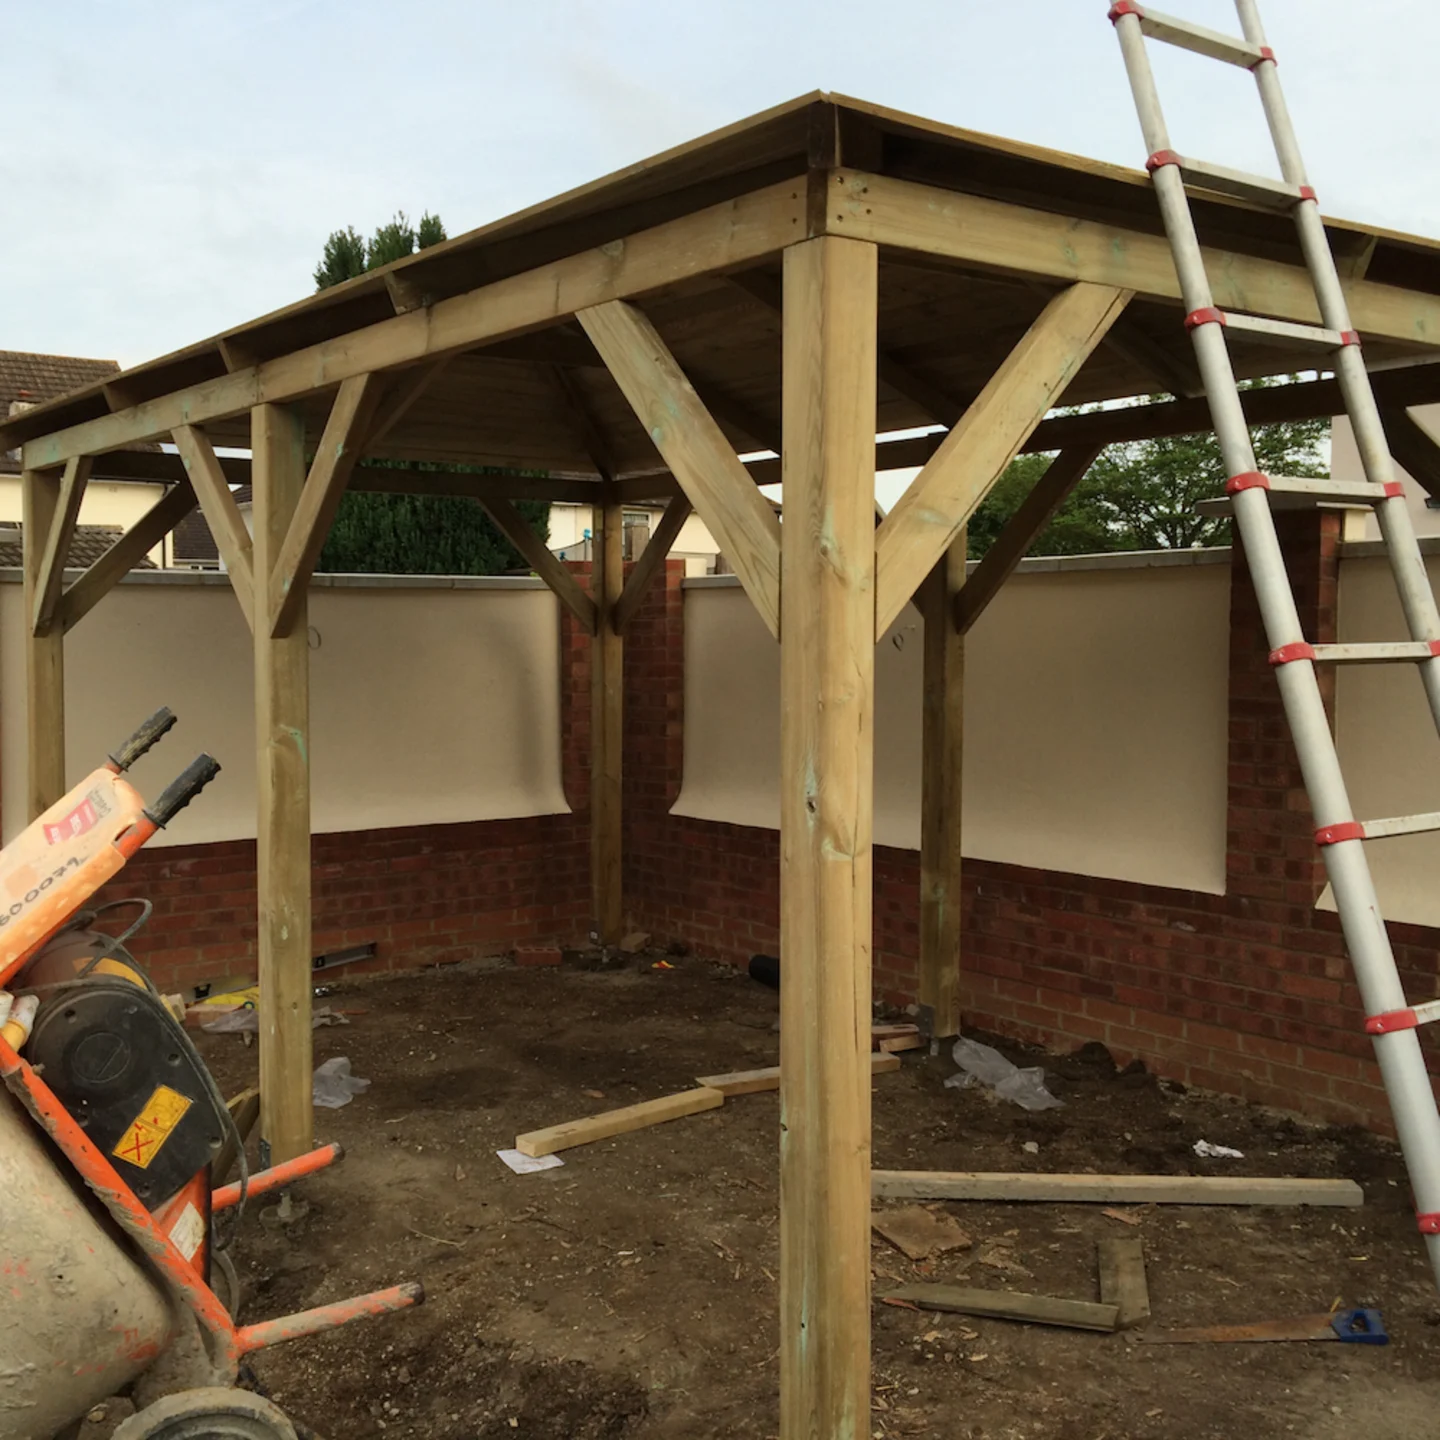
Ring Beam and Post Complete
You may see from the plans depending on your particular gazebo that they show it being built and then lifted on to the three posts. As I have shown my method is an alternative that you may wish to consider. I find it easier and you only need two people. It is of course up to you though how you think it is best to do. This method is of course also highly relevant for the flat roof gazebos.

Roof – Gazebo Installation
I’ve decided to do the roof install in a separate post as much of it is also very relevant to our log cabins so there will be combined advice.
The flat roof installation is a doddle once the main structure is up and doesn’t need any further explanation.