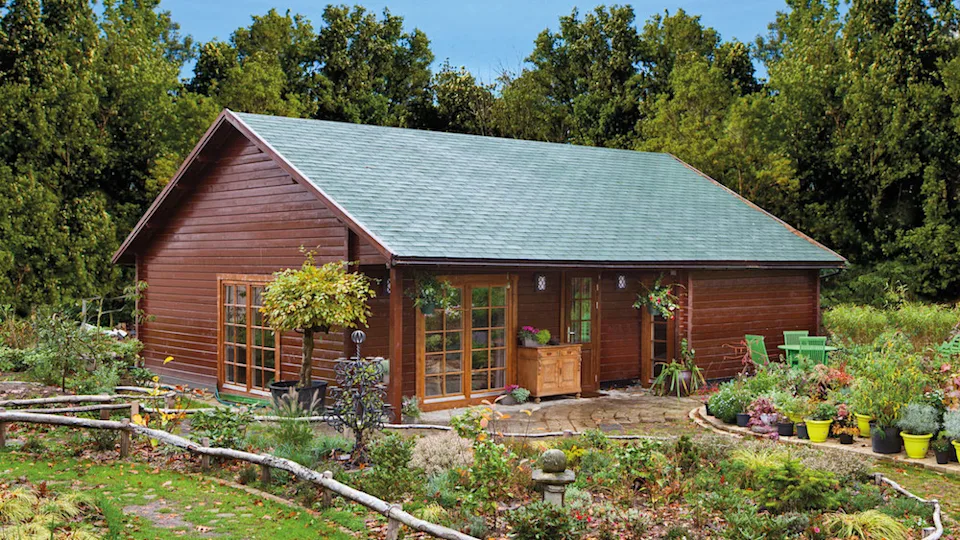
Base requirements for log cabins
Log Cabins are not built like a shed, at least the good ones aren’t. Especially when it comes to the cabins’ base requirements.
What I mean by this is;
Sheds: When a shed is installed the floor is placed down first, the walls go on top of it and the build is continued.
Log Cabins: With the majority of log cabins, the cabin is first built and the floor goes in afterwards and sits within the cabin and is not an integral part of it. The floor system acts as a ‘floating floor’ and should not actually touch the cabin walls. Despite this, the floor joists may touch. More often than not, the joists attach to the log cabin foundation beams.
Foundation Beams
All our cabins are built around the perimeter of a base and it is prefered that it is built on a foundation beam.
Foundation Beams are designed to go around the perimeter of the building, sitting between the first log and the base.
Adding this option to your cabin gives your first layer of logs protection from sitting directly in any water. As well as standard foundation beams, we also have profiled foundation beams as an option
Other options for foundation beams
These are other options available at Tuin or directly supplied with your order.
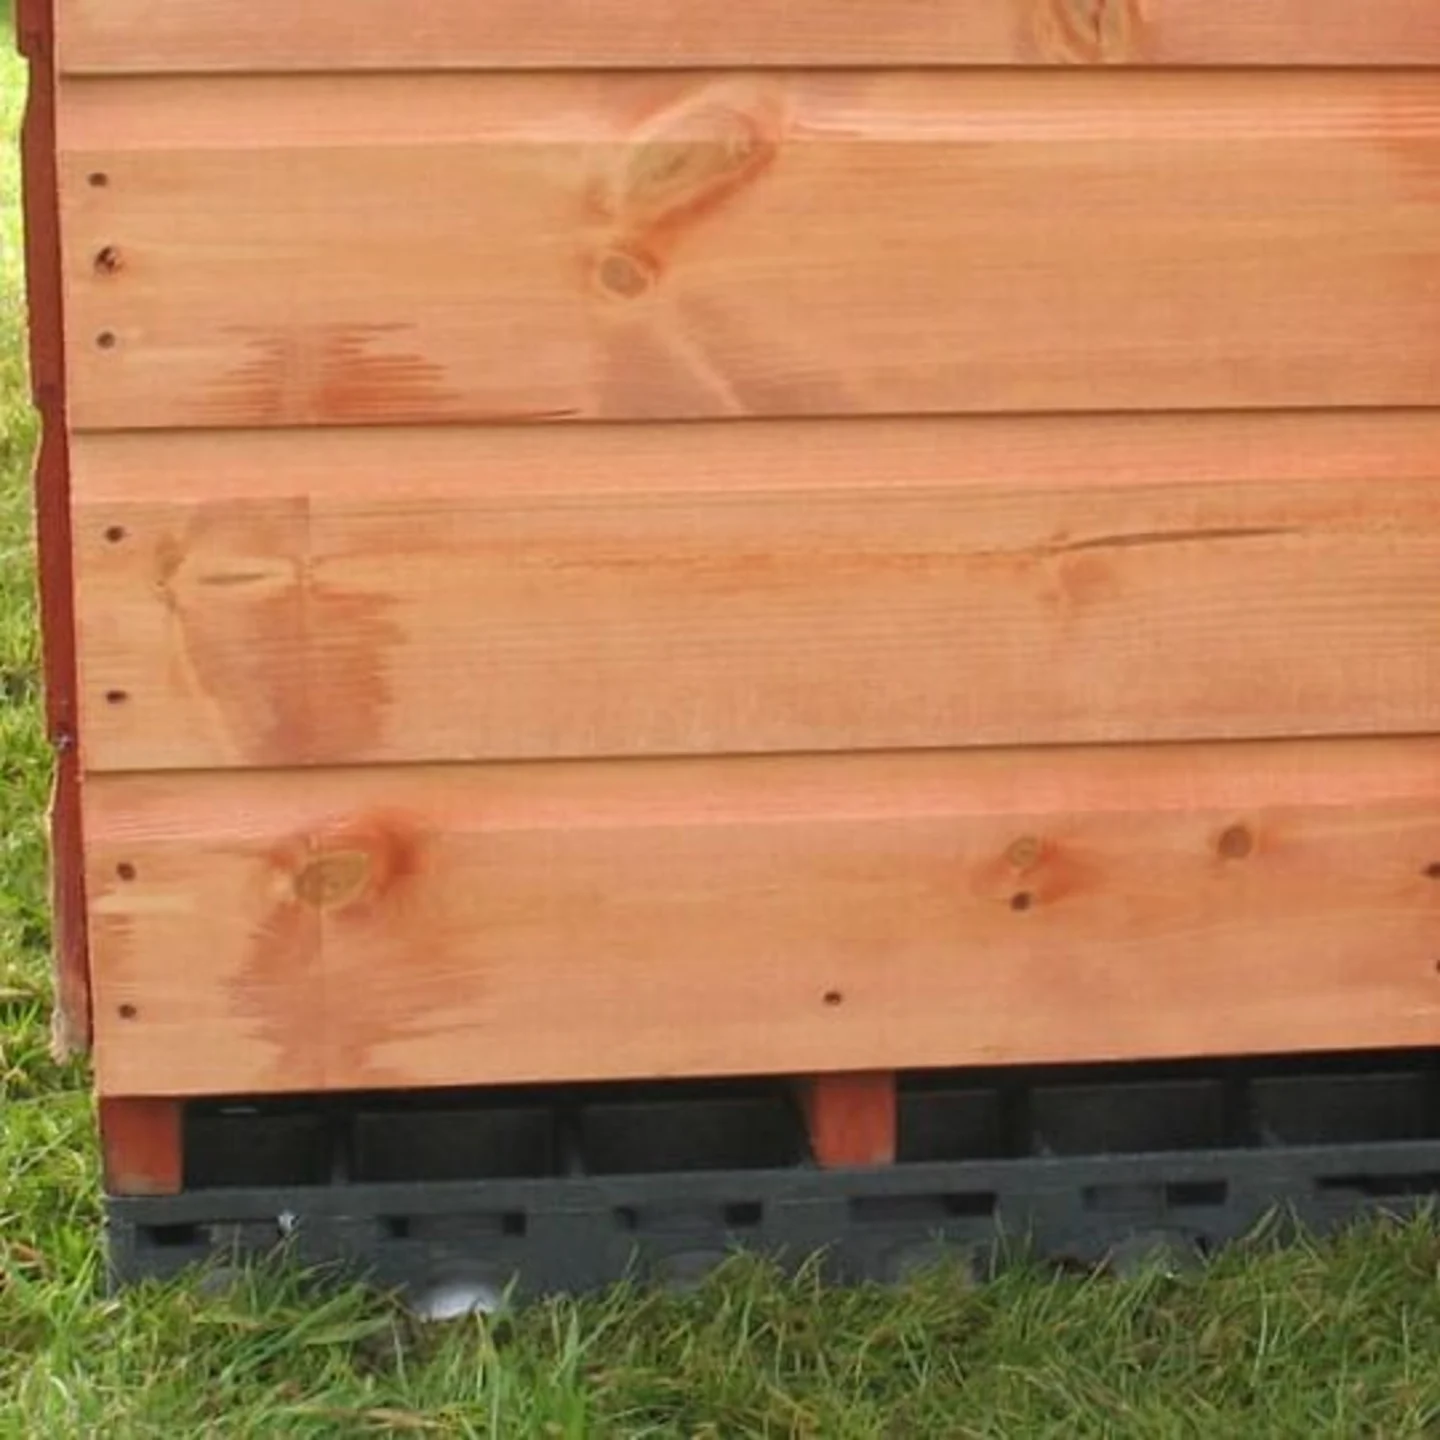
Tanalised foundation beams
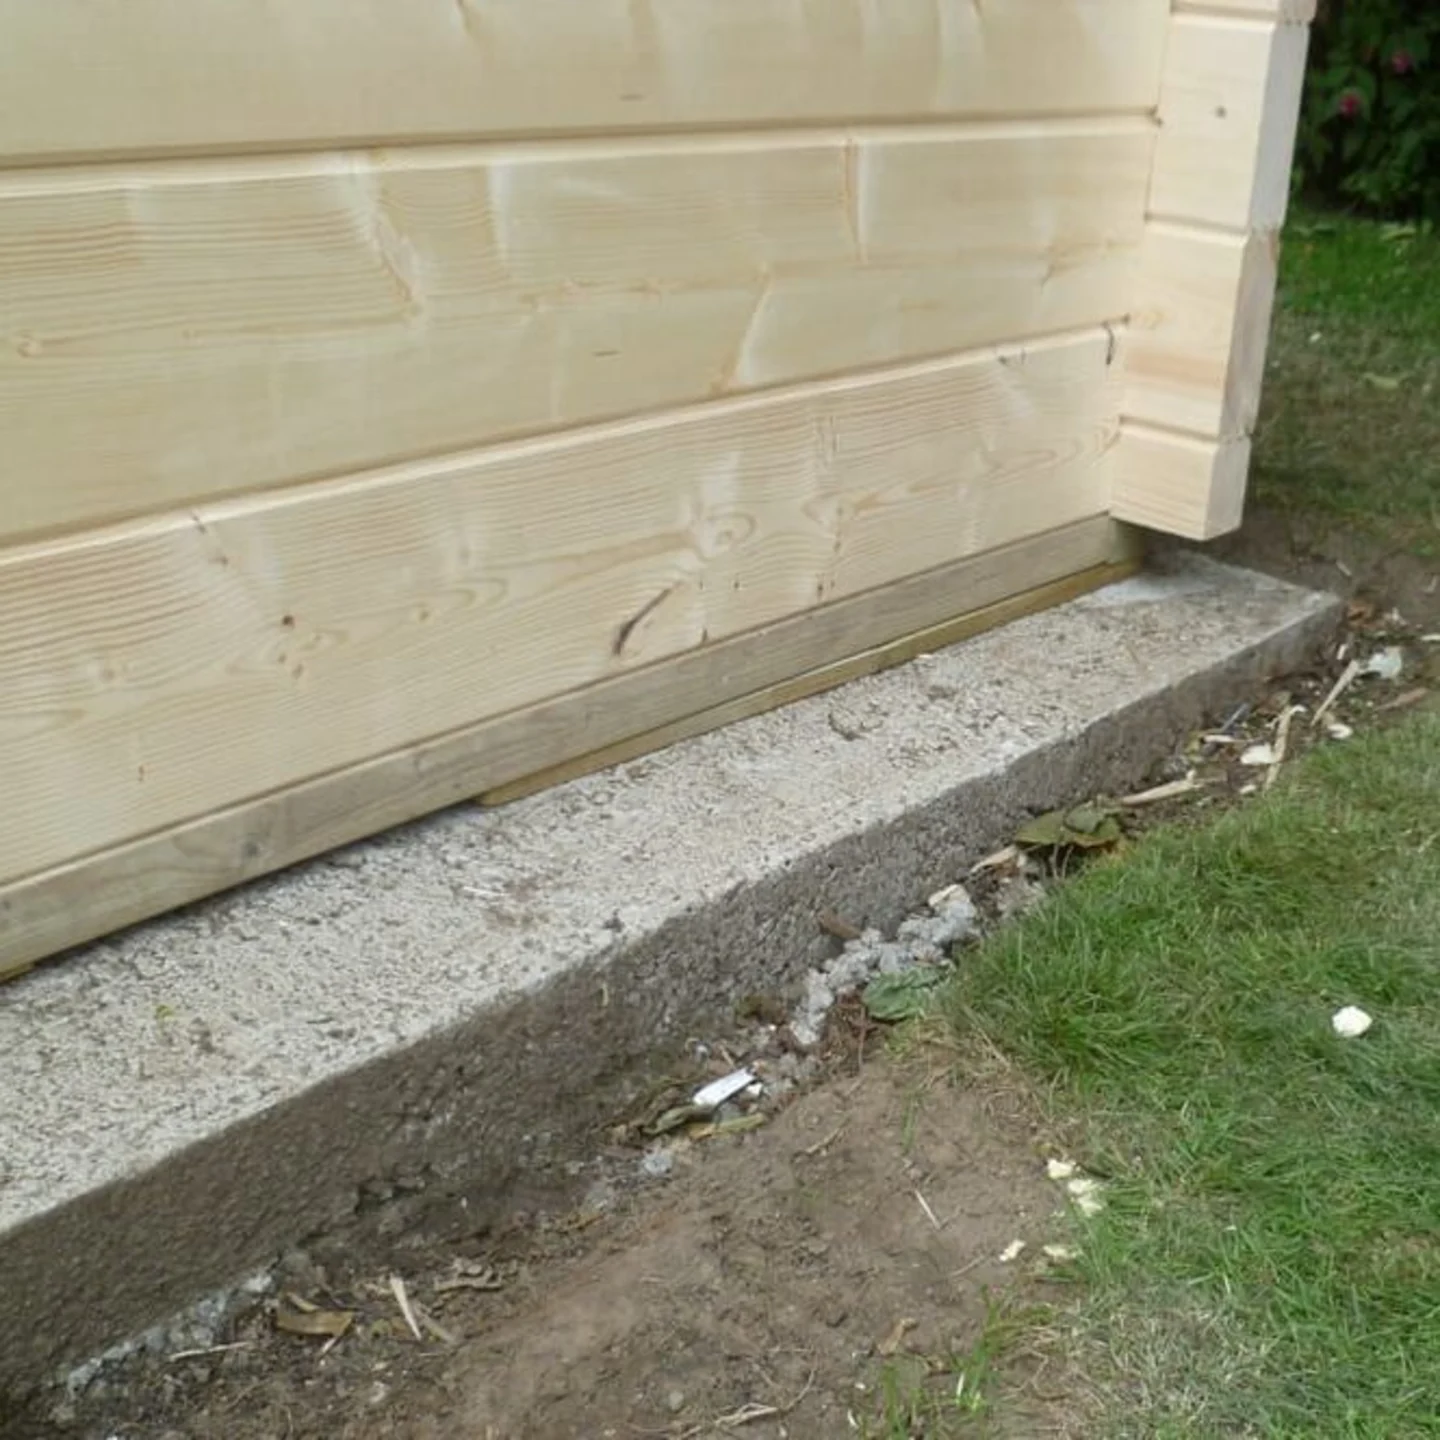
Tanalised foundation beams. We supply these with all our cabins. They go in between the base and the first log around the perimeter of the cabin.
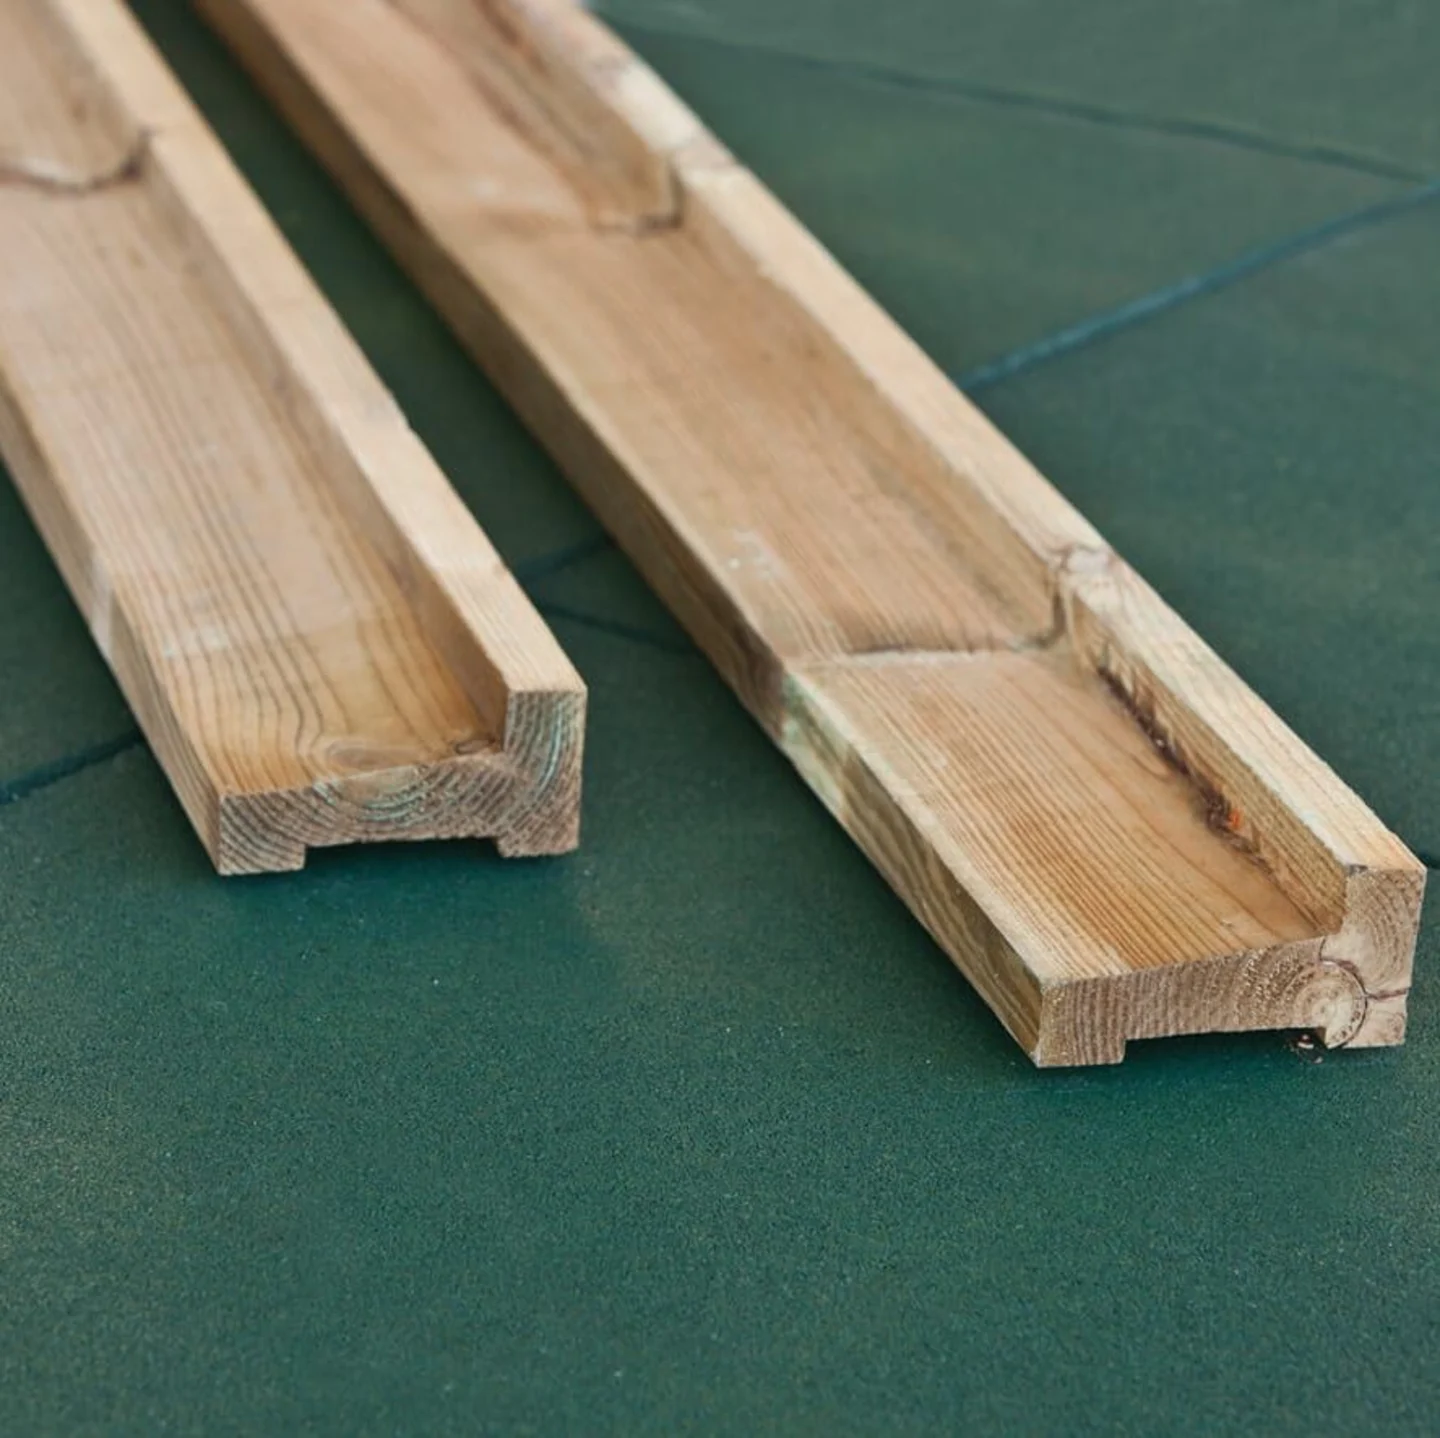
Profiled Beams
These are profiled beams. They allow any water to flush away from the first log. Available in tanalised and hardwood.
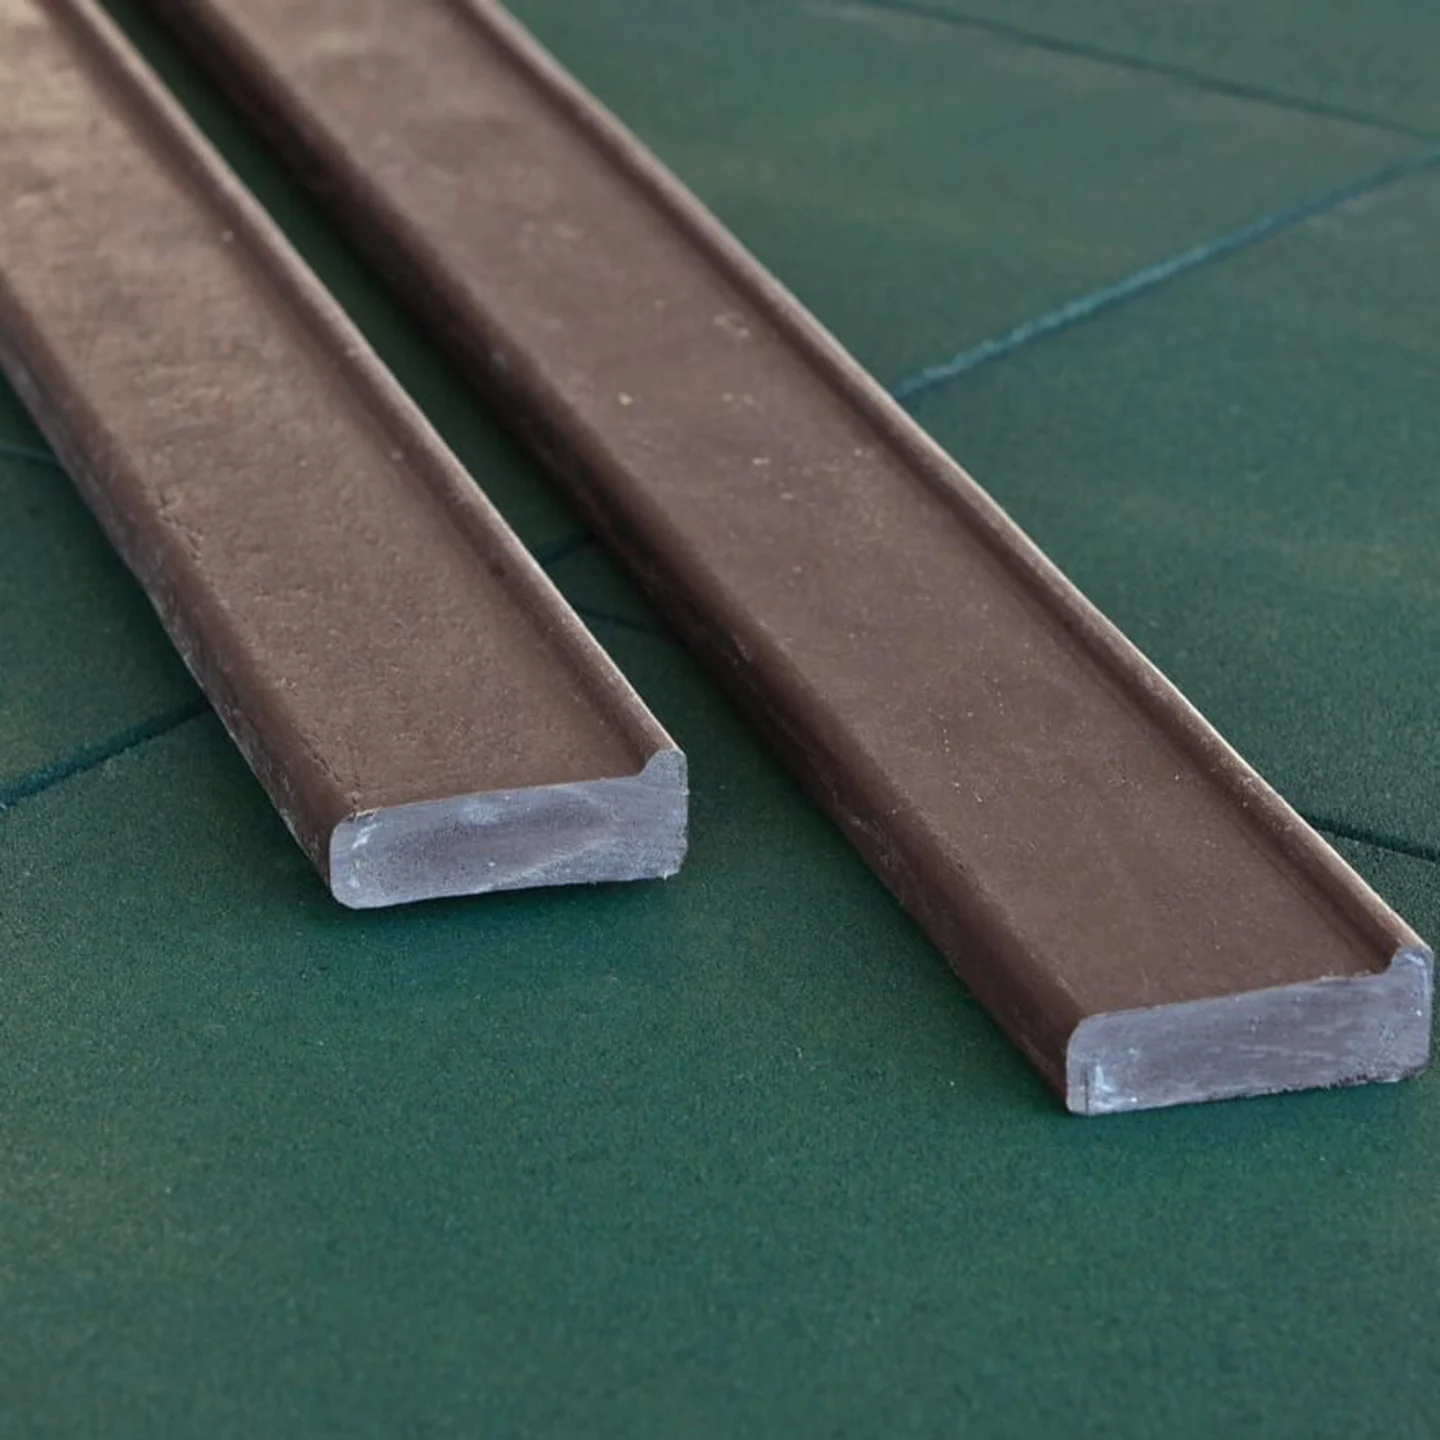
The same as the ones above but these ones consist of a composite material and never, ever rot.
The foundation beam runs around the perimeter and underneath the first log, acting as sacrificial timber. They ensure the first log stays away from any wet.
Log Cabins and Sheds bases
The perimeter of your log cabin
Understanding the above you will realise that all of the weight is on the perimeter of the cabin.
When constructing a base, definitely consider this. Sadly, I’ve been to several fits where the centre of the base is great but has chipping and drooping on the edges. Not to mention removing all the shuttering as all the concentration had been placed on the majority of the base with an eye to shed building.
The greatest strength for a log cabin base should be within the perimeter. This is where all the weight is.
Why do you need a level base for a log cabin?
Our Log Cabins are extremely precise things. Additionally, to mill the timber, we use the best machinery. As a result, there is little tolerance. They are designed for each log to sit directly on top of one another. Then, they interlock in the corners via corner connection and the tongue and groove connection along the log. They withstand vertical forces, however cannot withstand any lateral forces.
It is quite often tempting for a landscaping/building company. This is because they are used to patios, adding a slight incline to the base to help with drainage. They tend to do this without consultation, and chuffed to tell you that you have a 2 degree incline!
This is really not very helpful as, in effect, you’ll be building your cabin on a slope, subjecting it to lateral force from gravity. A cabin cannot handle gravity and the subsequent sideways force it puts upon it from sloping.
The end result will be a buckling and warping building. In addition, it will feature split and strained logs over time and inevitable tears as you see your lovely building disintegrate over time.
The biggest thing though about an unlevel base is that it makes it hard to put the thing together. Fully expect all sorts of problems with a wonky base:
The logs won’t seat properly.
The windows or doors will be on the wonk.
The apex will not sit flush with the upper wall leaving a gap which you will then have to trim to look anything, either with a planer or bits of wood stuck on it.
The roof boards will not go on straight and there will be an incline in them which looks terrible and you will always notice it.
Long term problems with warping, twisting, straining, cracking and splitting.
You’ll be on the phone to me immediately during installation as it’s not going together or in about 3 months time when it’s falling apart. I’ll pop out and look at your base and tut a lot, we’ll end up arguing and you won’t even offer me a cup of tea!
What if the base isn’t level?
Sometimes we must use what we’re given. There’s not often a great deal we can do about it. Trying to add a screed to a concrete base to get it level rarely works. It simply falls away as pressure is put on it.
If the base is out, we have to fix it before building the cabin. Either it’s demolished and started again or another solution needs to be found.
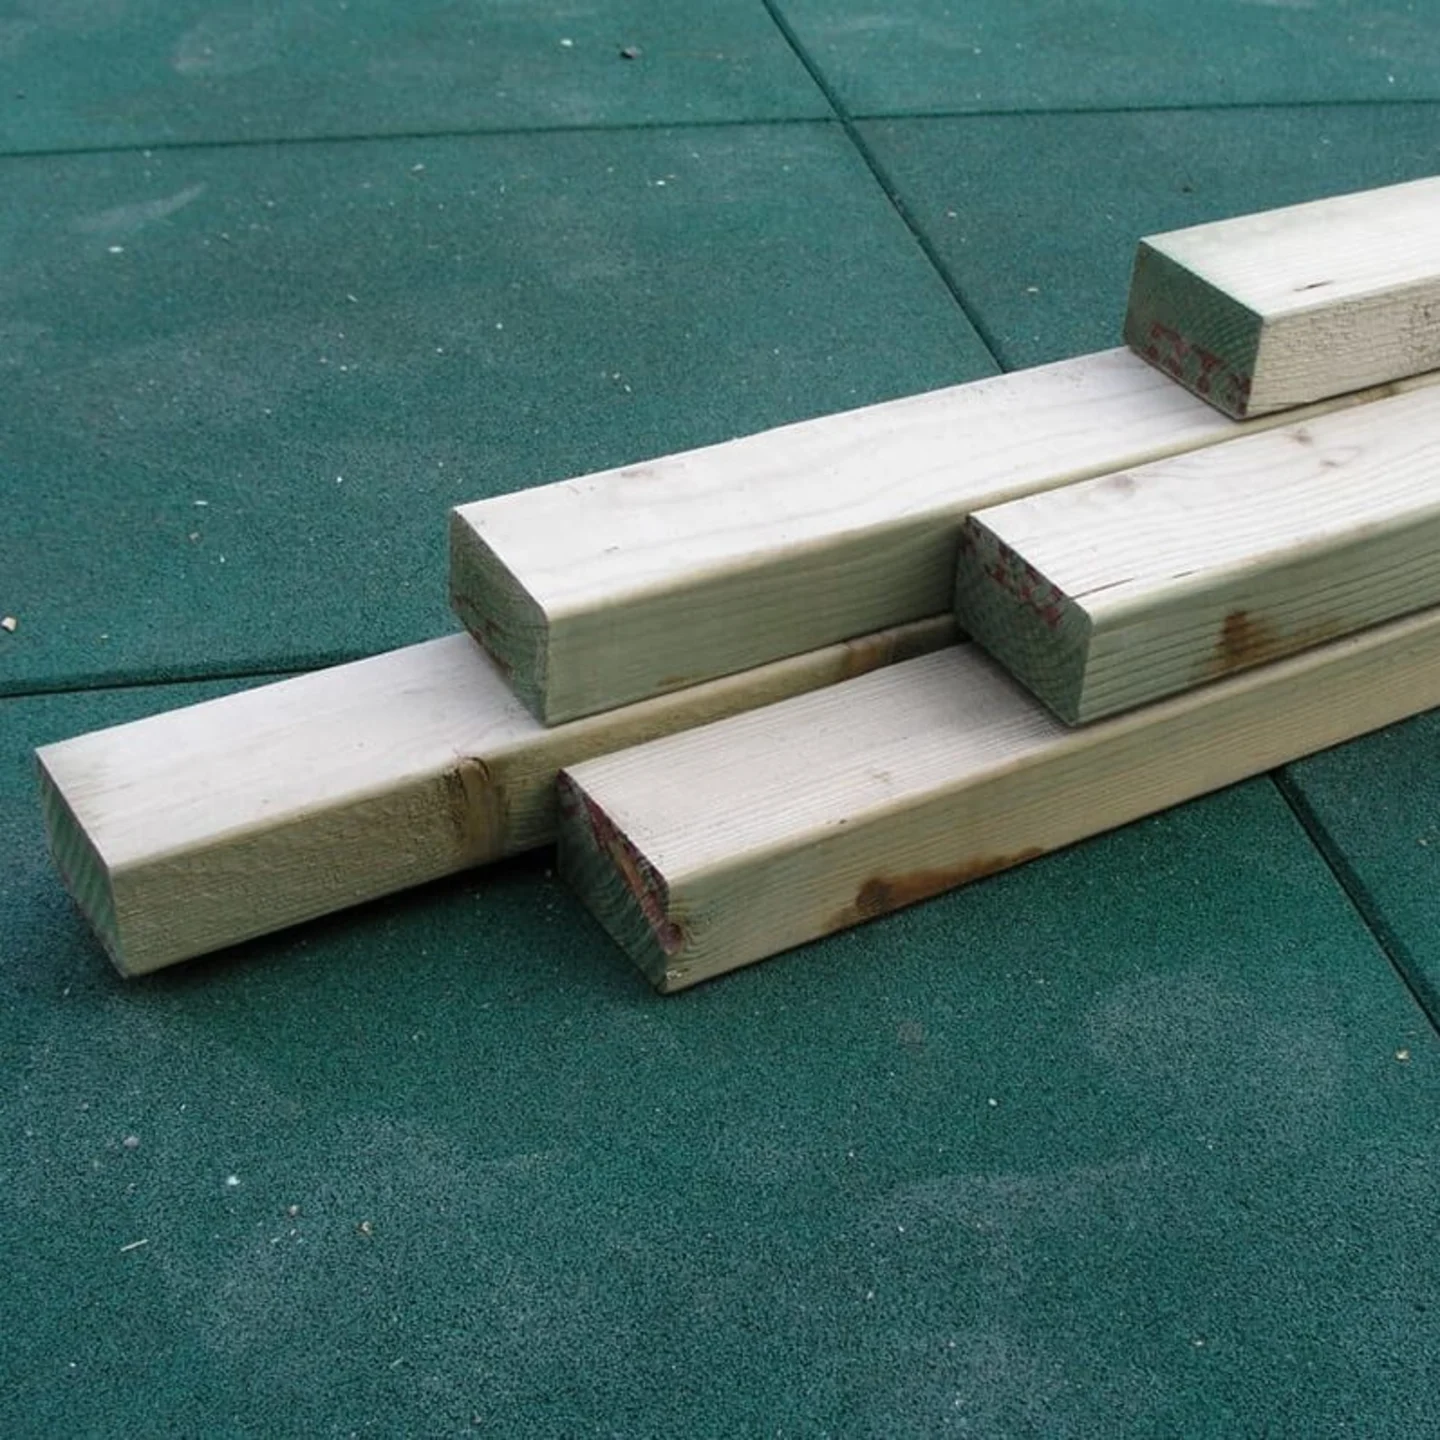
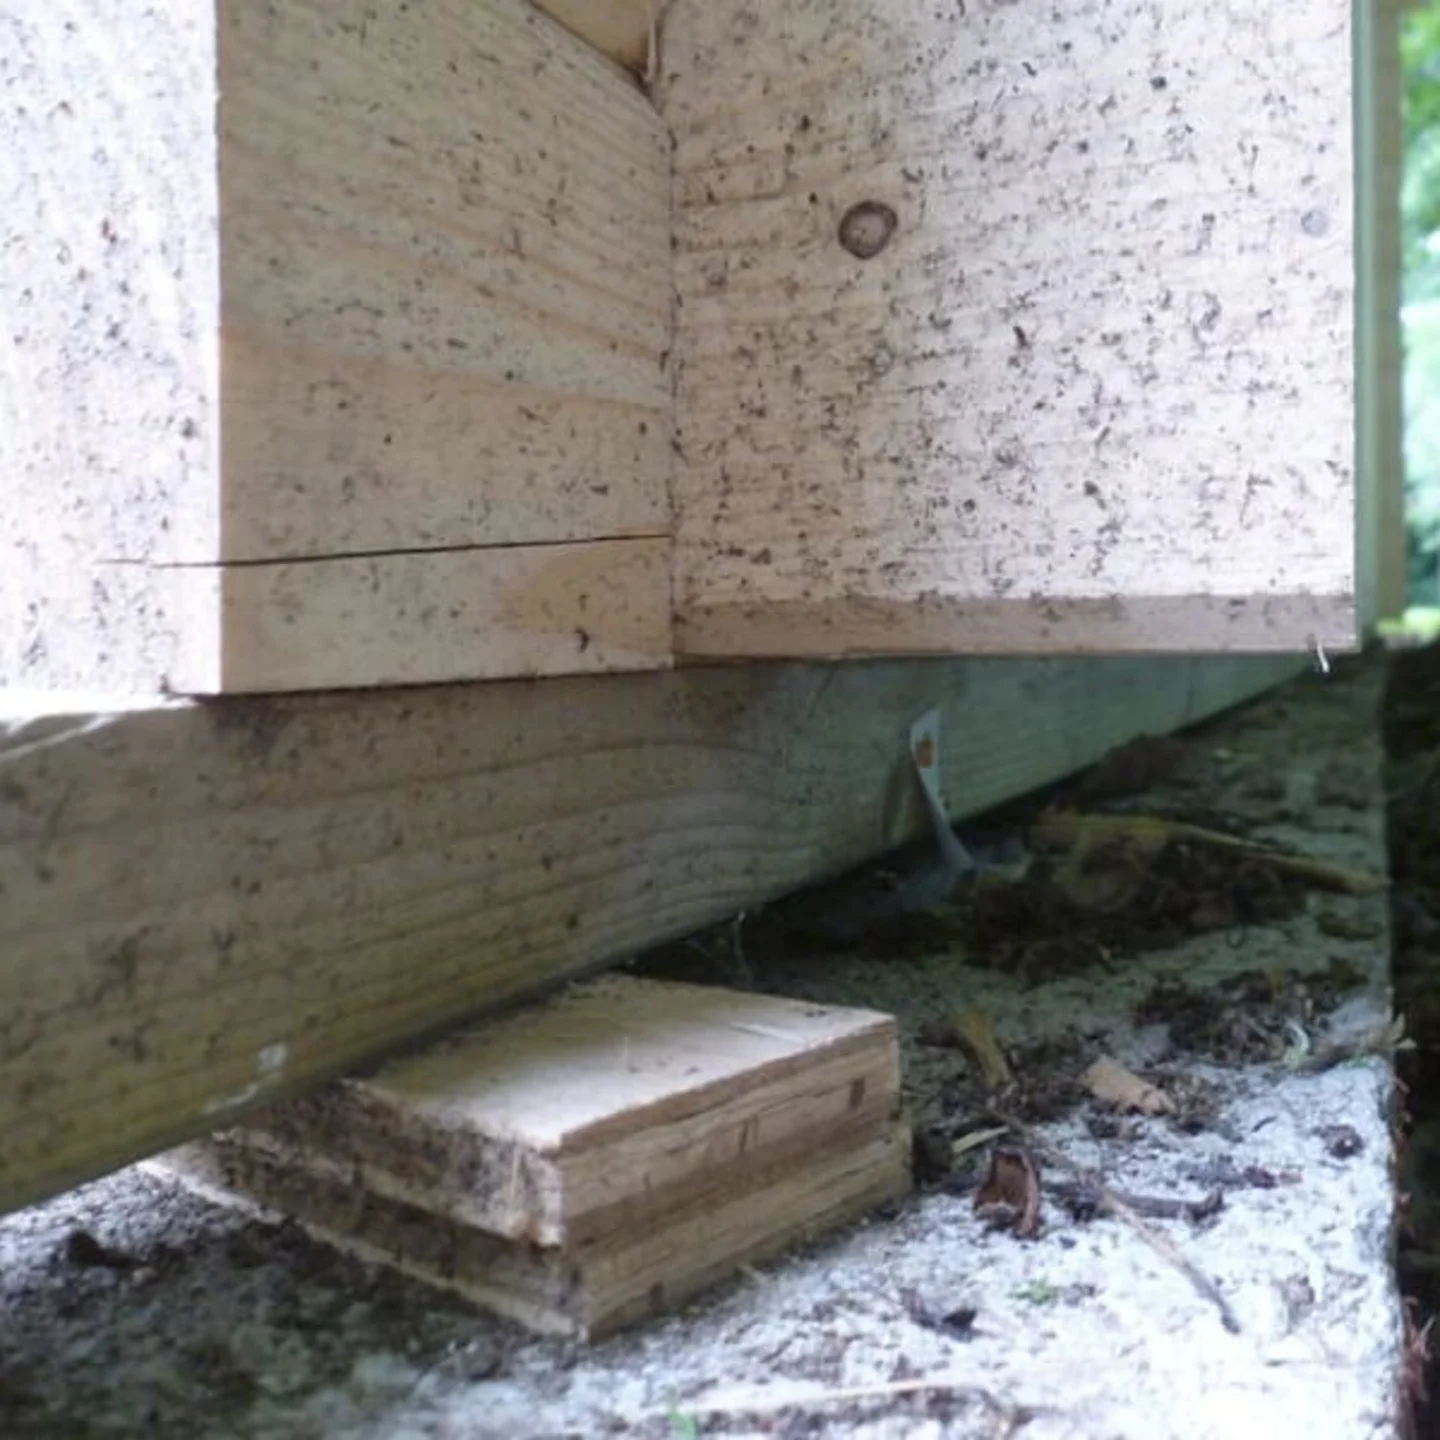
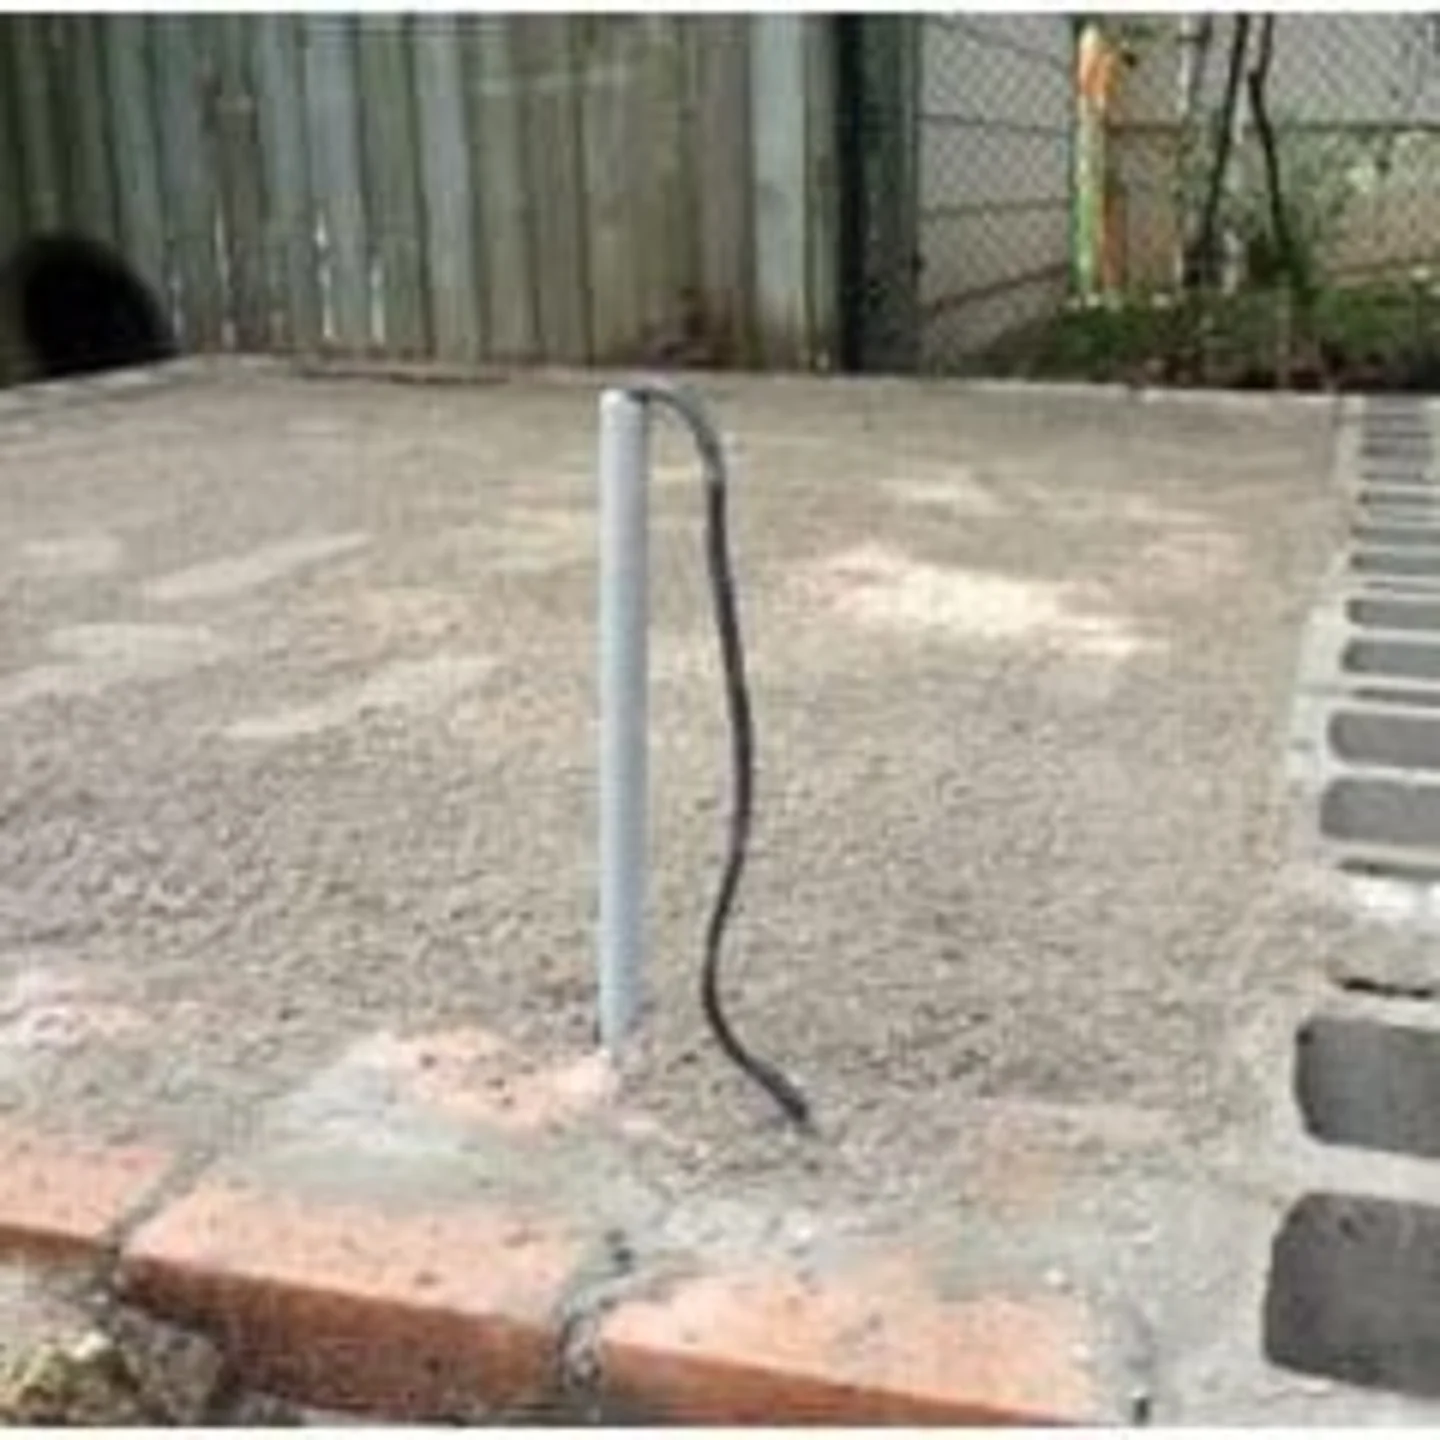
When fitting cabins myself, which isn’t often these days, I carry a box of ‘slithers’ of pressure treated timber in my van of various lengths and depths. Using these I could often overcome any deviation by adding them to the foundation beam and ‘chocking’ where necessary.
However, if you are going to chock a cabin up for goodness sake make sure it is supporting the whole length and not just a corner.
Here’s an example:
This is a log cabin ‘gone bad’ I recently visited. It’s a bit of a long story but the customer had some particularly shoddy builders in to build it for them who neither cared nor had a clue what they were doing and this was a substantial and very expensive log cabin.
The above image shows their version of chocking up the corner to make up the deficit in the unlevel base. This piece of plywood doubled up was supporting the corner of a huge 70mm log cabin. Not only had all the logs sagged across a 1m stretch the corner joints were also badly damaged and did not fit as it was still badly out of level. The apex also ripped apart and don’t even get me started on the purlins. But if it had worked – the plywood would have rot within a year and the whole thing would drop and destroy the cabin anyway!
Here’s how it’s best done:
I took the building down for the customer and reassembled it correctly. This is how I chocked the fault in the base. Notice I am using tanalised timber, supporting along its length, and kept properly level.
So, with a trusty box of slithers of tanalised timber, you can tackle most unlevel areas. Just make sure you have several depths available to you.
Please though, use timber that won’t rot in five minutes. Make sure the foundation beam remains supported throughout its length and, importantly, keep the building completely level in both planes regardless.
All Tuindeco log cabin measurement goes from one end of the log to the other, so a 3.0m wide log cabin is exactly that, from the outer edge of the log to the outer edge is exactly 3.0m. The base doesn’t specifically need to be to this measurement as all the logs have a crossover connection, this is generally 100mm or less depending on the size of the cabin (please ask us for your particular building).
So, for instance the base actually needed for a 3.00m wide log cabin is:
Length of log – 3000mm or 3.00m
Crossover – 100mm
Log – (crossover x2) = 2800mm or 2.80m
In this example we could make our base at exactly 2.80m wide and the log cabin will fit on it exactly. Be careful though, there maybe a wiggle in the shuttering or somebody is not as exact as they could be, there’s no room for error when doing it exactly to the footprint so it might be wise to add a centimeter or two either side just in case.
If possible though, I think it looks far nicer. It also has the advantage that when it rains water does not hit the base and fly up and make your lower wall of your smart, new log cabin all dirty and mucky.
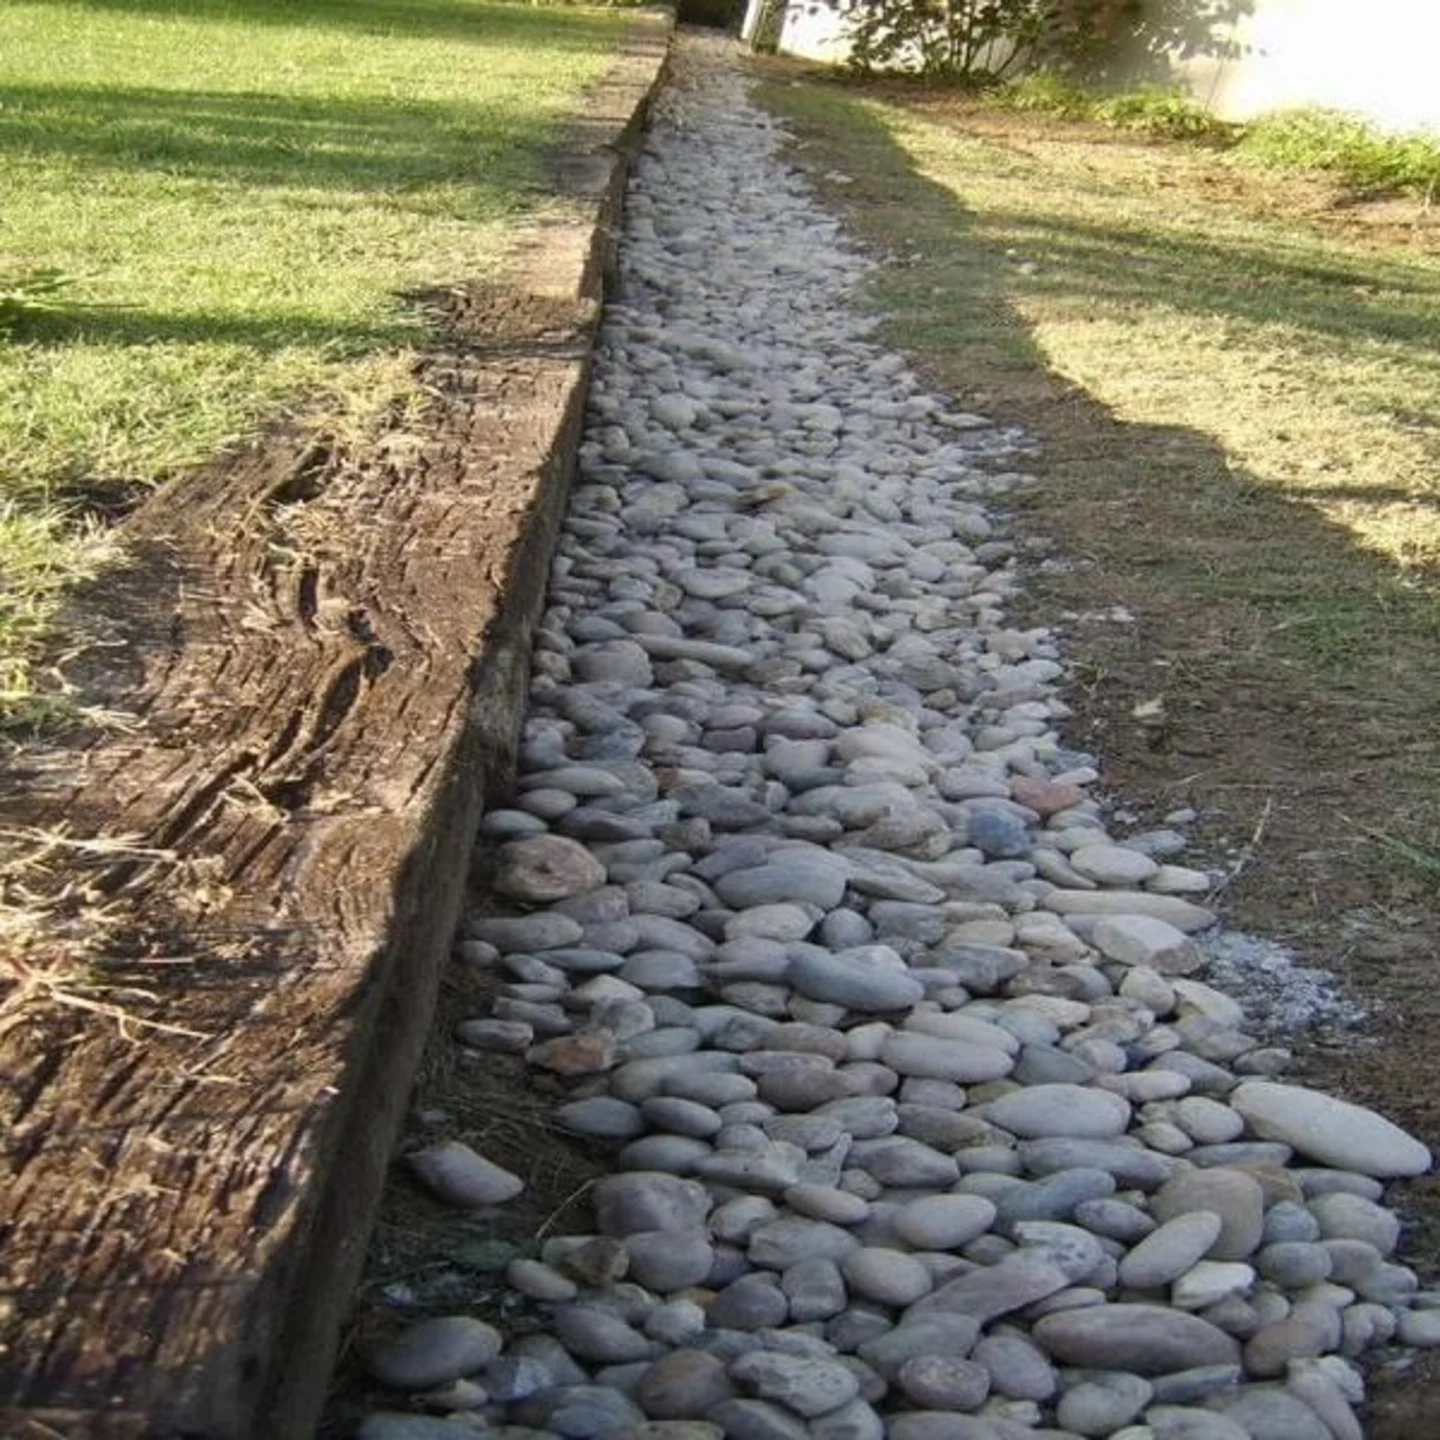
Another good idea when making the base to the size of the footprint is to then add a French Drain. This looks really nice and also absorbs the water, stopping it splashing up and also removes the need for guttering. The other advantage is the loose stones can then cover any of the concrete you don’t want to see. Apologies this isn’t a log cabin but I’m sure you get the gist:
A base can be pretty much made out of anything and we’ll get onto that in a moment but any base provided for any log cabin has to follow this criteria:
Consideration should be given to the majority of the weight being placed on the perimeter of the cabin.
Consideration should be given to the weight of the cabin, a 19mm is obviously considerably different to a 70mm.
It should be 100% level in every direction.
Ideally it should be square.
Ideally to just over the footprint size of the cabin.
What base do I need for a log cabin?
I hope with the above waffle I’ve given you a little idea what we’re ideally looking for in a base for your new and sparkly log cabin. I’m not going to go into how to build a base as I’m not a builder or landscaper, nor would I want to be as it looks like jolly hard work. I will however give you a few examples.
Concrete
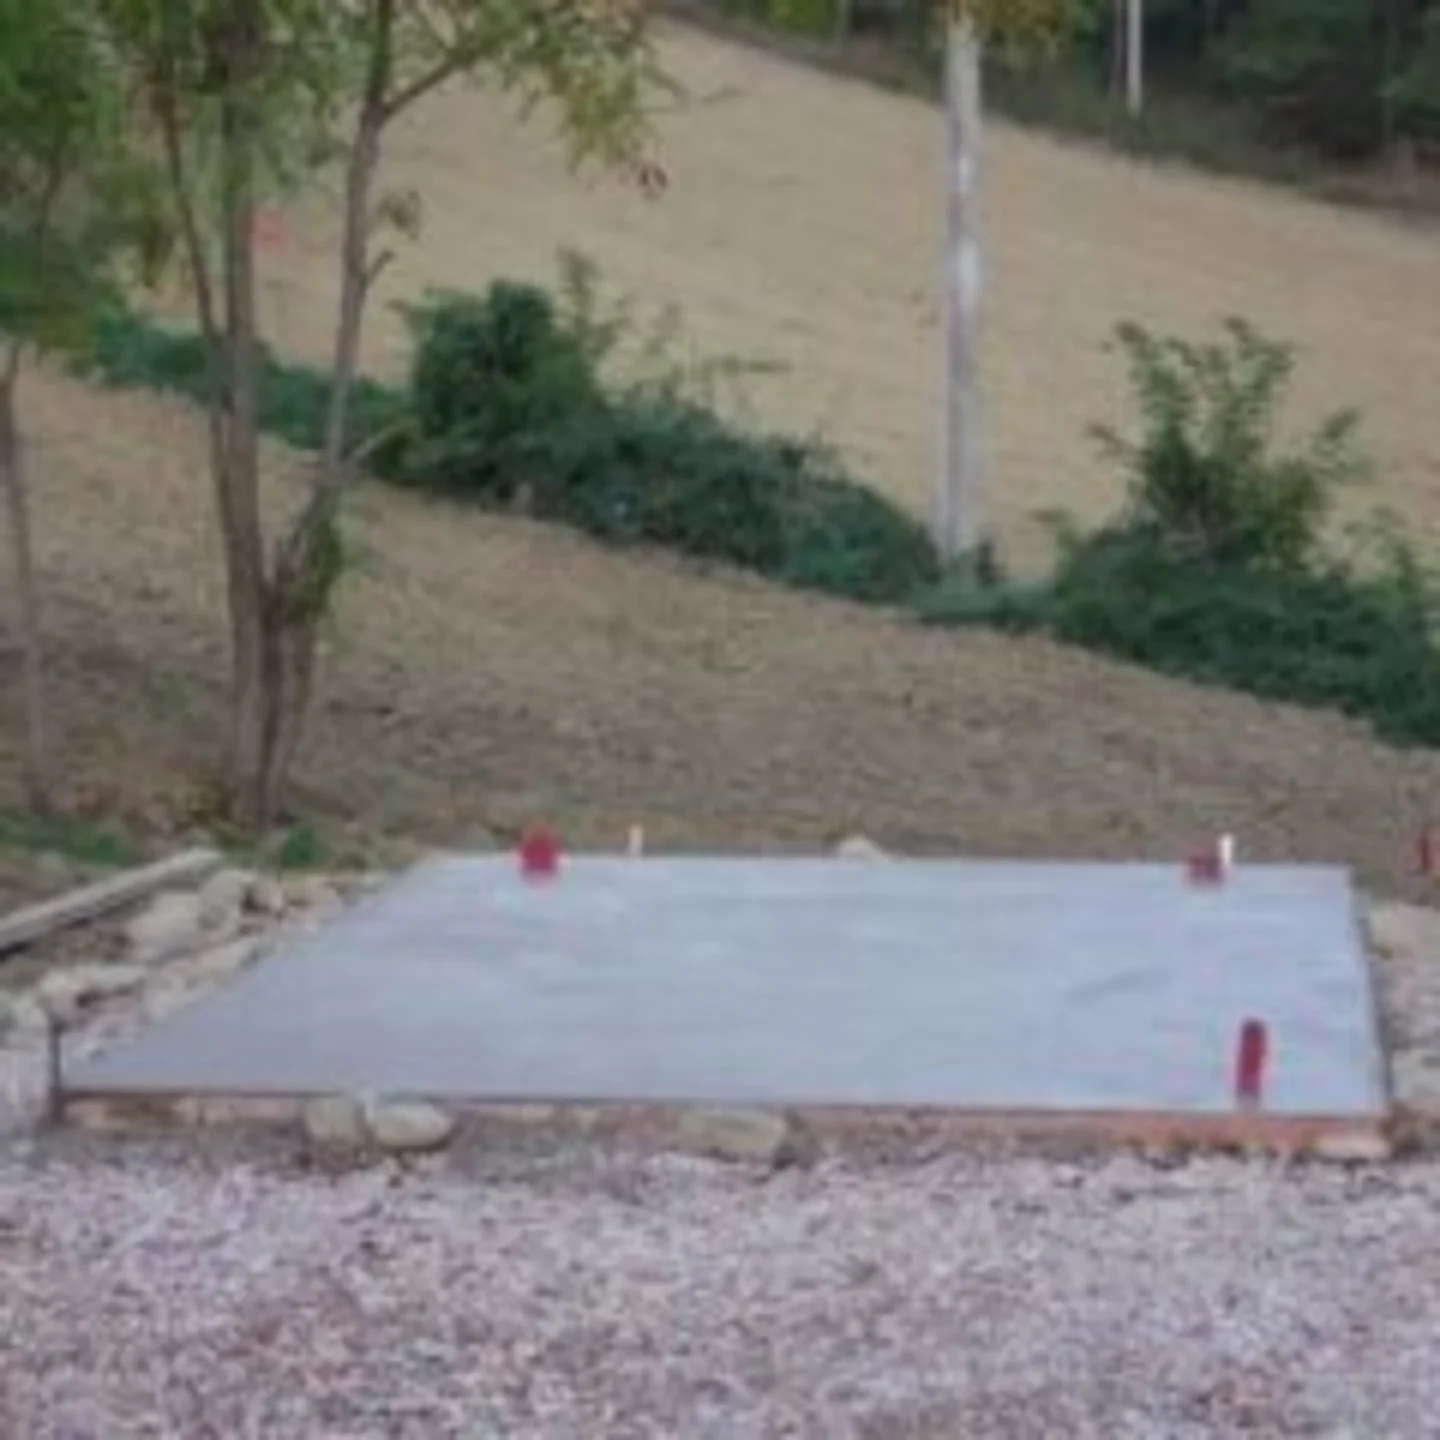
You can apply a base of concrete in a number of ways, generally done with simple timber shuttering. The average base will be about 80-100mm deep. Below shows a simple concrete base with timber shutting.
We can also get a little more complicated with a block work supporting wall and then filling with concrete, perhaps reserved for the bigger buildings that needs a little more weight supporting structure around the perimeter.
If you’ve got a large building your landscaper or builder may advise steel reinforcing within the base itself, remember though not to forget the perimeter.
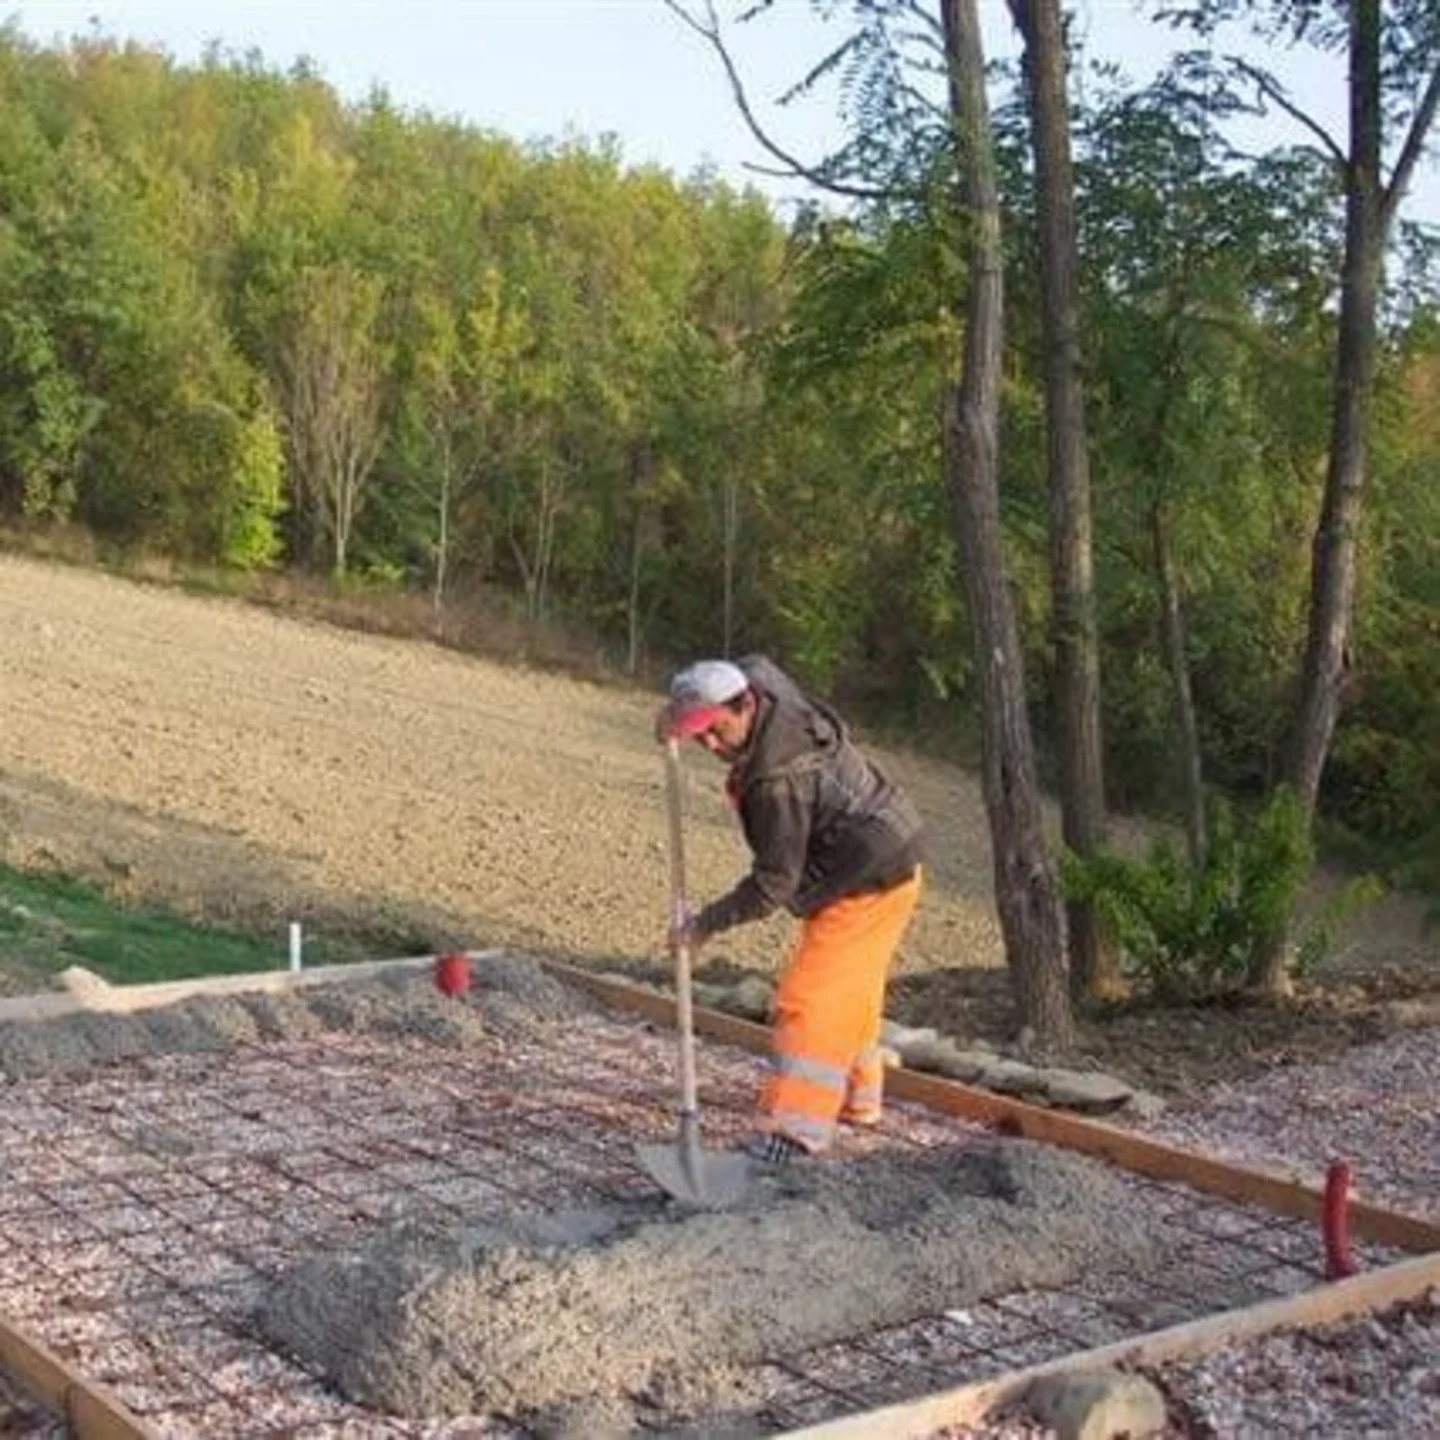
Steel reinforcing within the concrete base.
For advice on mix ratios, strength of concrete etc there’s lots of advice across the net. I advise seeking that information elsewhere.
However, from experience, use a mix of one bucket of portland cement to five buckets of ‘all in 20mm’ ballast gravel and add the water slowly. Don’t make it too wet though, make the fluid workable, mixing until uniform in colour.
As a rule of thumb calculate the volume you require (LxDxB) and add one third.
Creating the base is pretty straight forward. Use timber board as shuttering to guide the edges. Then mark out the area and use a tape or string corner to corner to ensure it is straight.
Level the shuttering with a spirit level and pour your concrete. Keep working it across the surface with a board until it is level with the top of the shuttering boards. Allow three or four days and et voila your base is formed.
Alternatively; ask someone who knows what they’re doing. The above concrete method sounds good in principle but I’ve never managed to get it right and still had a few undulations in it, depressions are fine, hills aren’t so good!
Slabs
This probably doesn’t even need explaining. It is a cost effective and easy to apply feature. Again like concrete follow the base criteria I mentioned. Normally a 70mm layer of dry sand and cement is sufficient, tamped down until level with the slabs then levelled on top of it. A quick method and probably the cheapest and can work for most of the cabins we sell.
This I can get right and is pretty straightforward, just make sure it’s all level.
I have in the past tried the various other ‘eco’ slab bases but I could never really get on with them. They were more expensive than a simple concrete slab and still required the same amount of levelling. I still remain unconvinced of their real benefit, but I hope that opinion changes.
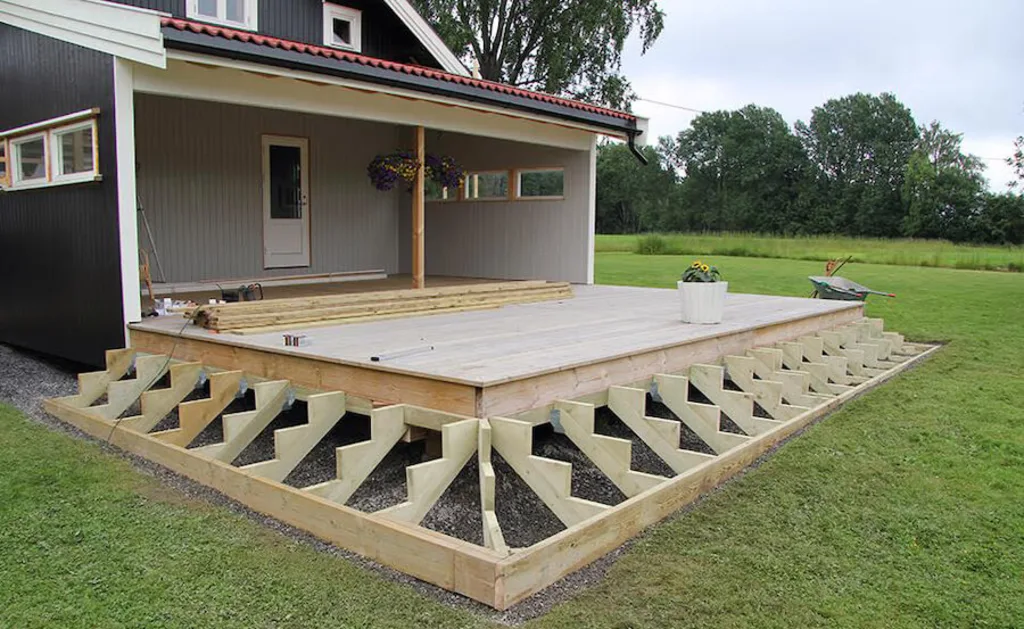
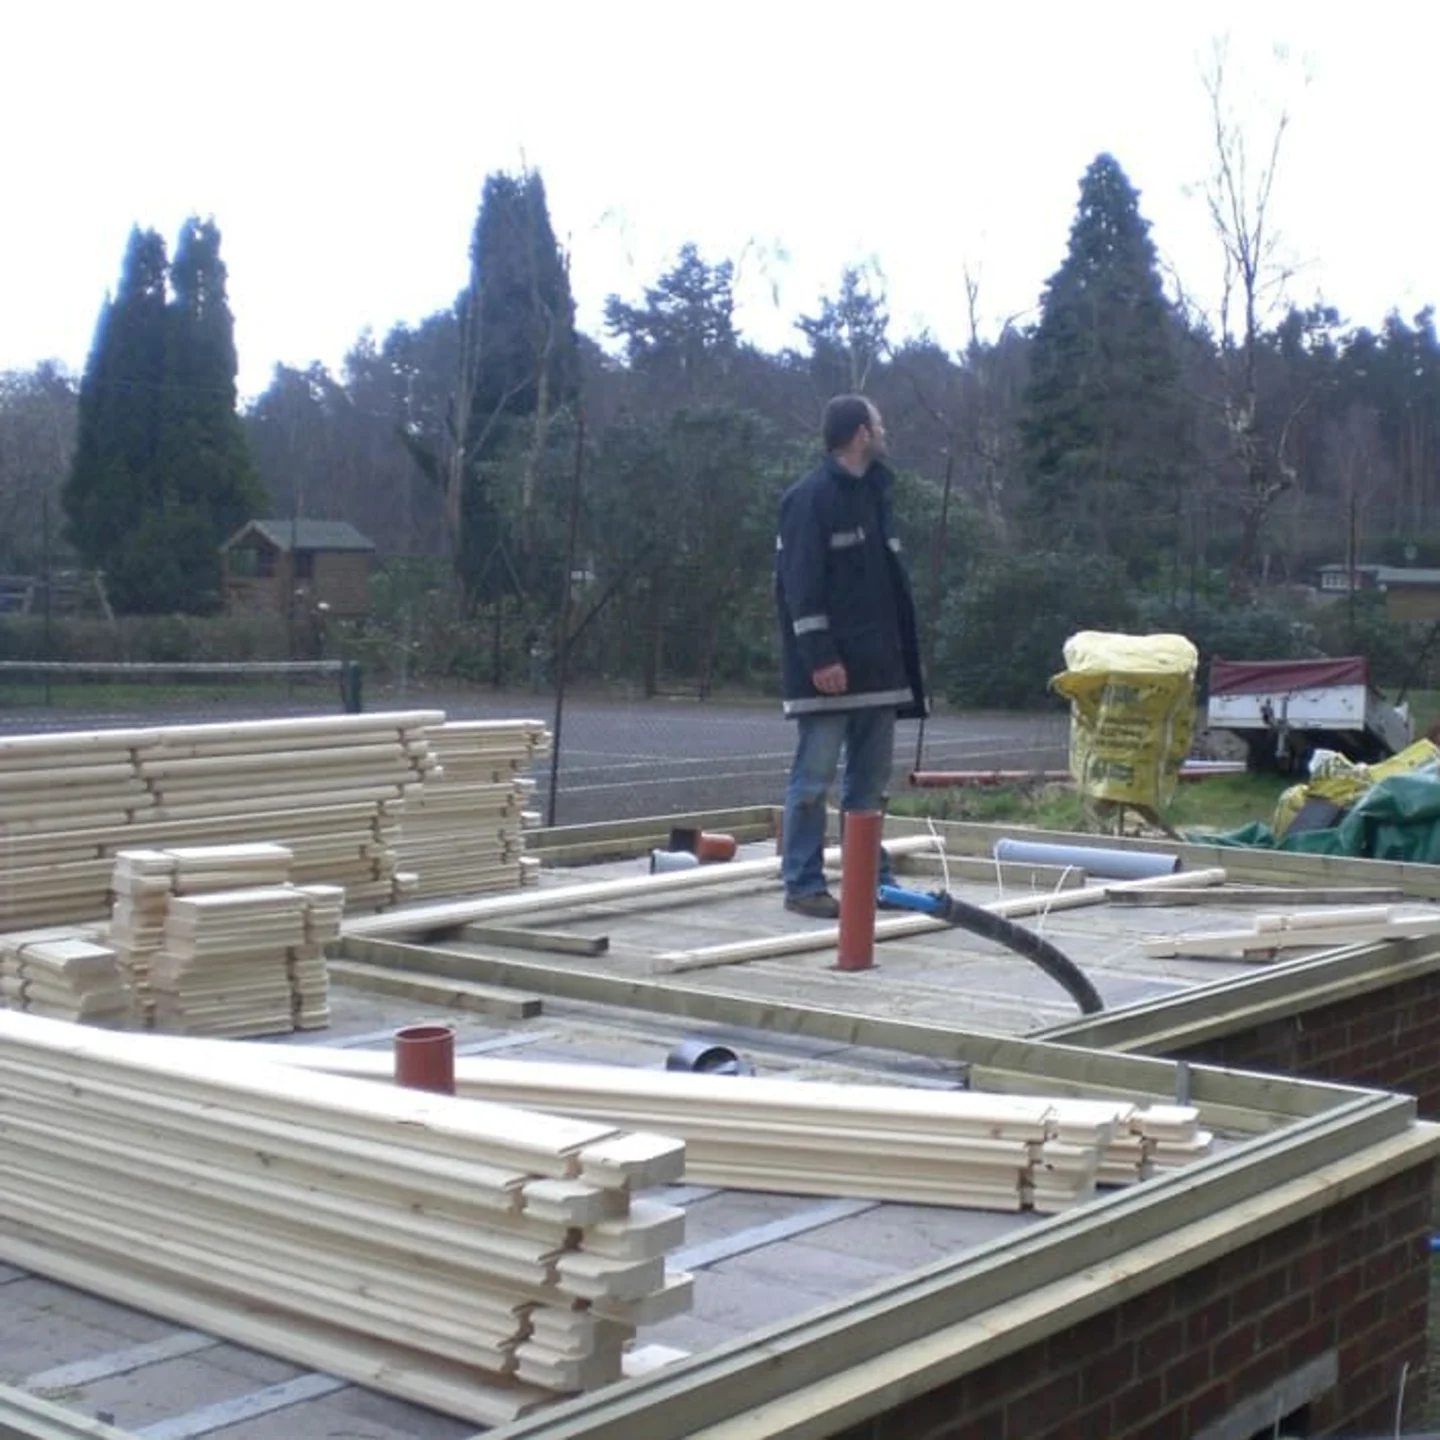
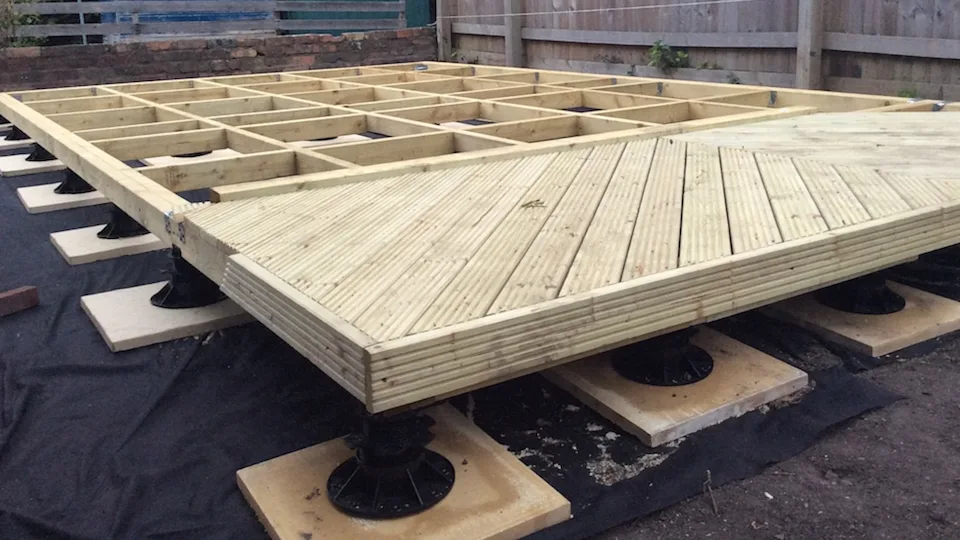
Timber Frame
This is by far my favourite method of laying a base, of course it’s not the best way I just enjoy doing it as there are so many permutations and challenges.
It’s using a timber frame supported by stilts, or pads or simply paving slabs positioned at intervals. I find it a good environmentally friendly solution and great for areas where concrete is just not possible or when there are steep inclines to overcome.
There’s no hard or fast ways of doing it so I’ll simply give you a few examples for ideas:
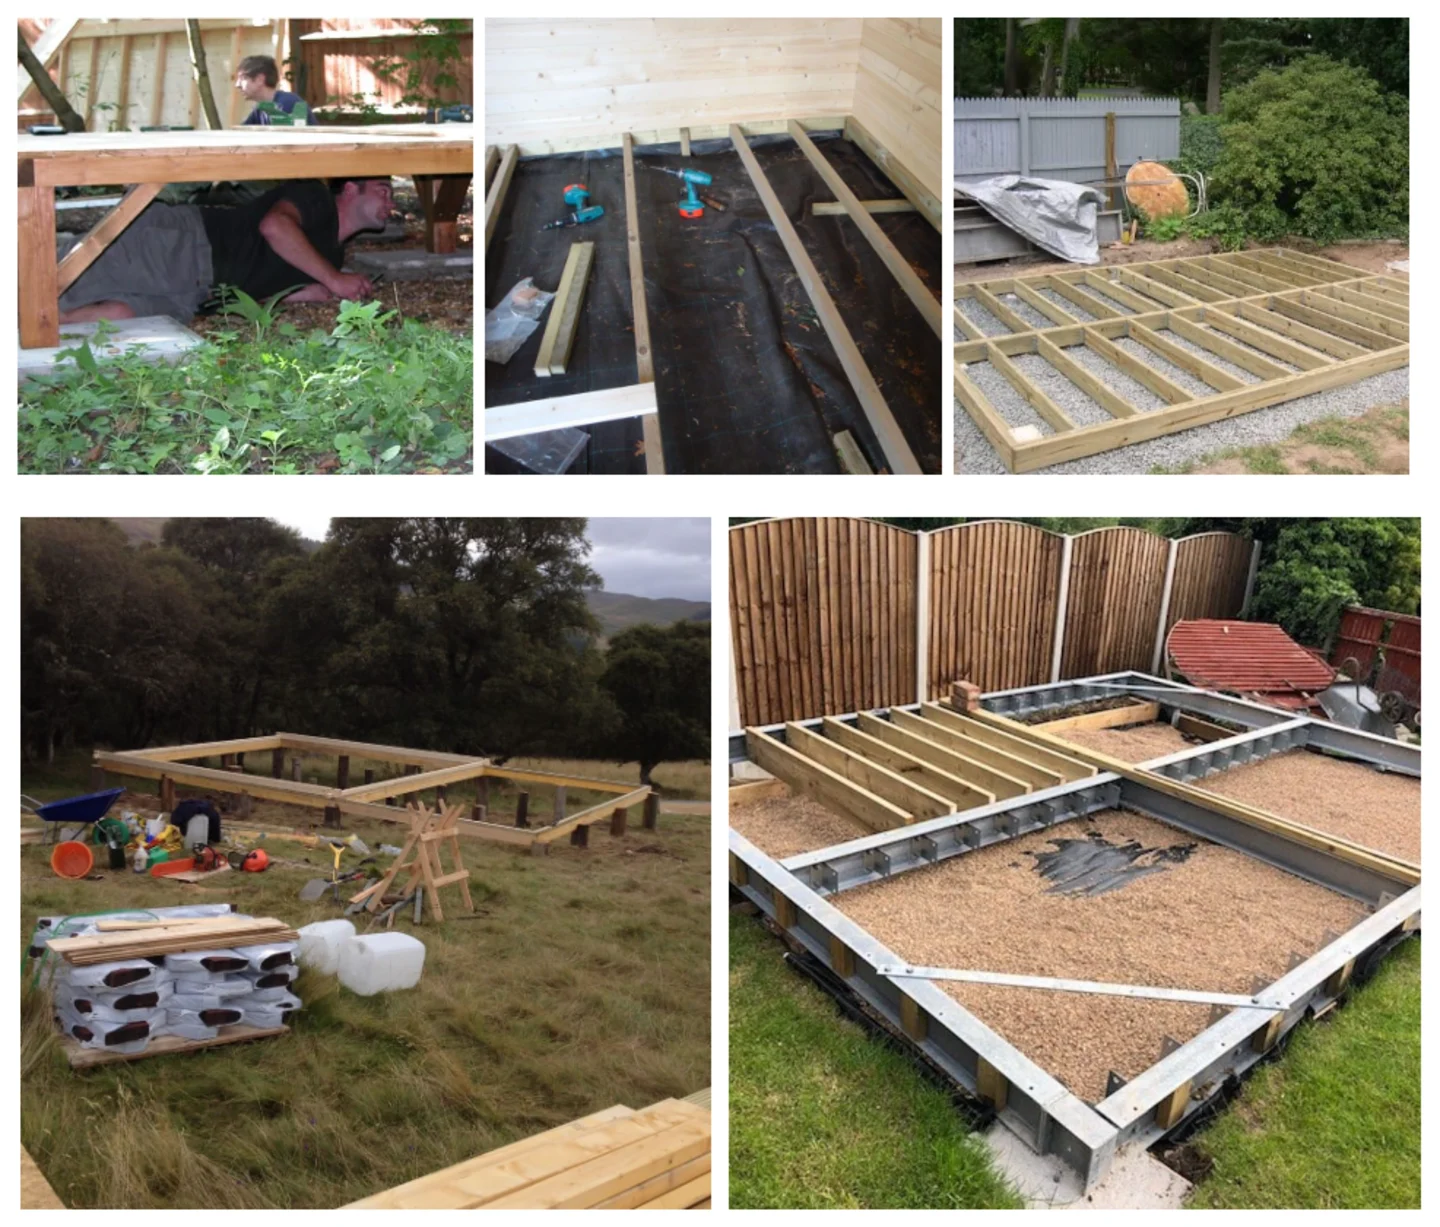
What I love about a timber frame base is that:
You can move it around.
It’s truly a temporary structure which is great in certain circumstances.
It allows air flow, preventing rot to the timber, even if untreated.
It’s a cheap solution in inaccessible areas for concrete.
Cheap overall.
If subsidence occurs you can simply jack up the area concerned and re-pin.
A good system when flooding occurs naturally and does not affect it’s environment.
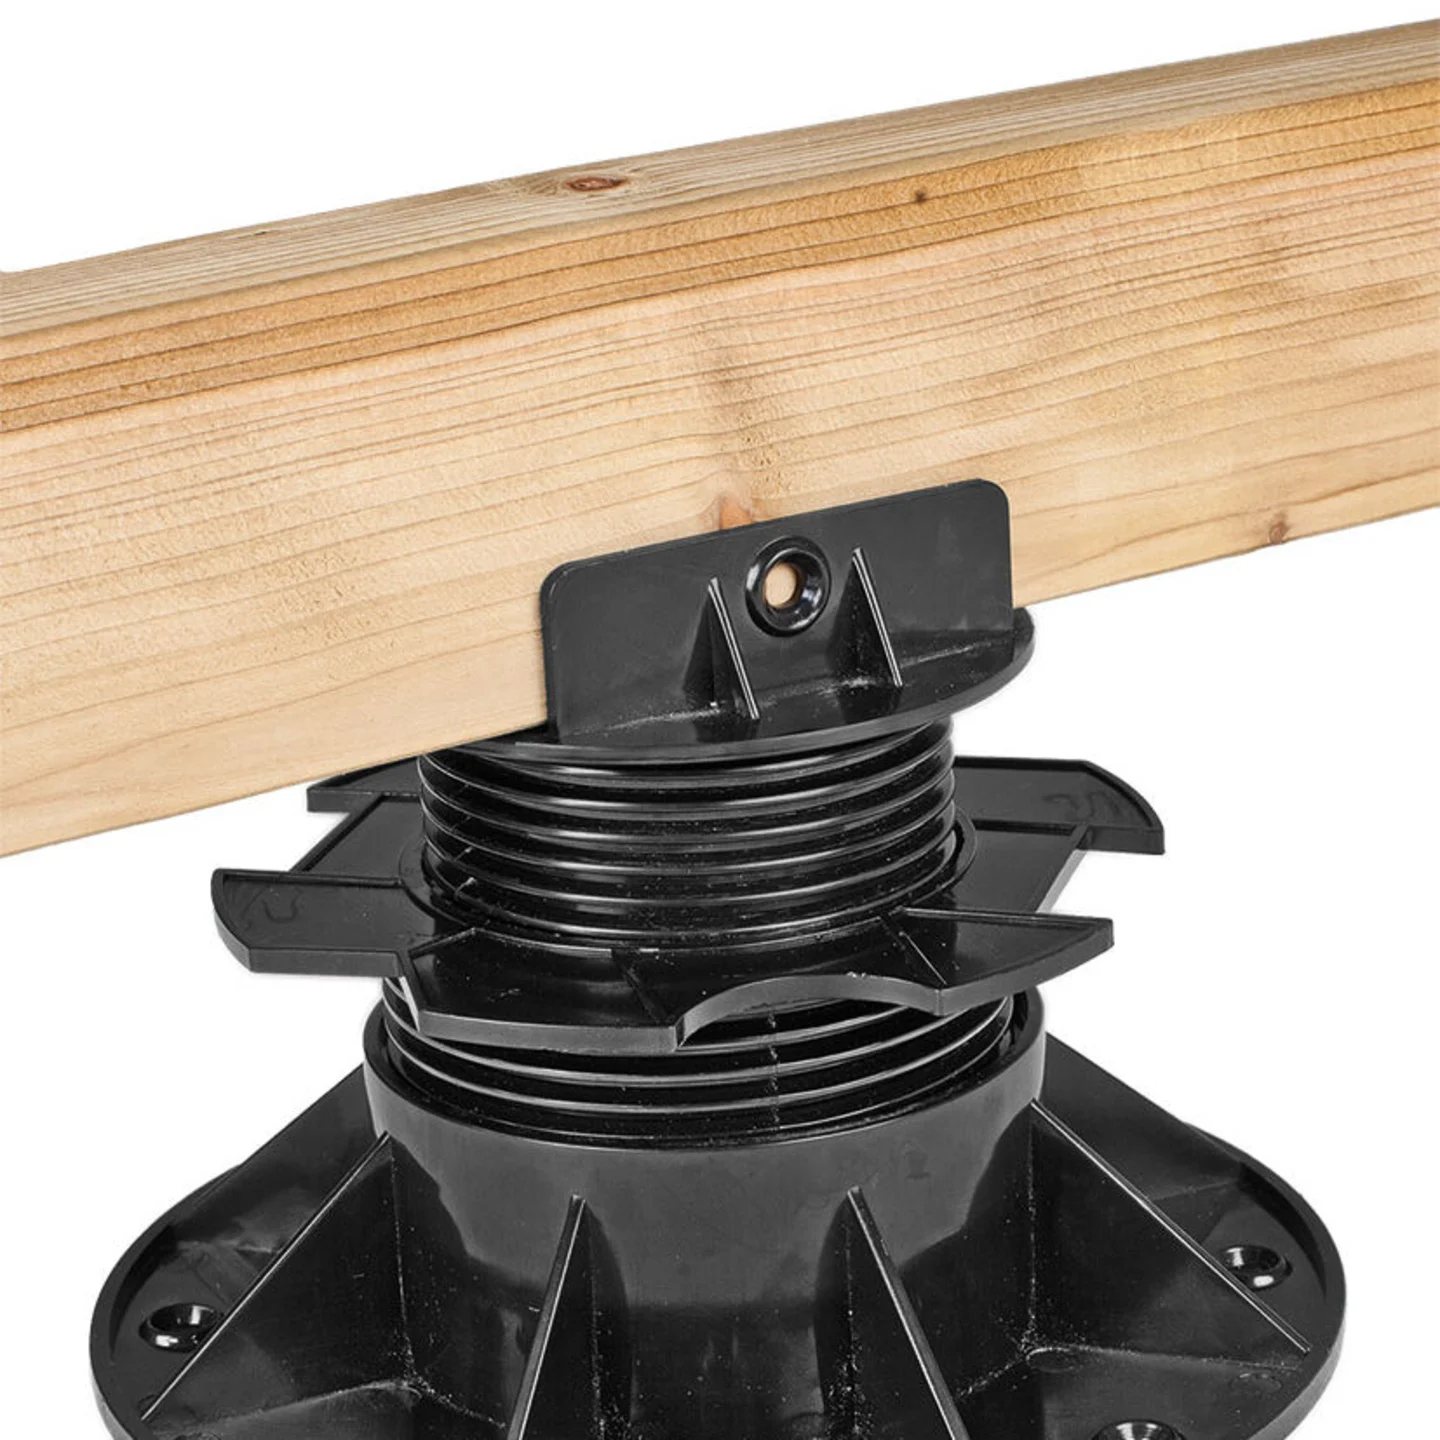
To make leveling the base we do have a nice product. It’s not a bad price either and you can level between 30mm and 140mm using a combination of two units:
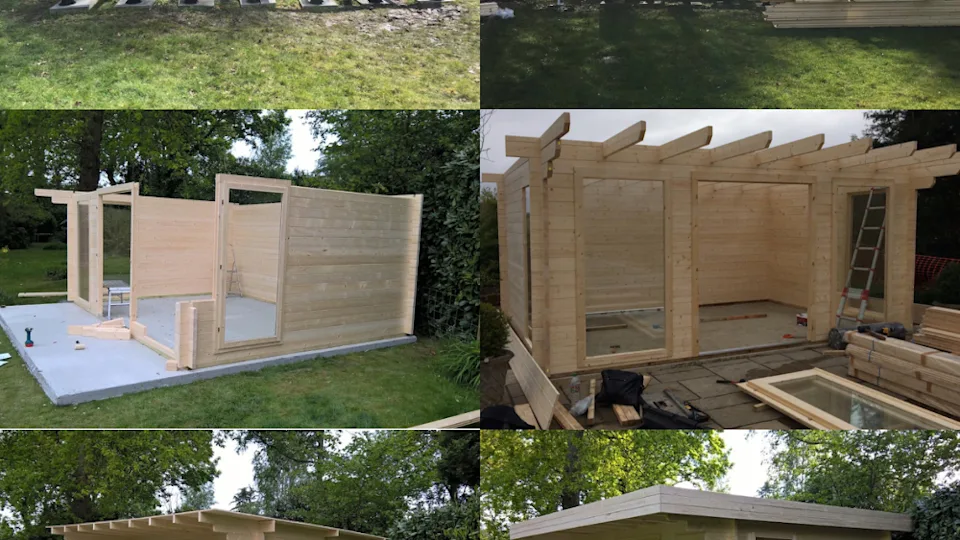
Please also see a recent post about a customer’s building for more examples of a timber frame base for log cabins:
Log cabins base construction FAQS
About the author: Richard
Meet Richard, a dedicated professional with a rich history at Tuin, contributing 25 years of experience within the garden timber industry. With an expertise in garden buildings. From design, manufacturing and installation for a range of timber buildings. Sheds to log cabins and all the way up to timber framed houses. In his time he had worked with experts all over europe, and also included his own personal experience of installing and testing Garden Buildings from a range of companies, models and sizes. You will find a majority of his blogs to include expert installation advice for your Log Cabin. Information on how timber reacts to different environments and the best way to preserve your garden buildings.