Adding a window to a log cabin
Imagine you’ve built your Log Cabin and you find you need more light. Perhaps you already know another window needs adding to your log cabin. Or maybe you cannot block out that amazing scenery you have from your garden.
Another window?
Imagine you’ve built your Log Cabin and you find you need more light. Perhaps you already know another window needs adding to your log cabin. Or maybe you cannot block out that amazing scenery you have from your garden.
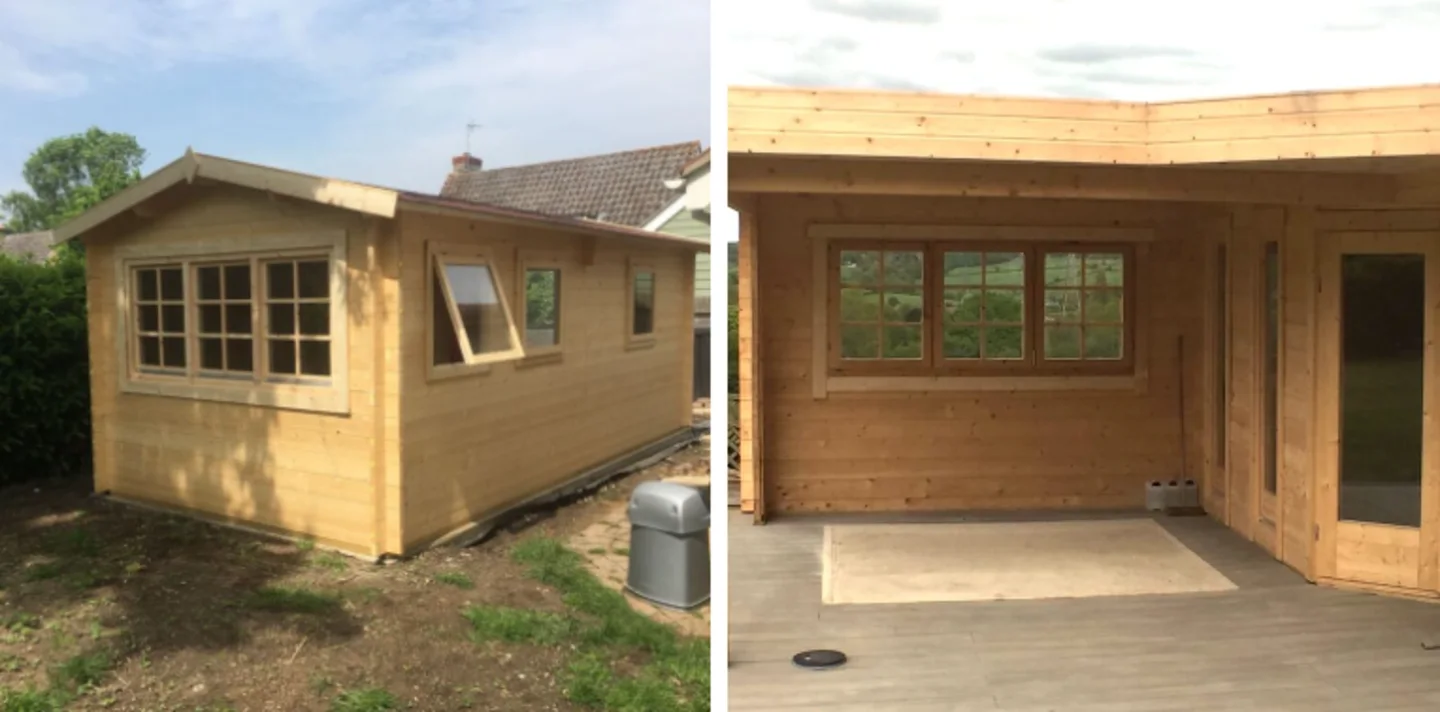
Rick 40mm Log cabin with an extra window Jutka Gazebo/Log cabin combination building with extra window
If you do decide you would like another window Tuin do offer these. Likewise, they’re a generic window of various sizes and can fit to any log cabin from 28mm up to 70mm:
When to install an extra window
If you would like an additional window to the one supplied, order it around the same time as your building. You’ve then got to decide whether you are going to install it at the same time or afterwards, neither really matters, but my preference is to always install it following the whole install. I like this way because:
You can be sure the main building has gone together correctly.
You will not void any guarantee.
You can be 100% certain of the positioning.
You avoid making mistakes in cutting logs.
You can be sure you are not going to structurally effect the log cabin.
Of course you can install it as you go but you run higher risks of a mess up, of which I have done in my early days fitting log cabins – namely cutting the logs wrong which does end in tears when there is no spare logs.
There are several ways windows are made for Log Cabins and invariably they all follow the same pattern; they are a window frame with facias applied to create a U section that the wall logs will sit in.
Remember it is important that the windows or doors are NOT fixed to the logs in any way to allow for expansion and contraction.
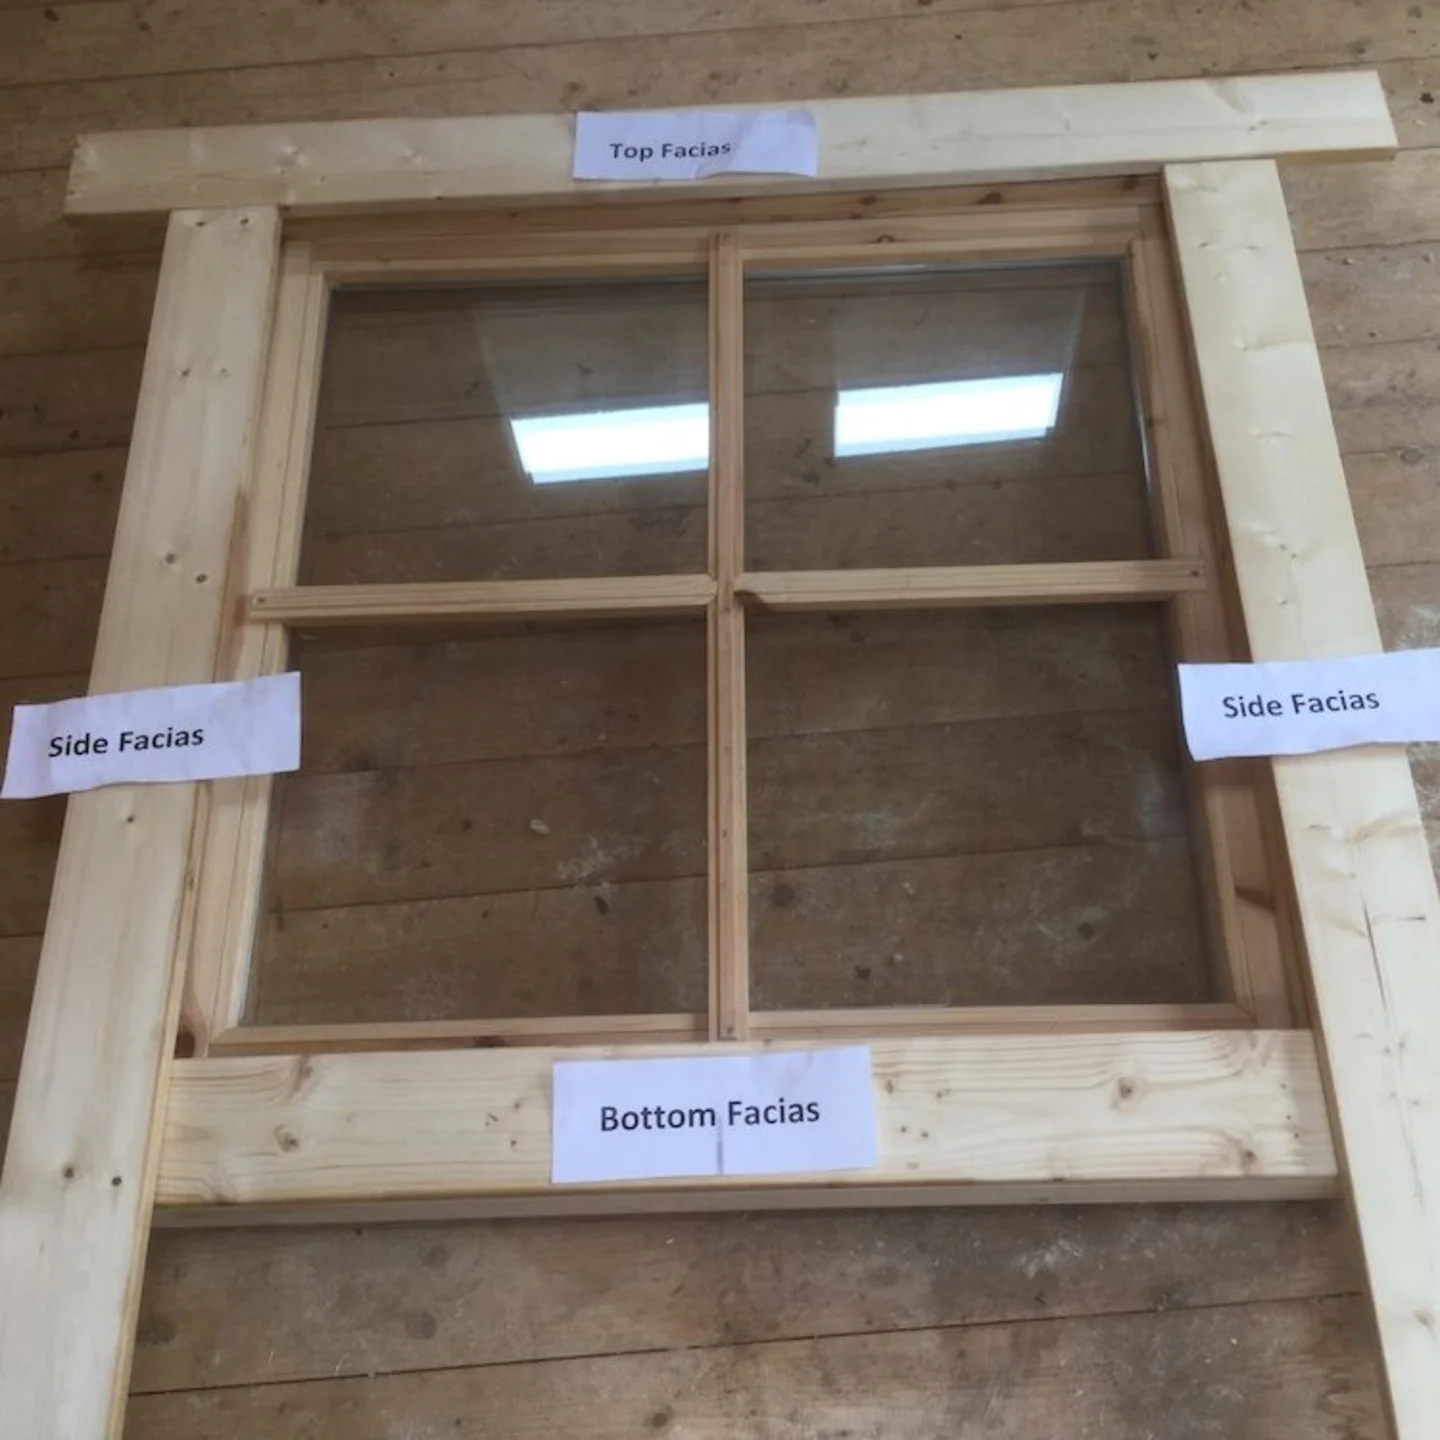
See below a generic window I found in the workshop. I’ll use this for a demonstration on fitting a window.
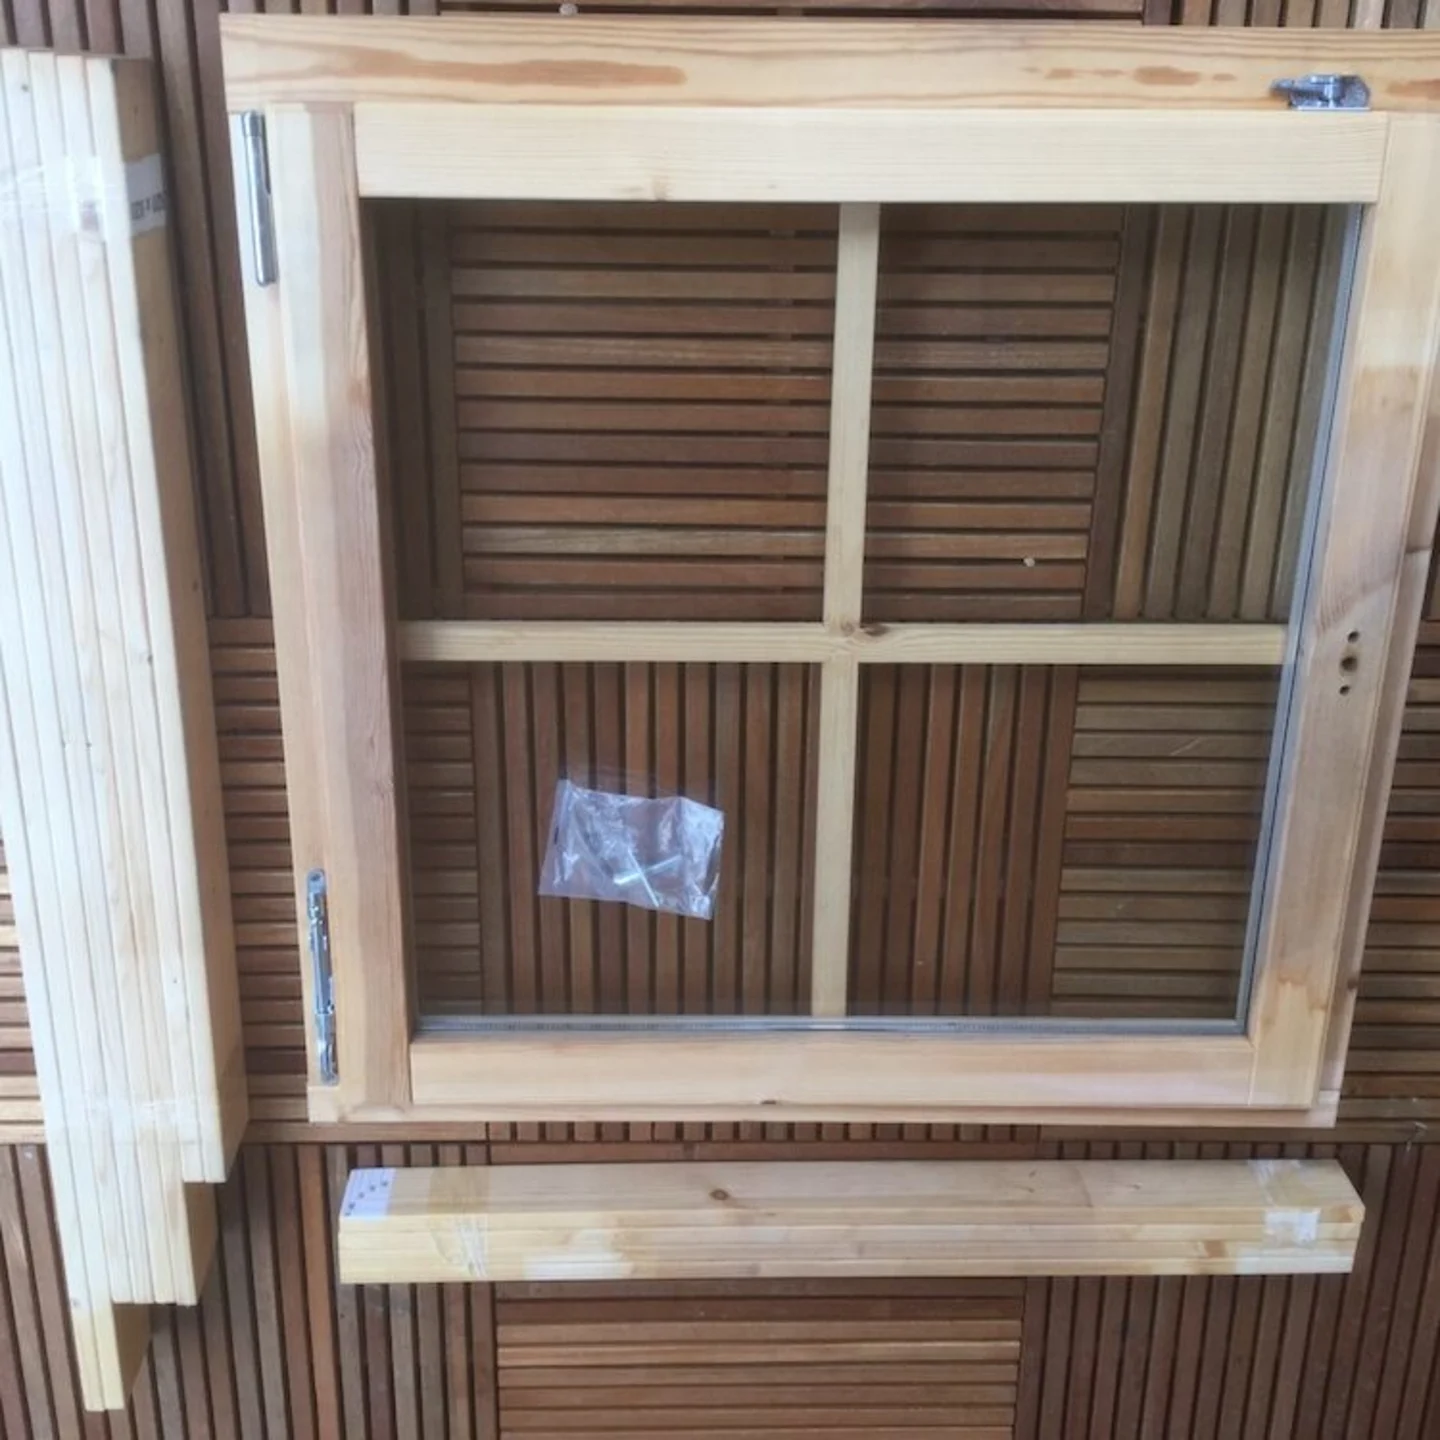
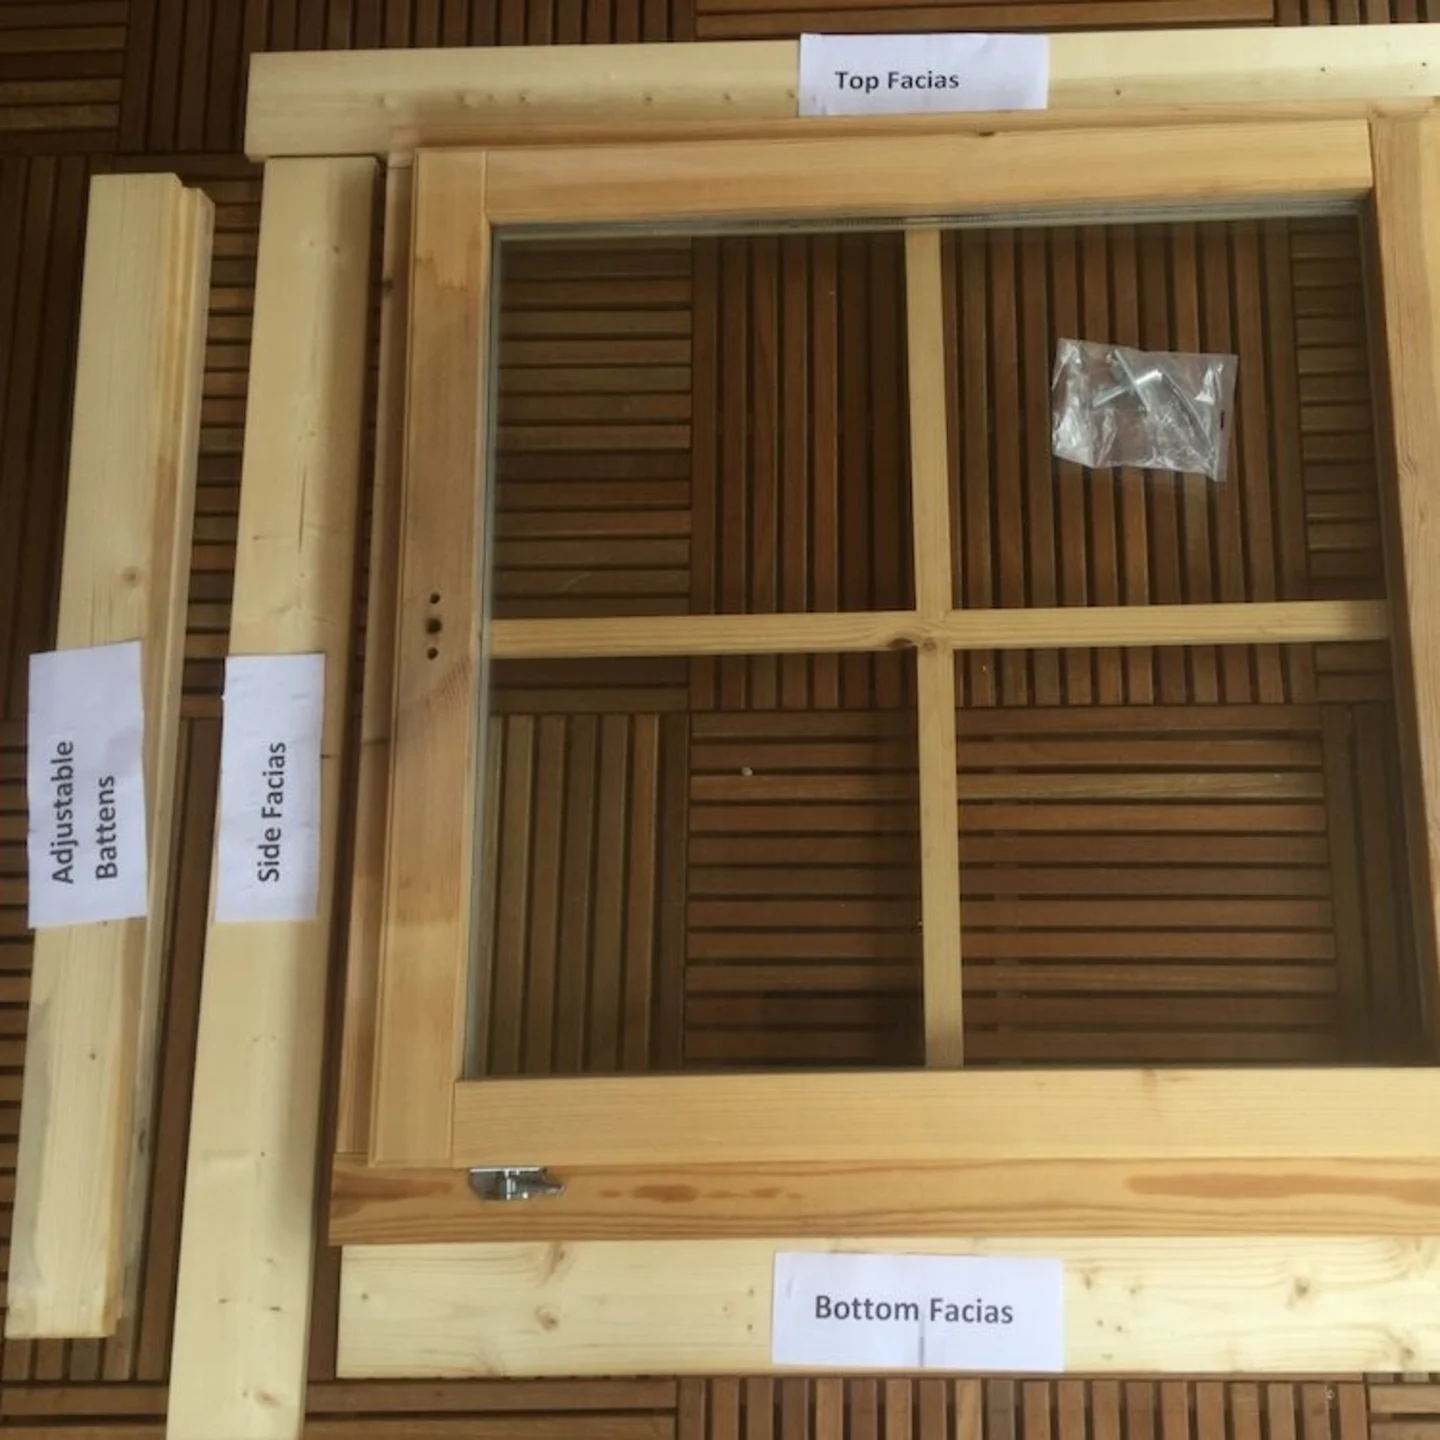
Three components make up these windows:
Window Frame
Spacer Pieces according the width of wall log.
Window facias
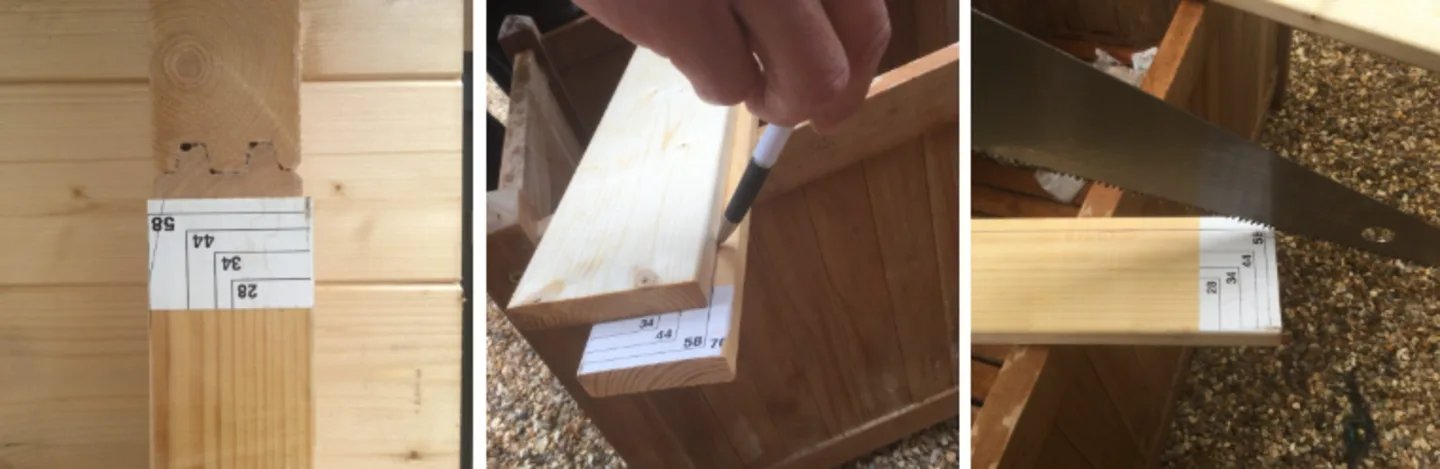
If we look at the spacers/battens you will see a paper label showing you measurements for various log thicknesses.
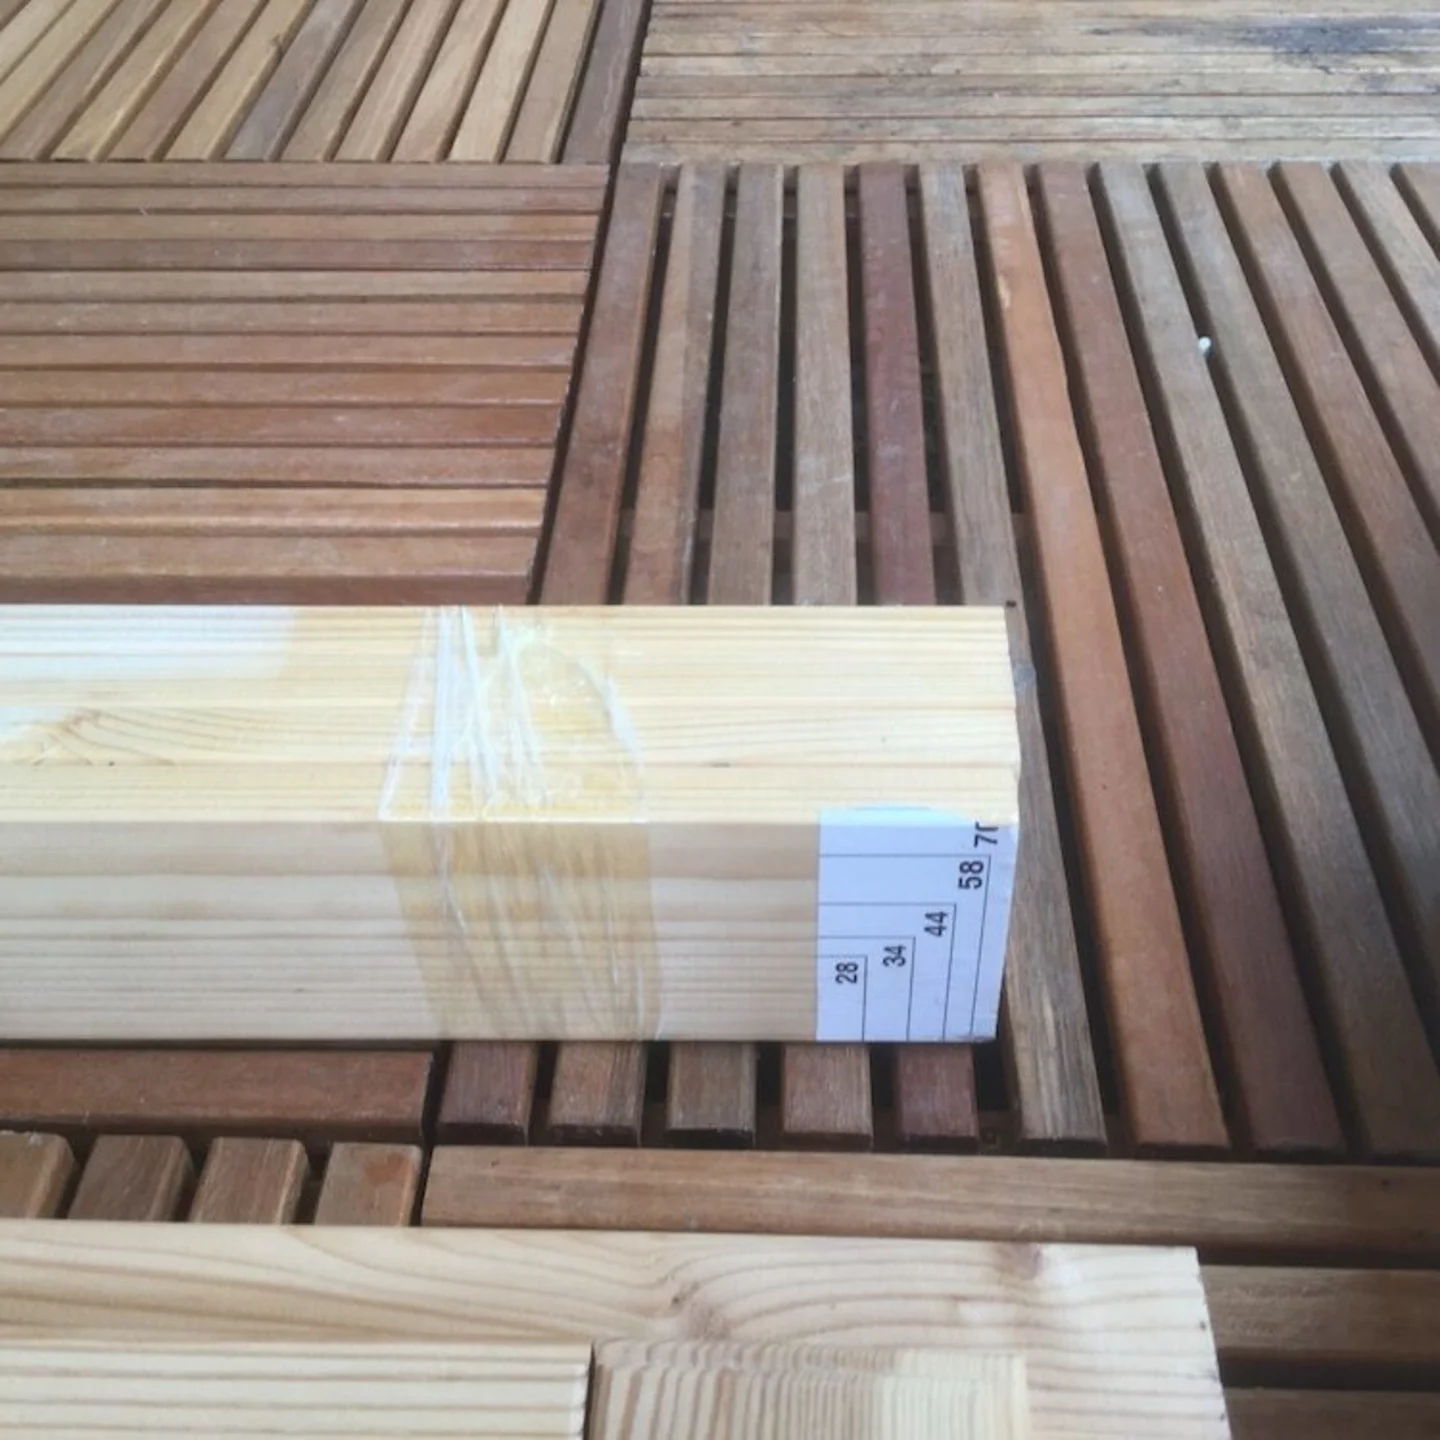
If you lose the paper, get it wet, or even if your log thickness doesn’t show, then measuring it is easy. When cutting to your own size it is best to make is 2 – 3mm larger. For instance; a 40mm thick wall log would have a spacer measurement of 42 – 43mm in width.
It might help to layout the parts so you can see exactly what you have.
Adding the generic window
Before you start, trim down the spacers to match the thickness of your log cabin either by using the mark guide or measuring yourself. We are going to fit this window into a 58mm log cabin at our show site.
Once you have your spacers to size you can then fix them to the window frame.

You will of course need four spacers that go on each side of the window frame. You can fix these however you would like to. Some fitters will use nails but personally I like to use screws as I think it gives a better fit. It’s easier to take apart and is generally stronger. All in all, the choice of fixing is yours at this point.
Cutting a hole in your log cabin
This next bit can be a bit tense. I must admit it still makes me a bit nervous in case I mess it up.
Before we start measuring or cutting holes we need to find the best place for our window. There’s a couple of rules to follow:
Do not cut any closer than 200mm to the interlocking corner of the cabin.
Do not cut any closer than 200mm to the side of another window.
Ideally start or finish your cut on a full log.
Ideally leave at least two clear logs above the window, maintaining integrity of the building.
Make your own judgement of the integrity of the building after cutting the hole. If you need advice for a tricky placement please contact the main office or leave a message on this page and we’ll help you out.
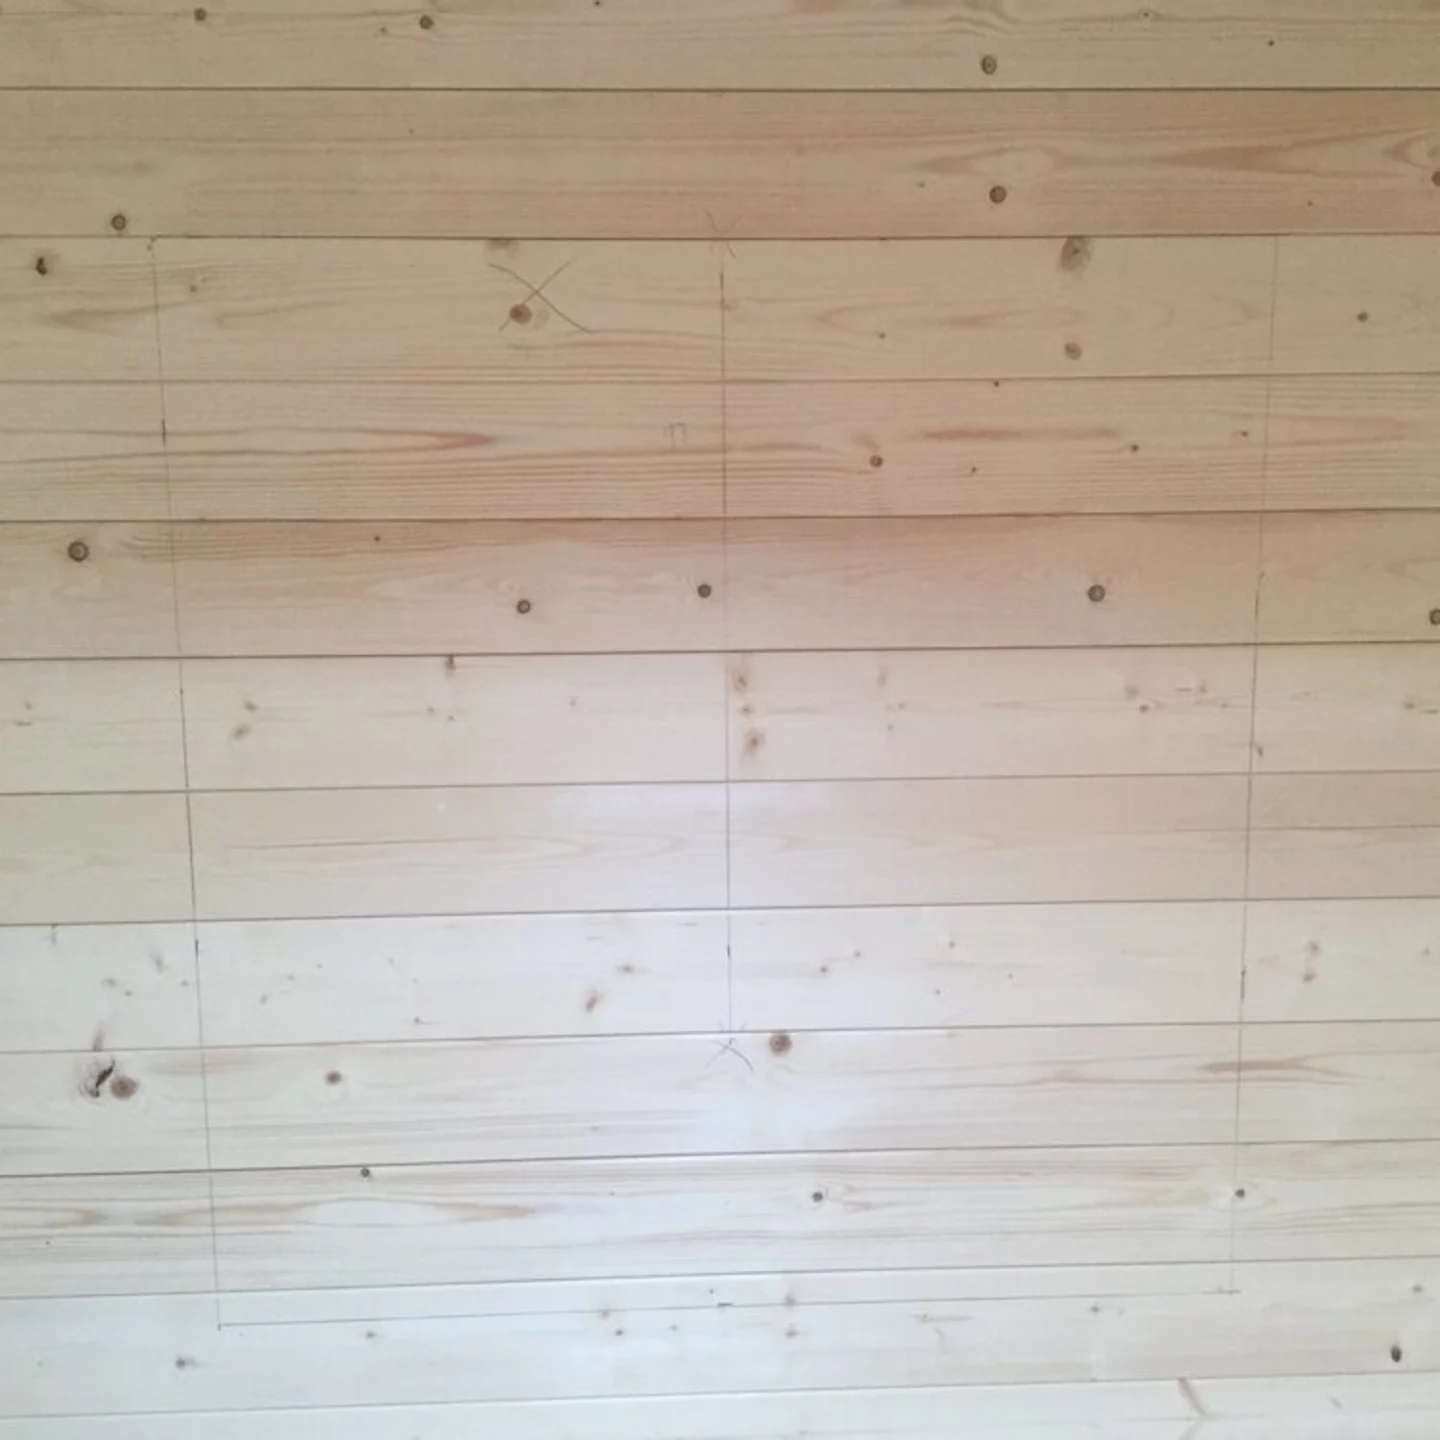
You can measure the window and transcribe those measurement onto the walls which is what I think a lot of people do. You would start at the centre point and measure out either side both top and bottom and then mark the lines.
Personally I still don’t trust myself or a tape measure and hold the actual window frame (including attached spacers) to the wall and mark around it with a pencil/pen. That way I can be sure my eyes haven’t gone wonky or the tape measure has stretched or shrunk.
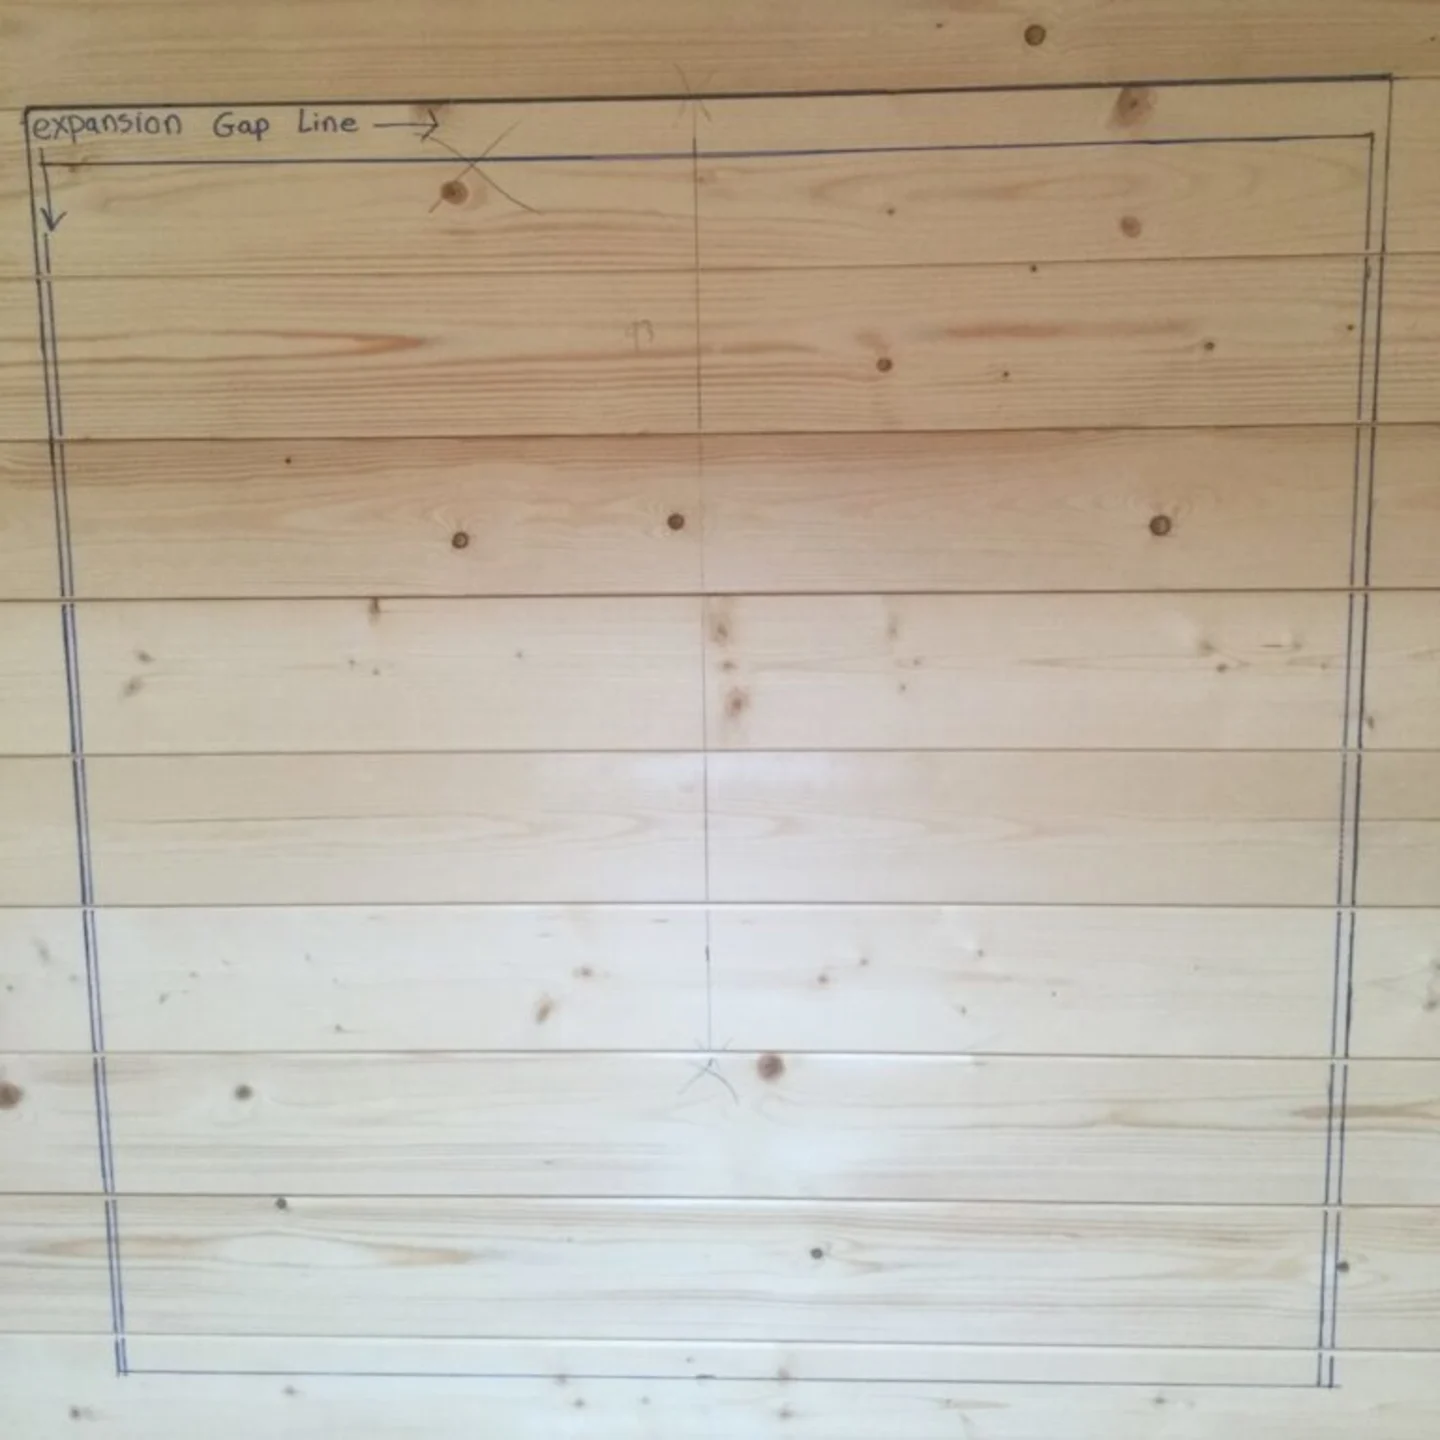
One marked you need to consider what happens when your log cabin either expands or contract which it will do over the cycle of the seasons.
As you will know it is necessary to leave an expansion, or, contraction gap above the window to cope with seasonal variations. The gap you make will be decided by the time of year you are installing:
Height of Summer: The wood will be at its smallest as a lot of moisture will have escaped. Therefore only a small gap of 10 – 15mm maybe necessary as the building is only likely to expand more as Autumn and Winter arrive.
Depths of Winter: The wood will be at its largest size as it will have absorbed a lot of moisture from the surrounding air. Therefore a gap of 20 – 30mm maybe necessary as the building is only likely to contract as the Spring and Summer arrive.
As the logs expand marginally length ways you only really need a gap of around 5 – 10mm either side, again depending on the time of year you are installing.
I prefer to be on the right side of caution and will perhaps make the expansion gap slightly smaller. I will then advise the customer to check behind the facias as the season changes over the first year to make sure a gap is still present of at least 5mm in the depth of winter. If it is not it is easy to remove the window and take out a little more to allow for the gap.
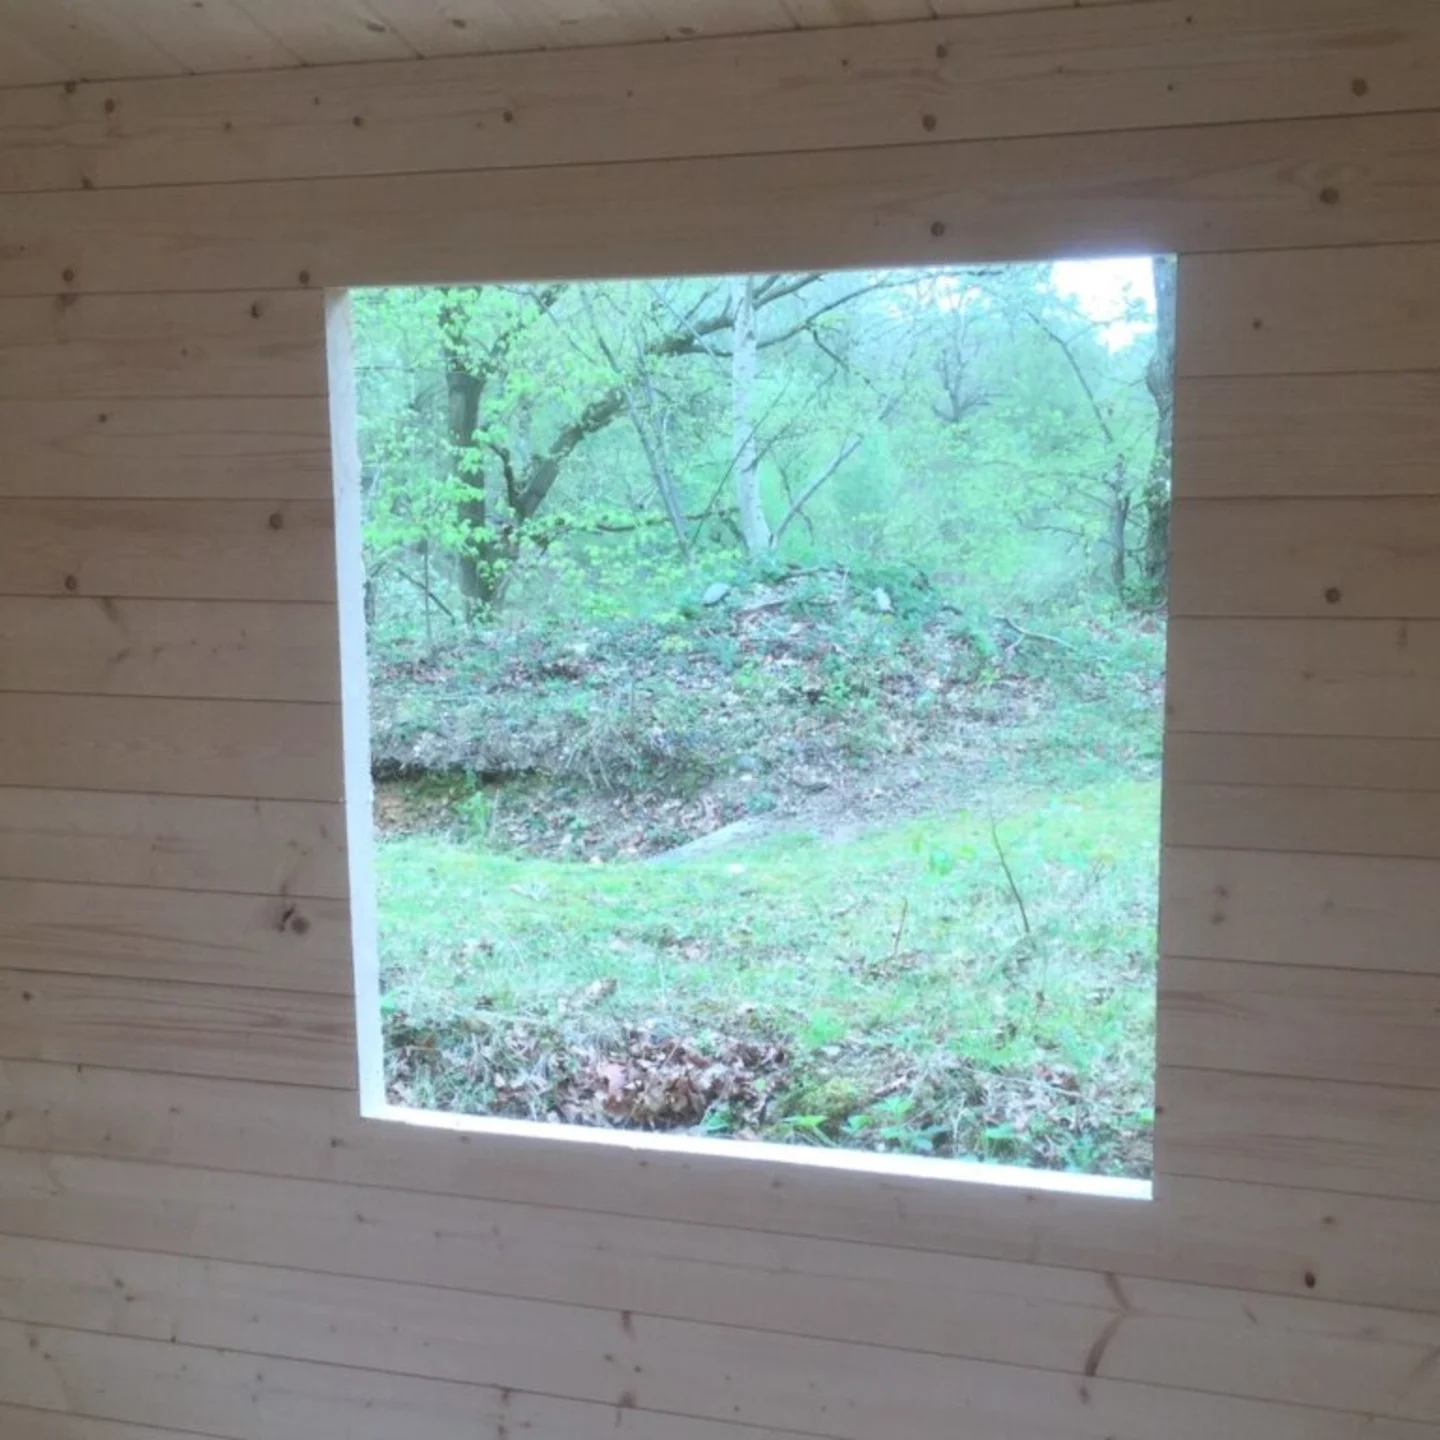
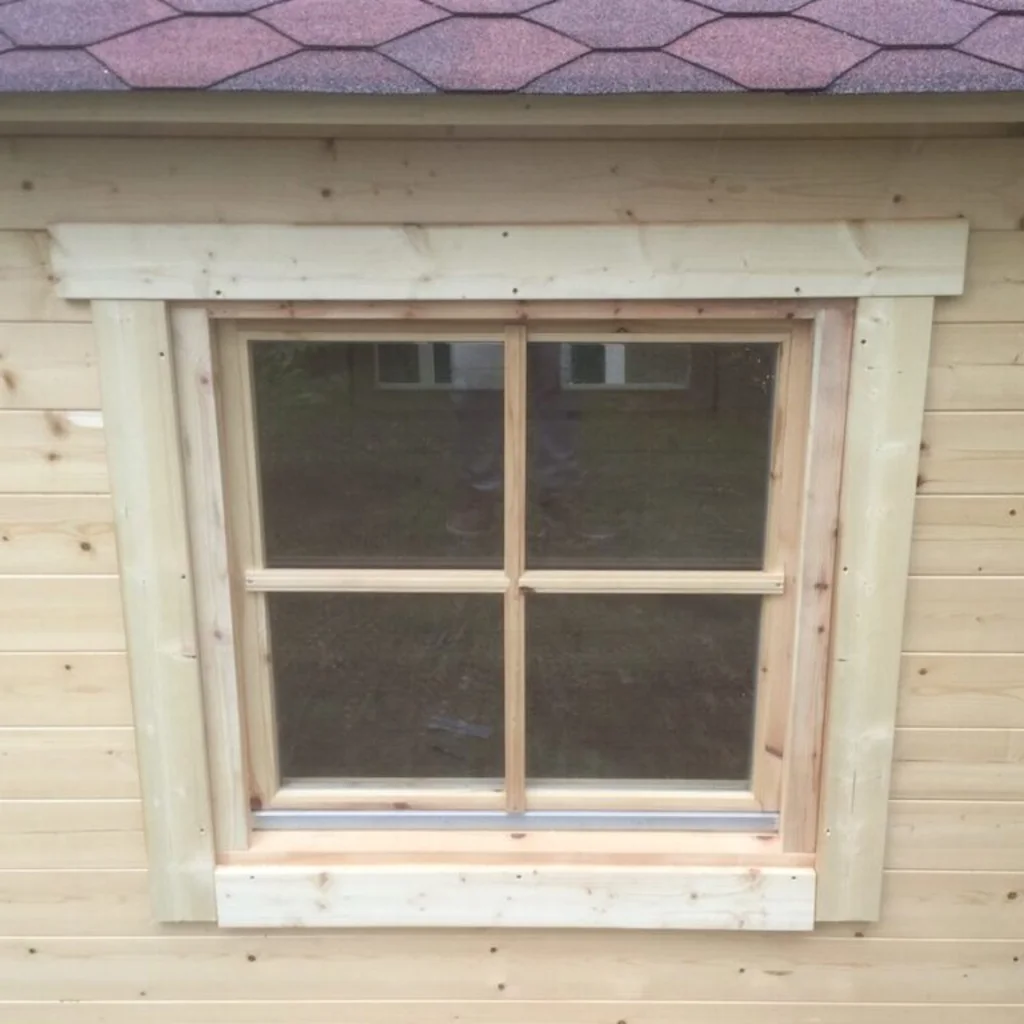
A complete window hole cut. Do not worry if you are not 100% straight in your cut as any slight deviations will be hidden behind the fascia.
You can offer up the window to check for fitment.
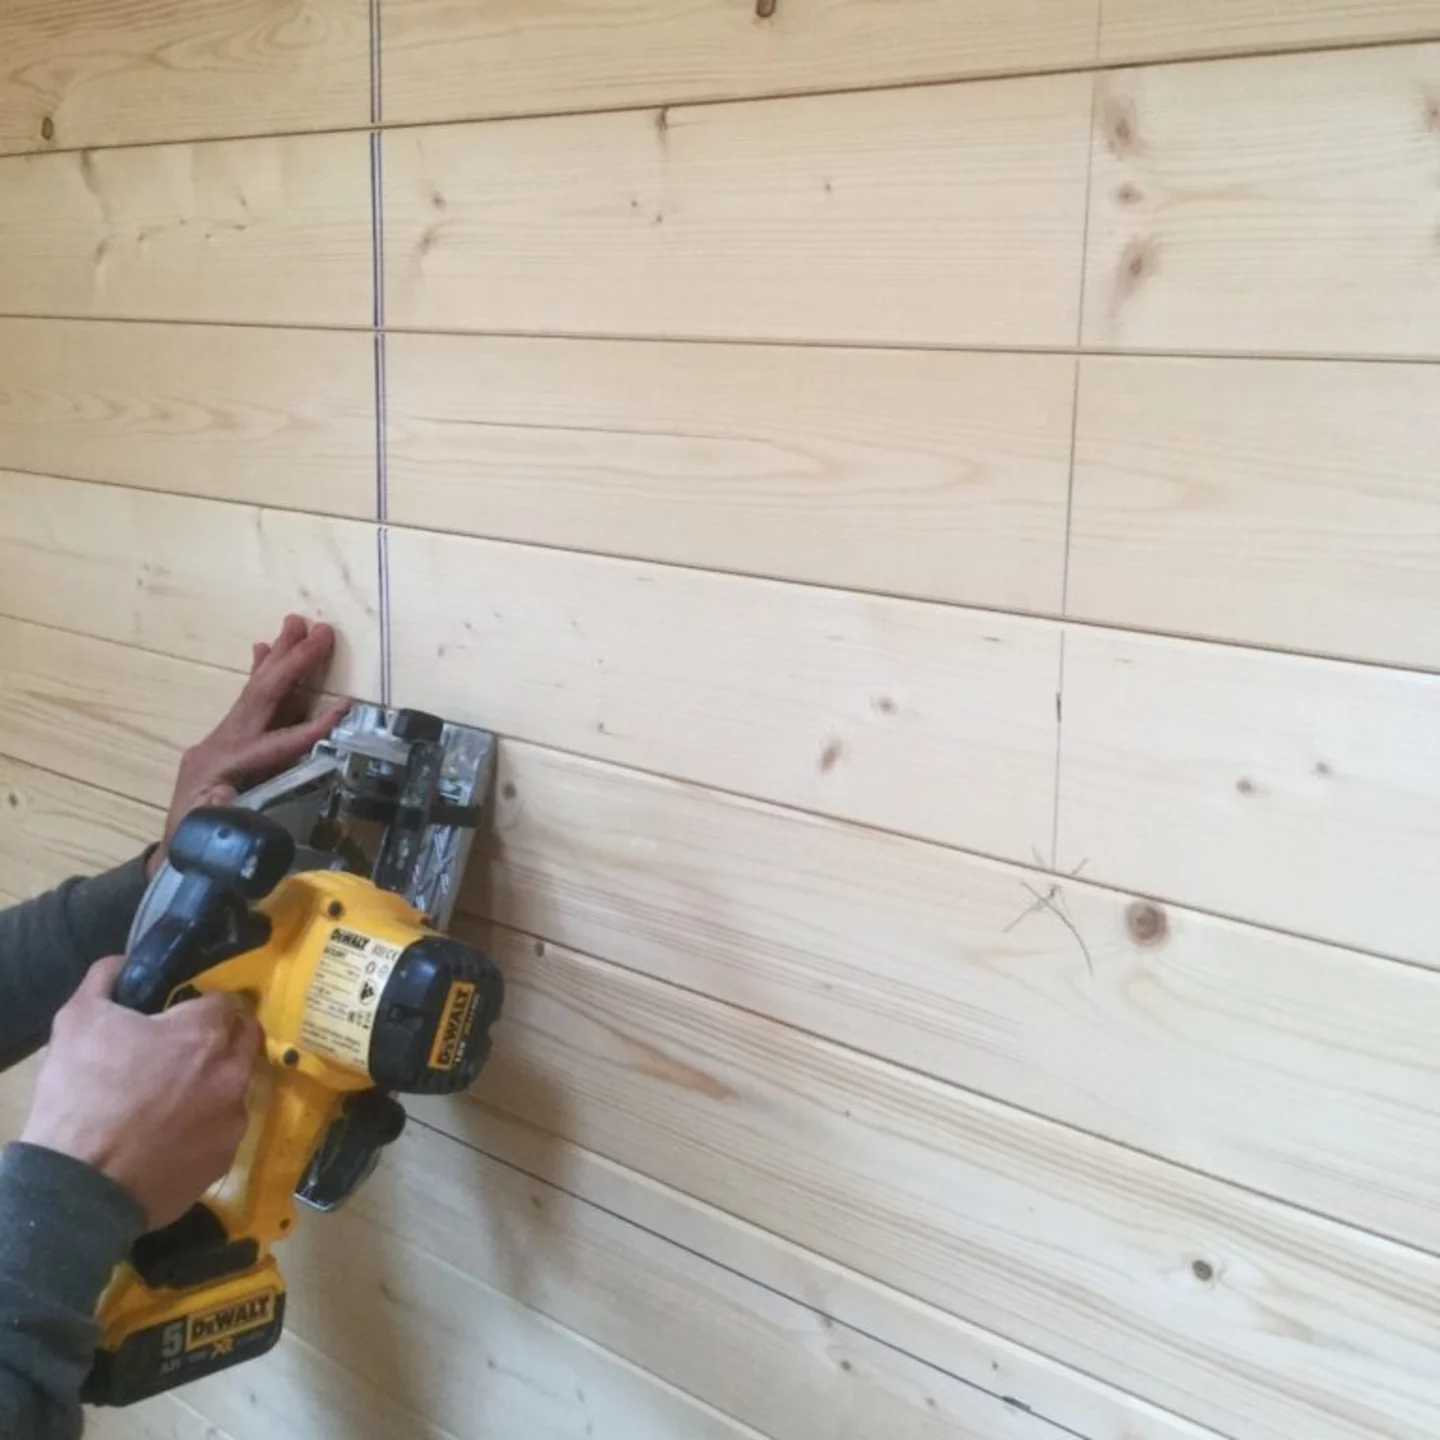
Once you made your marks, double and triple checked then we can cut the wall logs. A circular saw make sit easy work but you can of course use a hand saw.
Final fitting of the generic window
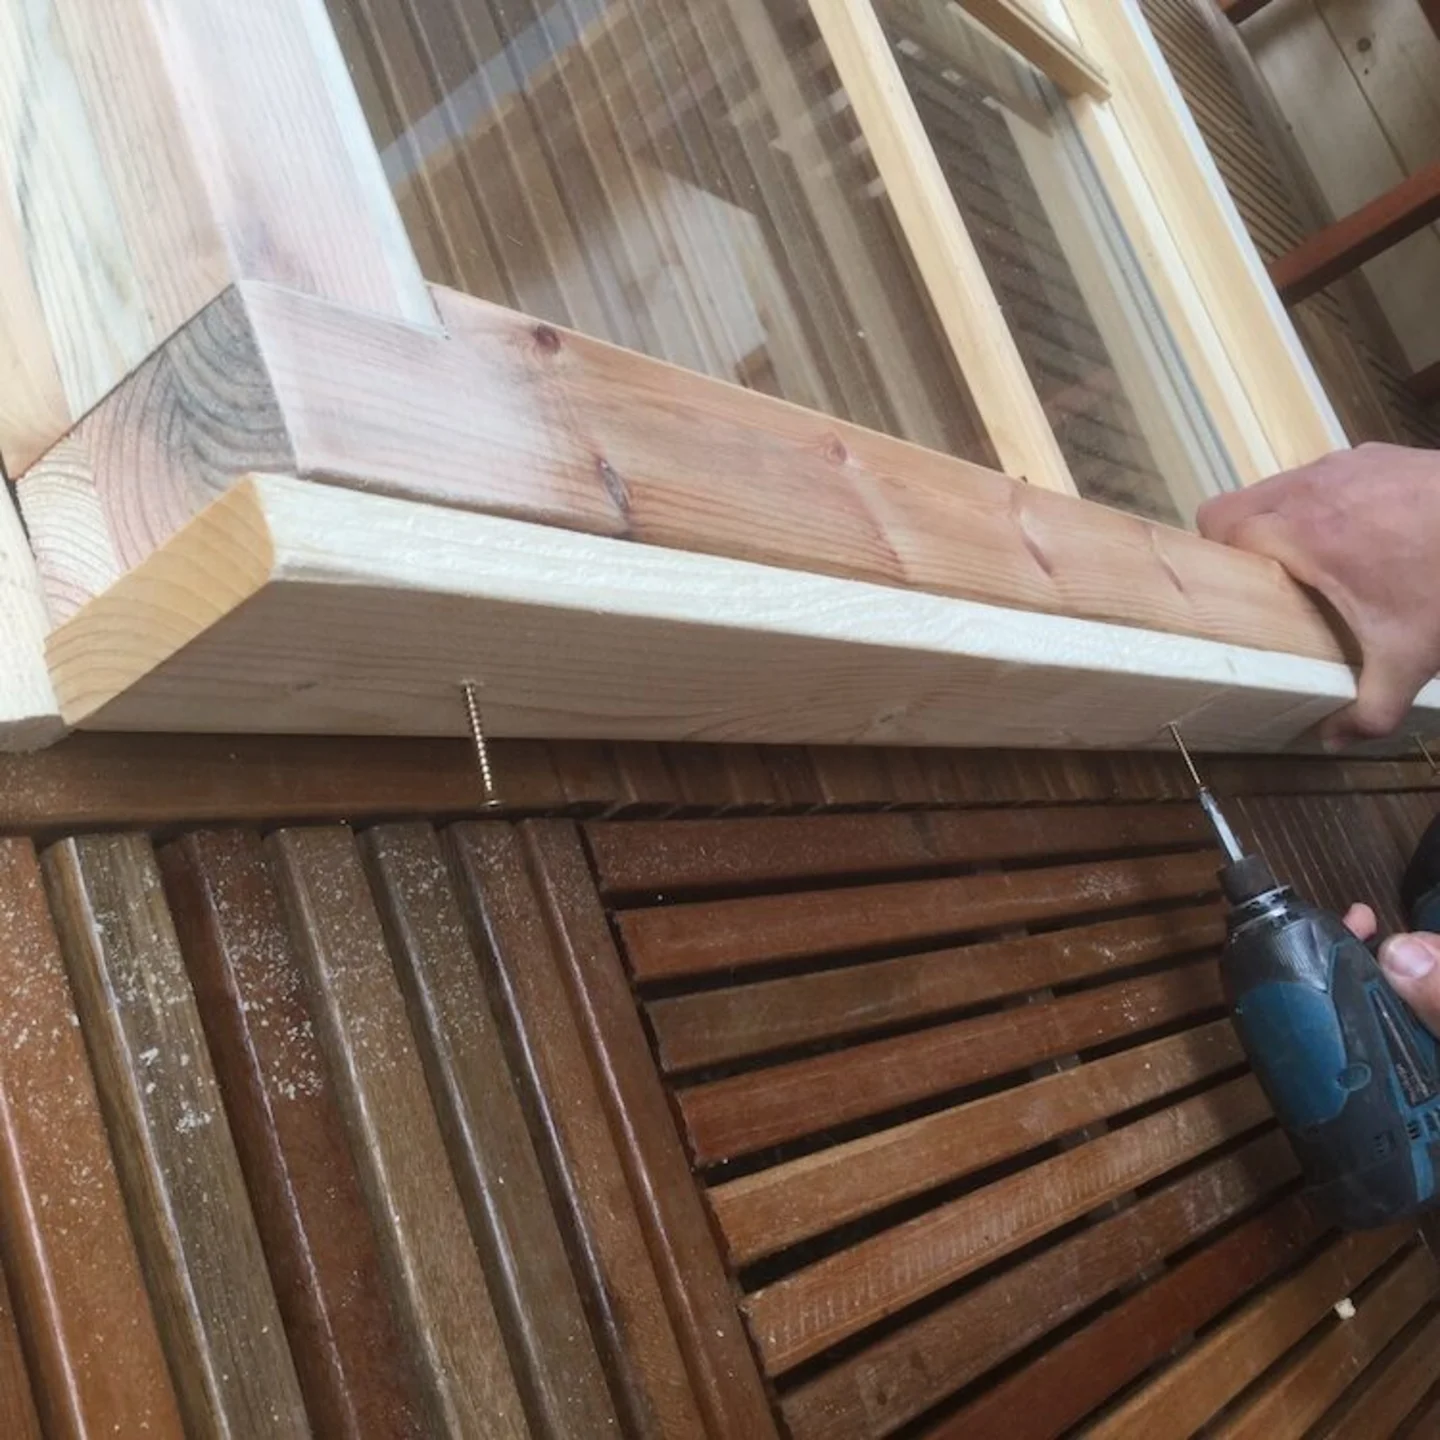
You can now fit the facias on the outside of the window, again, like the spacers you can either screw or nail them onto the frame. I personally think screws are far better but it is up to you.
When you are working with wood it is always highly advisable to pilot hole anything you screw or nail in.
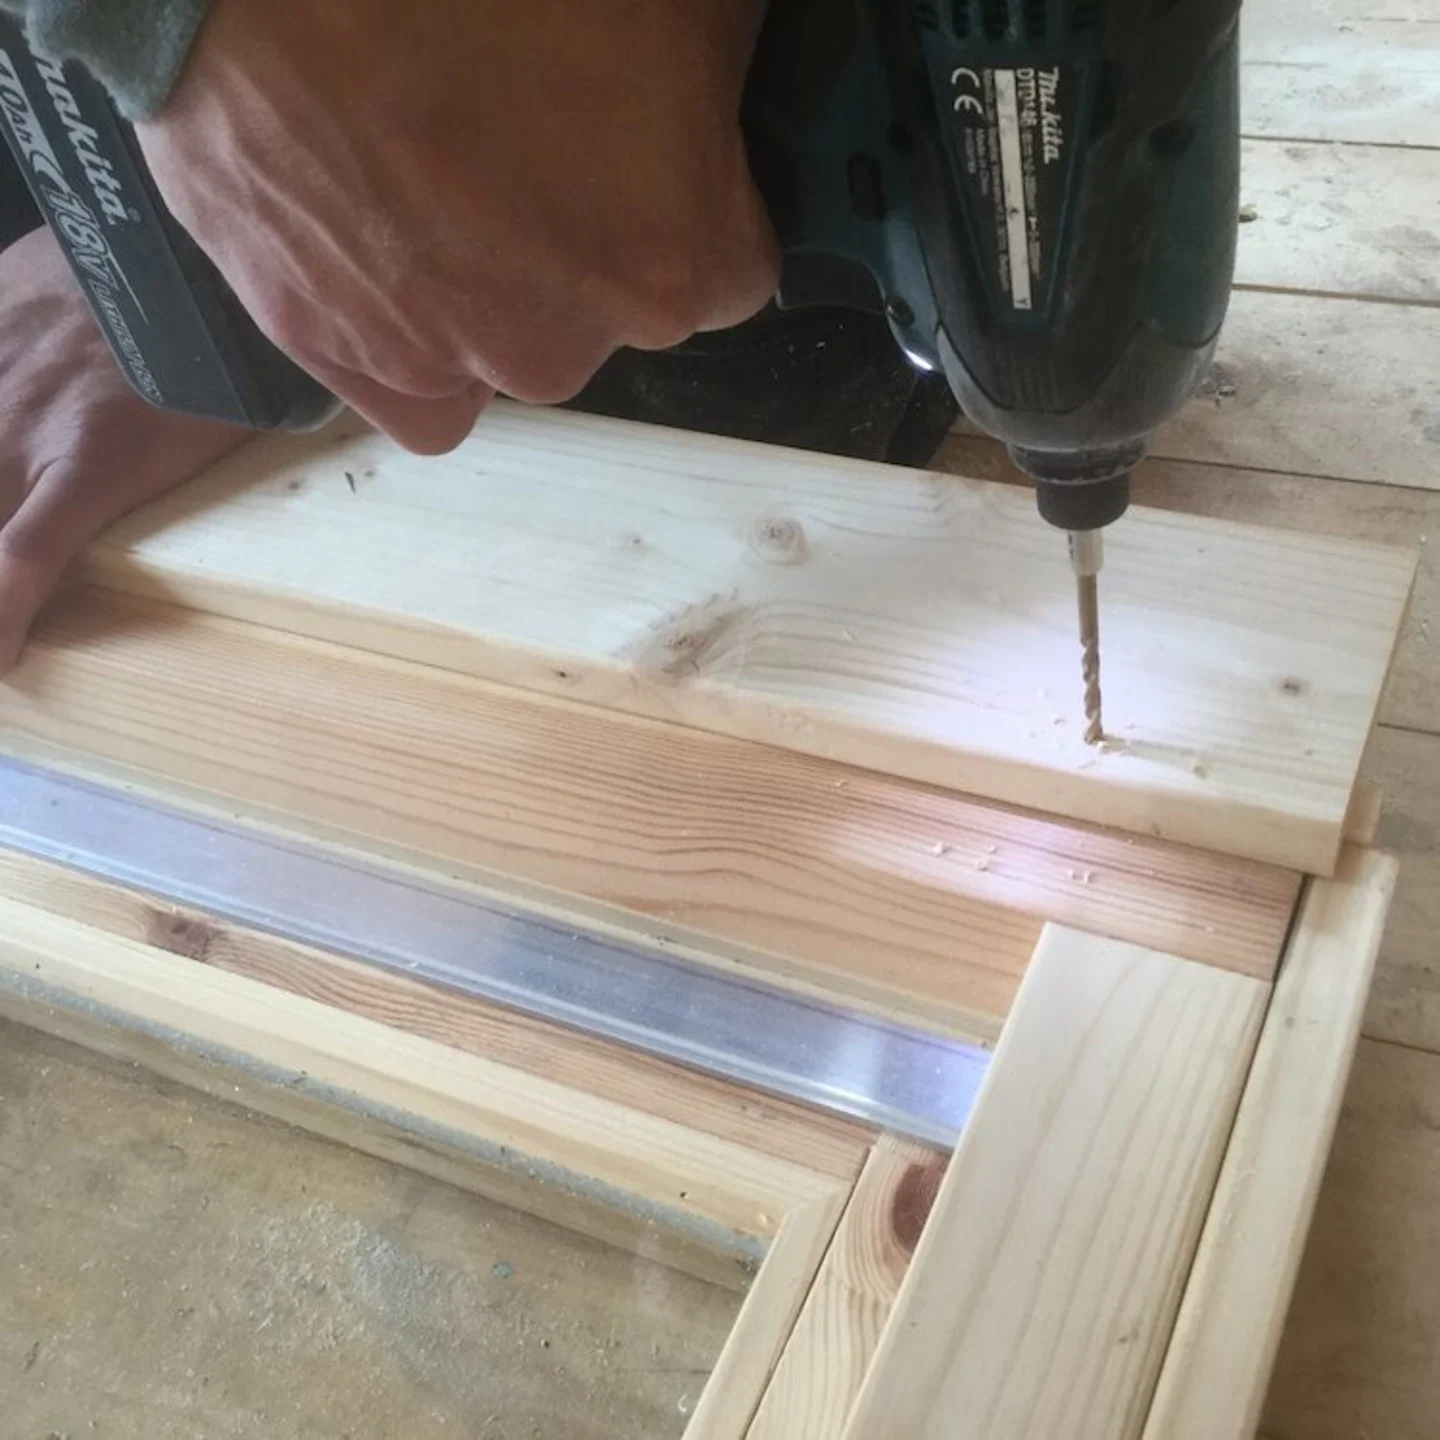
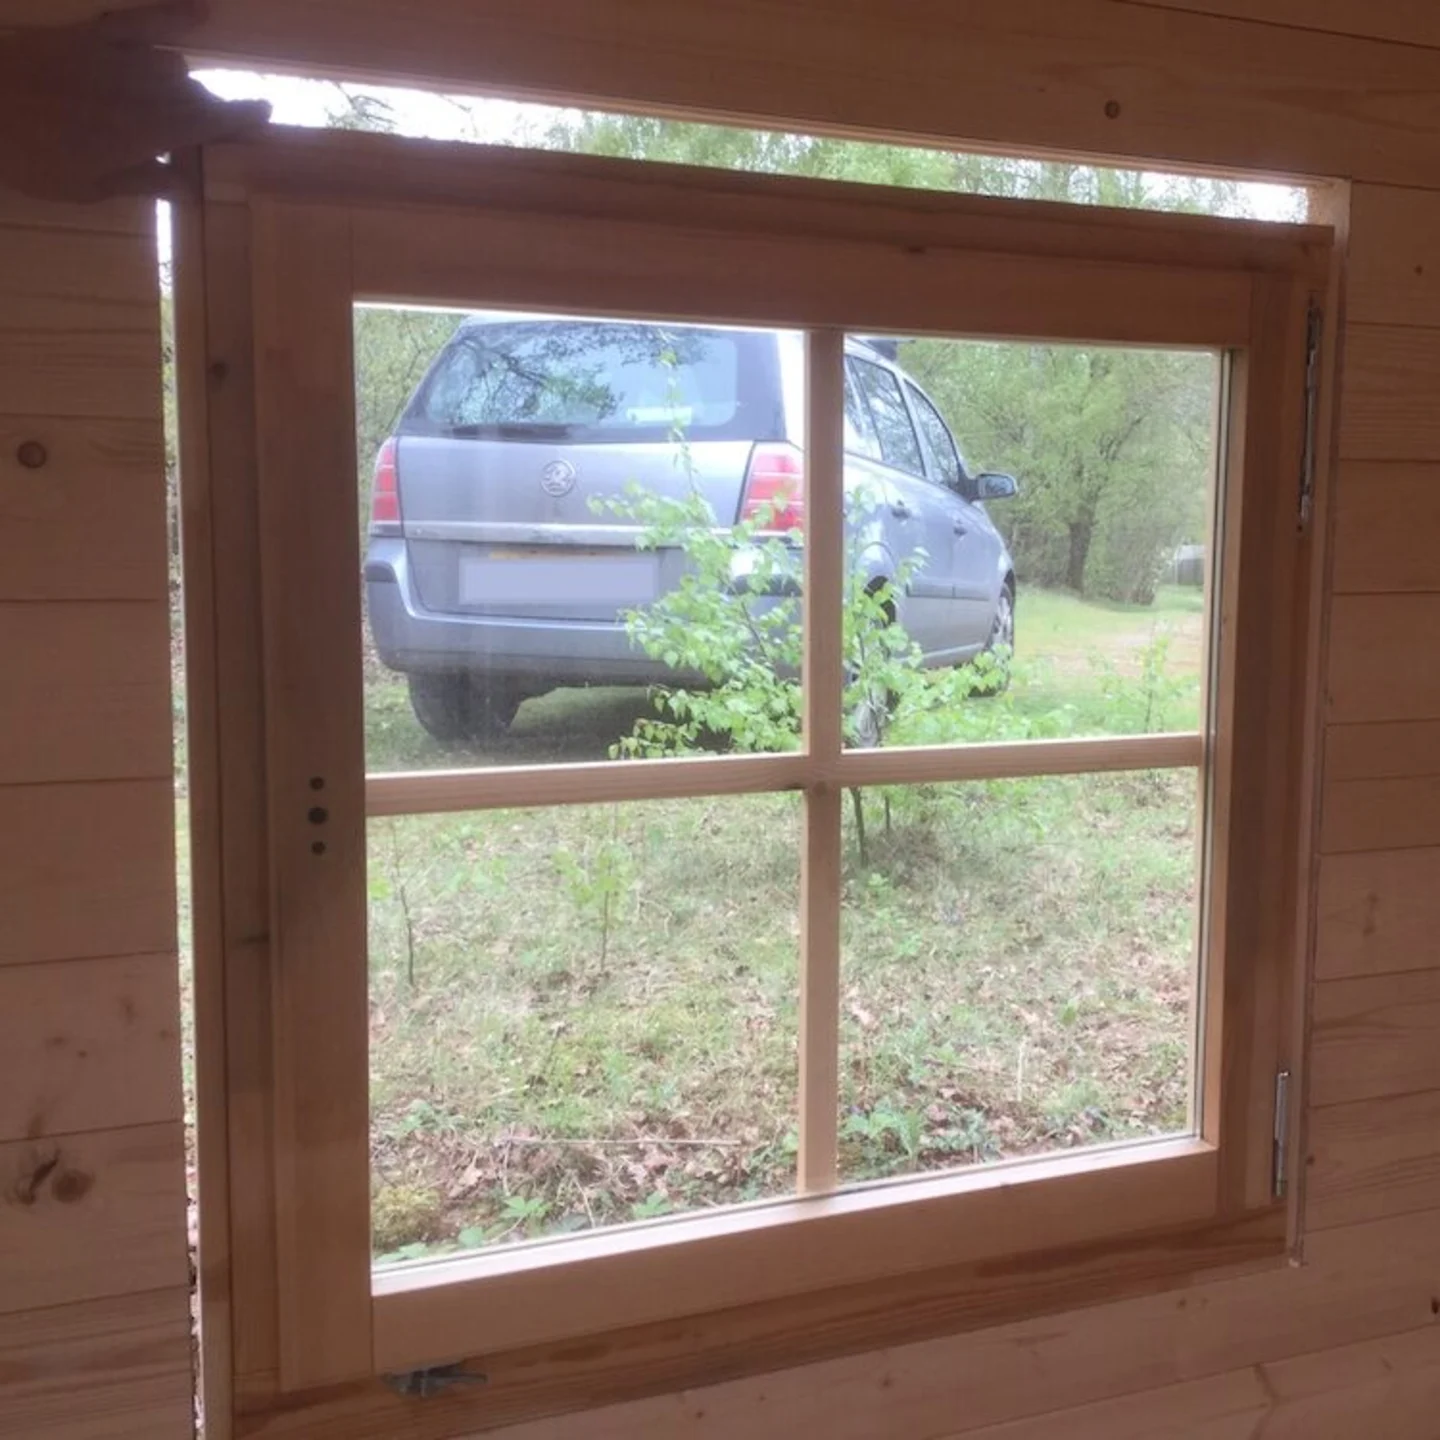
Upon fitting all four of the outside facia, you can then place the window into the hole. In the next picture we have done this from the outside. Notice the one single screw used in the centre of the top facia. This is to loosely secure the window so to complete it from the inside single handedly. It is of course better if you have someone holding it for you.
Note the screw will be removed once the window is installed.

Complete window fitted from the outside of the log cabin, loosely held in place by one screw at the top to make it easier to fit. The screw is of course later removed.
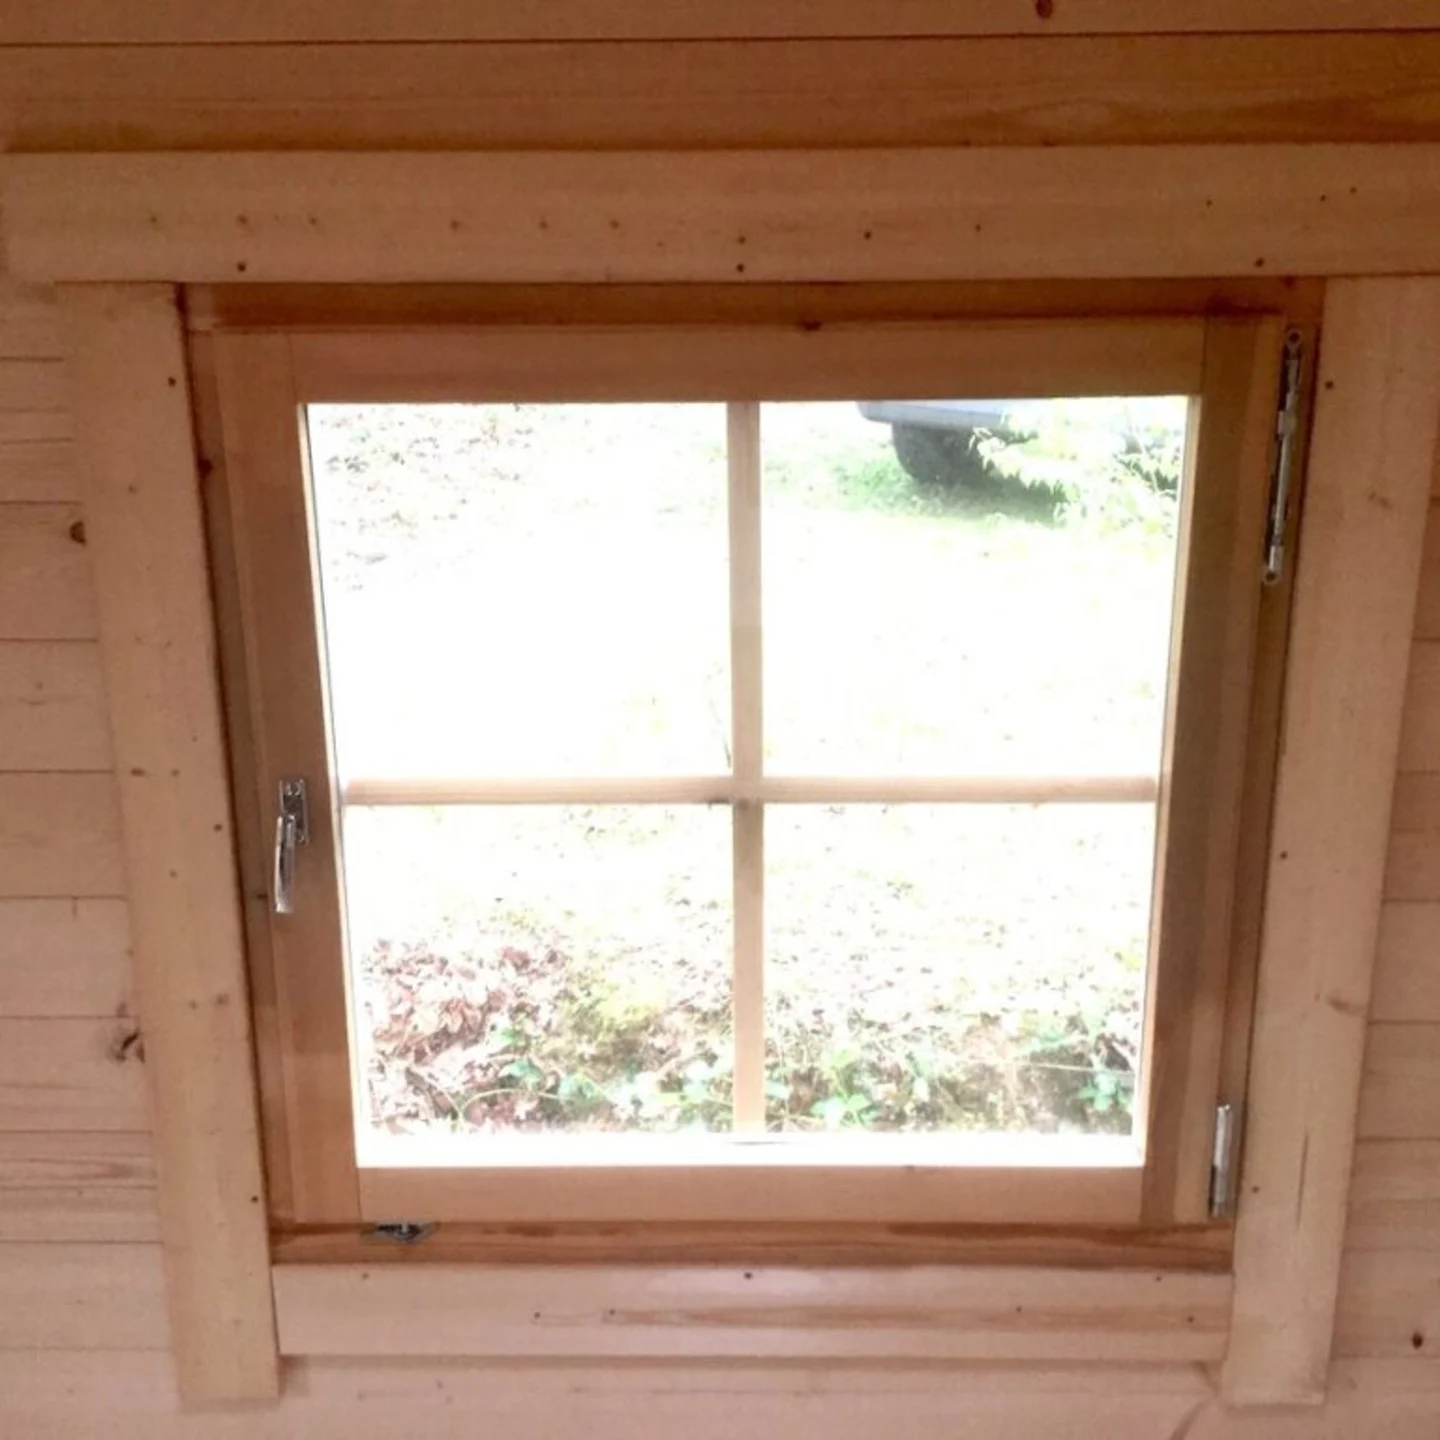
The fascias are fitted to the inside and the ‘helping screw’ outside is removed and the window is complete.
A few window notes:
Fitting a window is not too hard at all, just consider you expansion and contraction gaps, also the old saying of ‘measure twice cut once’ is very relevant.
Over the first year as the seasons change, periodically check your gap above the window, you can easily remove the top facia to check behind it.
If security is a concern you can:
Countersink your screws and use wood filler mixed with sawdust to hide your screws on the outside facia.
You can use Philips head screws and, once installed, drill the head permanently.
Make sure you use security screws.
About the author: Richard
Meet Richard, a dedicated professional with a rich history at Tuin, contributing 25 years of experience within the garden timber industry. With an expertise in garden buildings. From design, manufacturing and installation for a range of timber buildings. Sheds to log cabins and all the way up to timber framed houses. In his time he had worked with experts all over europe, and also included his own personal experience of installing and testing Garden Buildings from a range of companies, models and sizes. You will find a majority of his blogs to include expert installation advice for your Log Cabin. Information on how timber reacts to different environments and the best way to preserve your garden buildings.